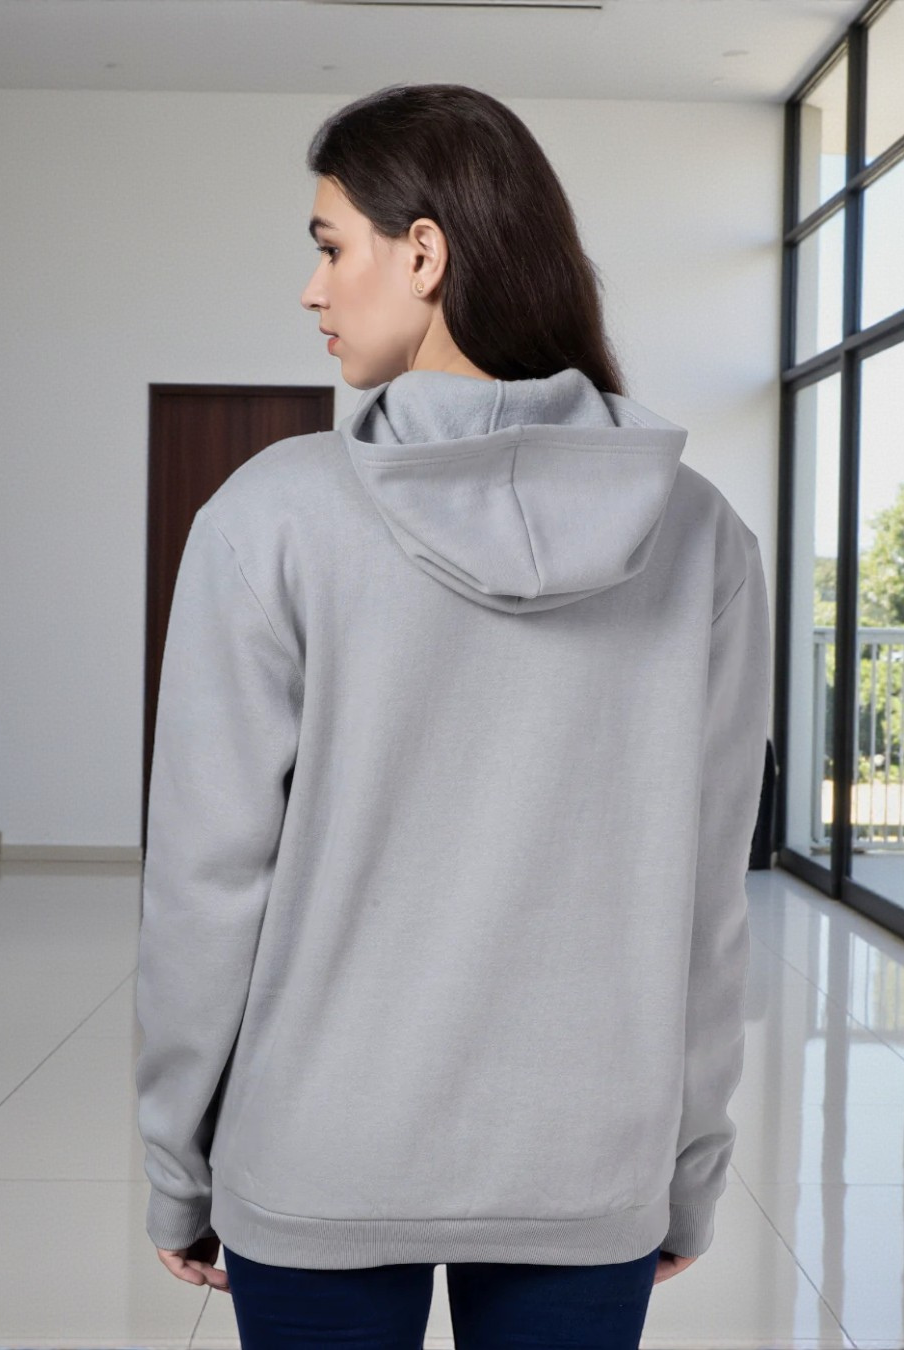
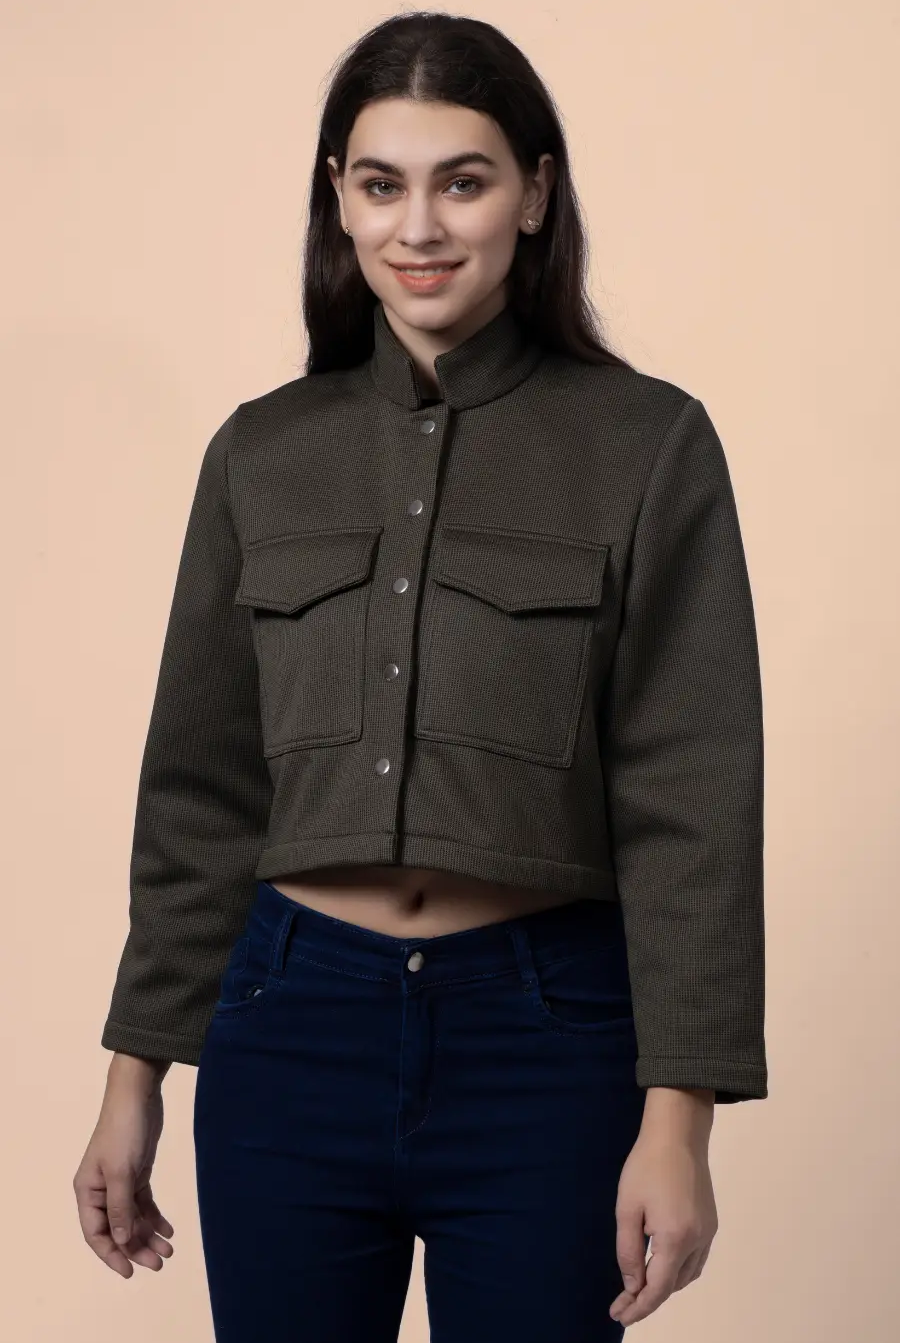
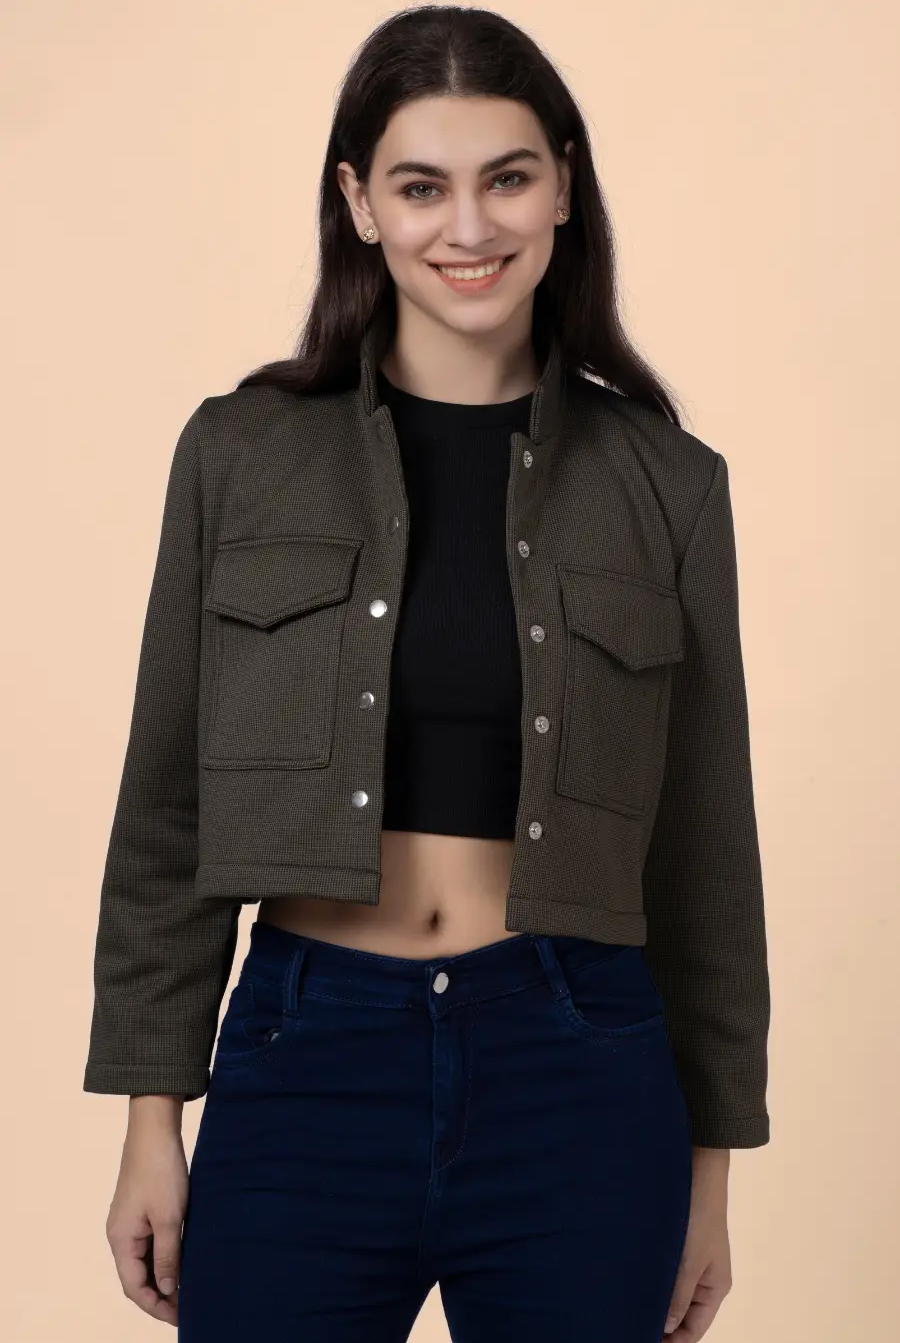
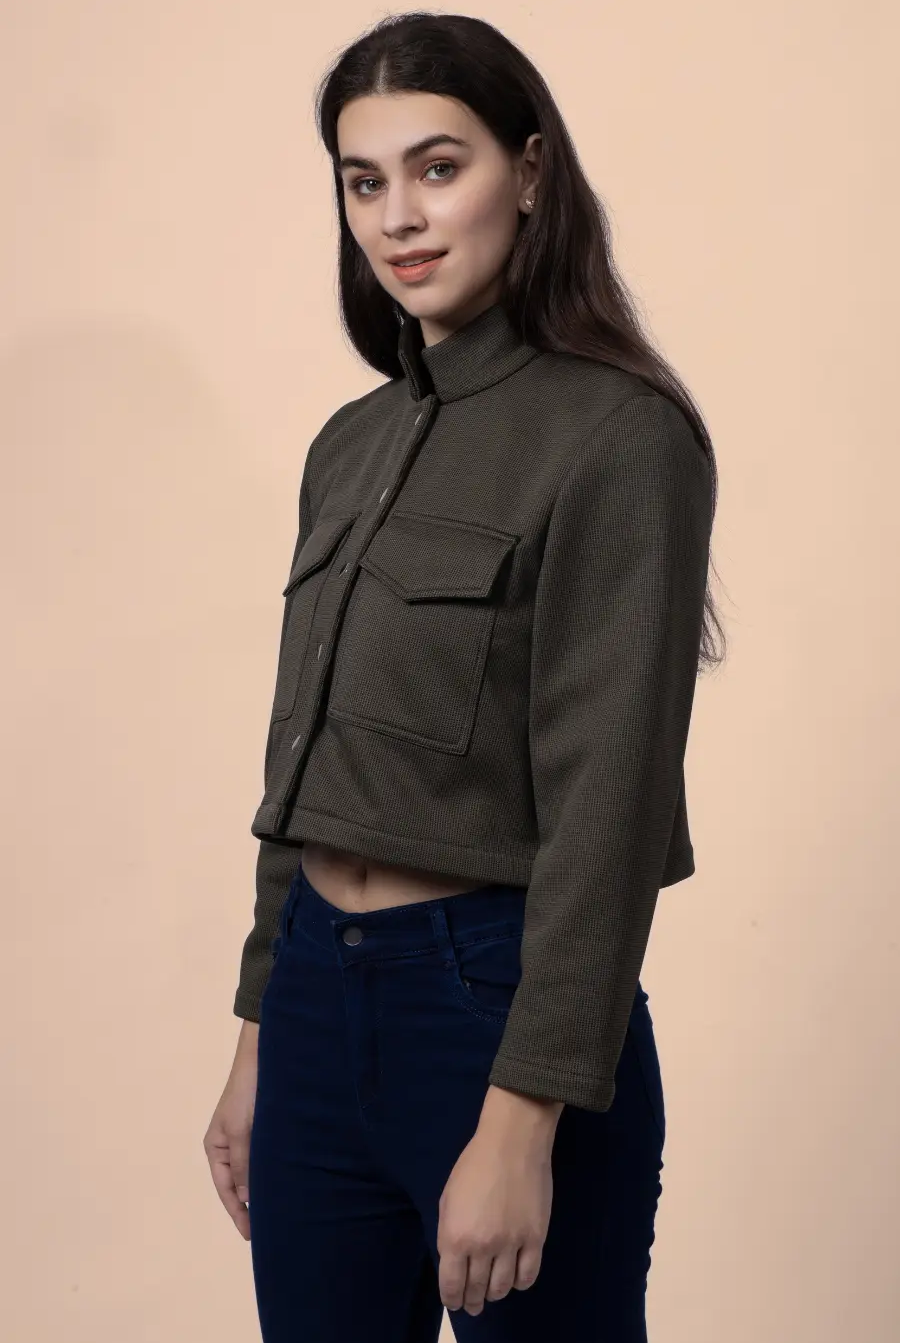
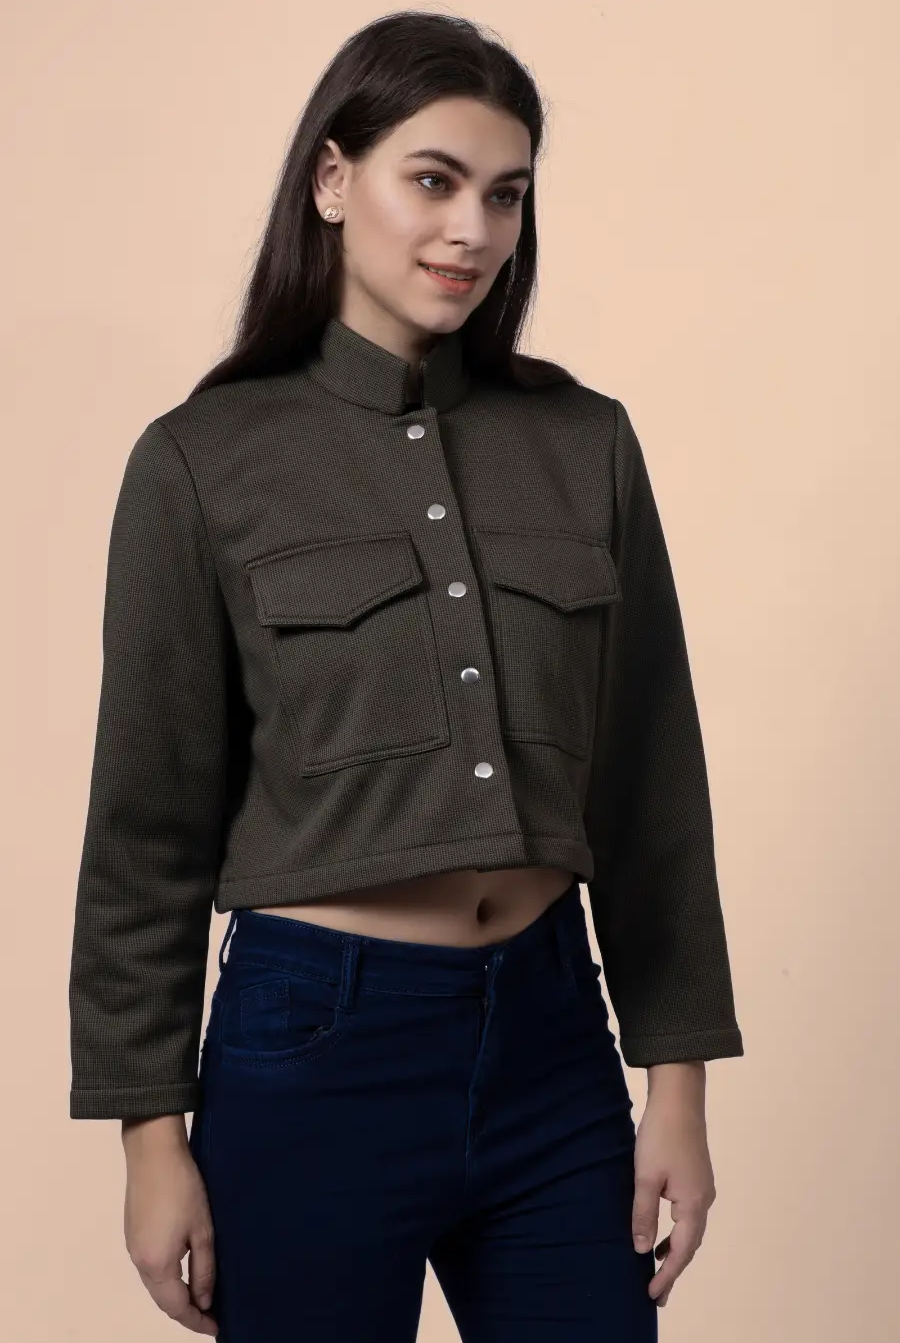
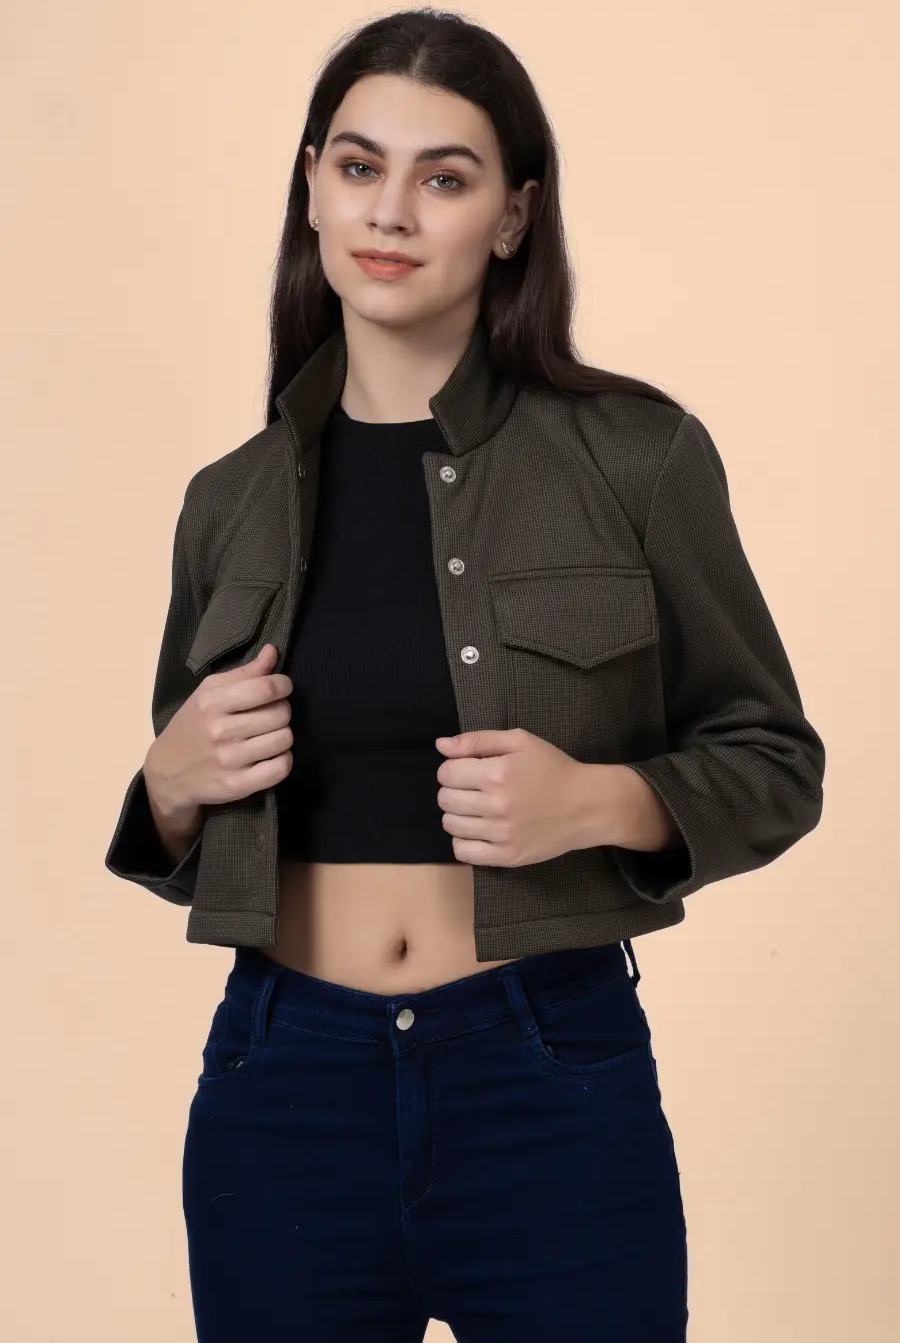
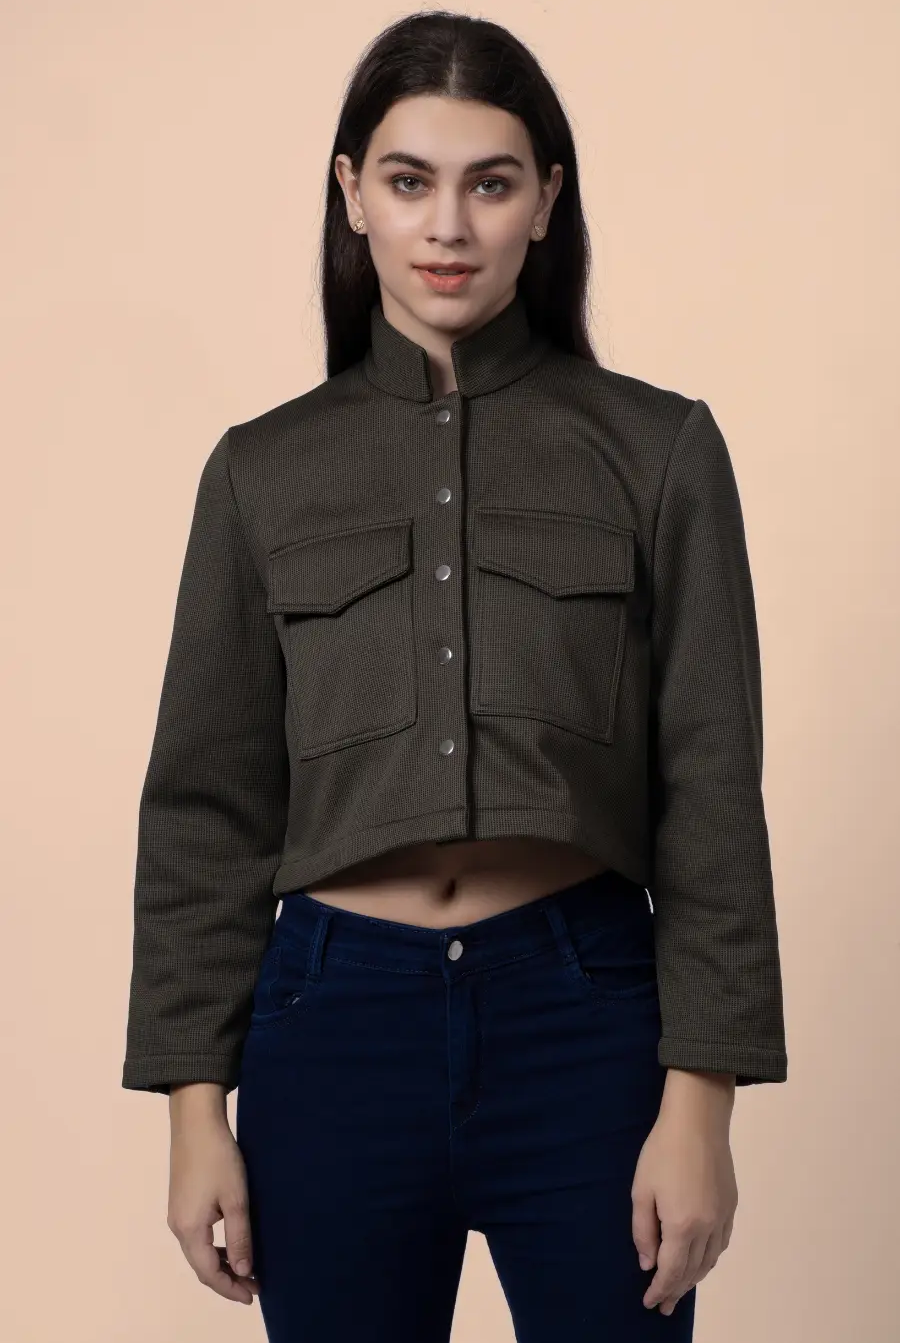
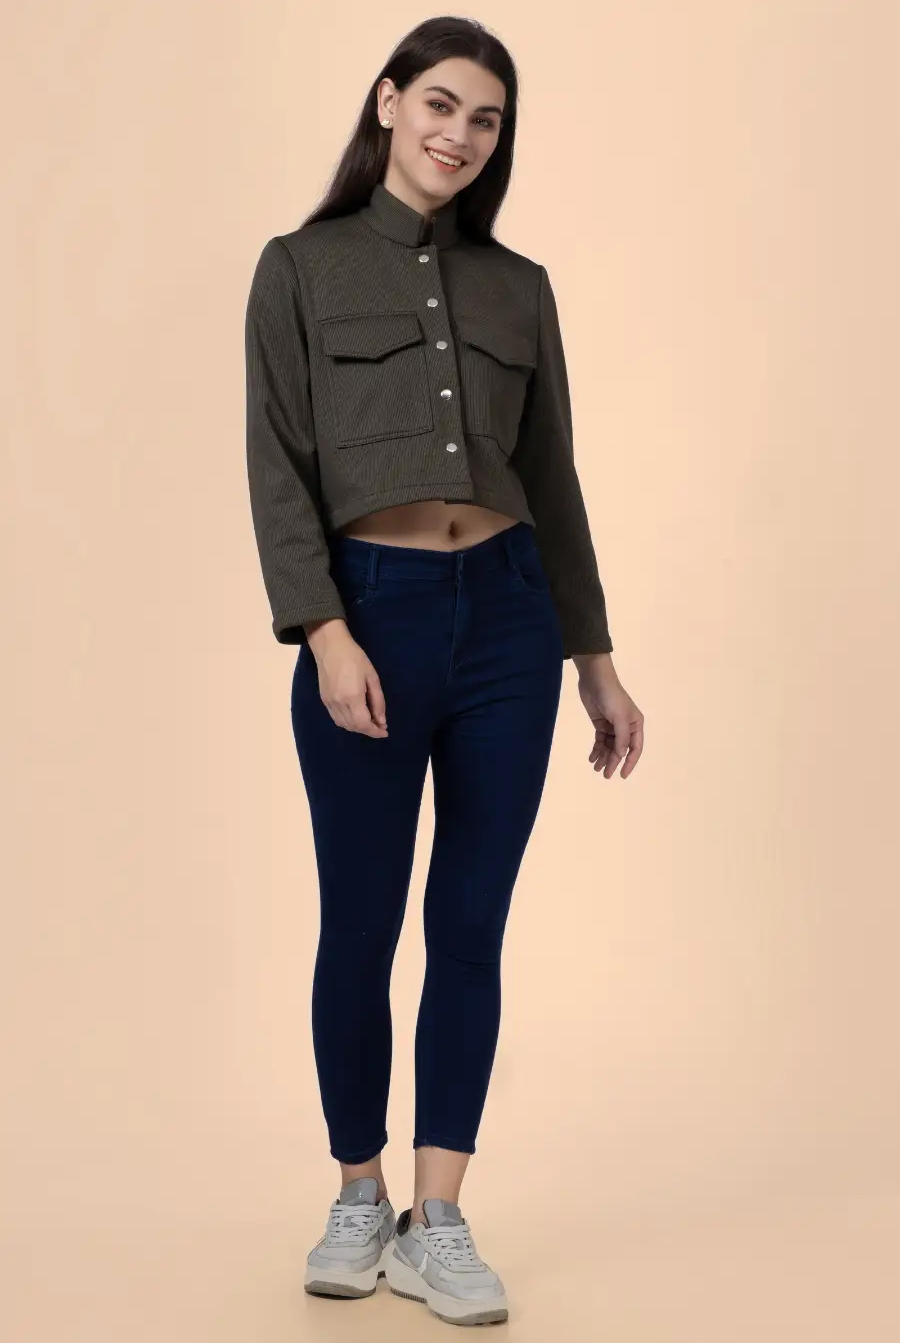
There’s nothing quite like a handmade hoodie. It’s soft, cozy, and tailored exactly how you want it. Whether you’re lounging at home, heading out for errands, or layering for colder weather, a DIY hoodie is the kind of project you’ll want to make on repeat.
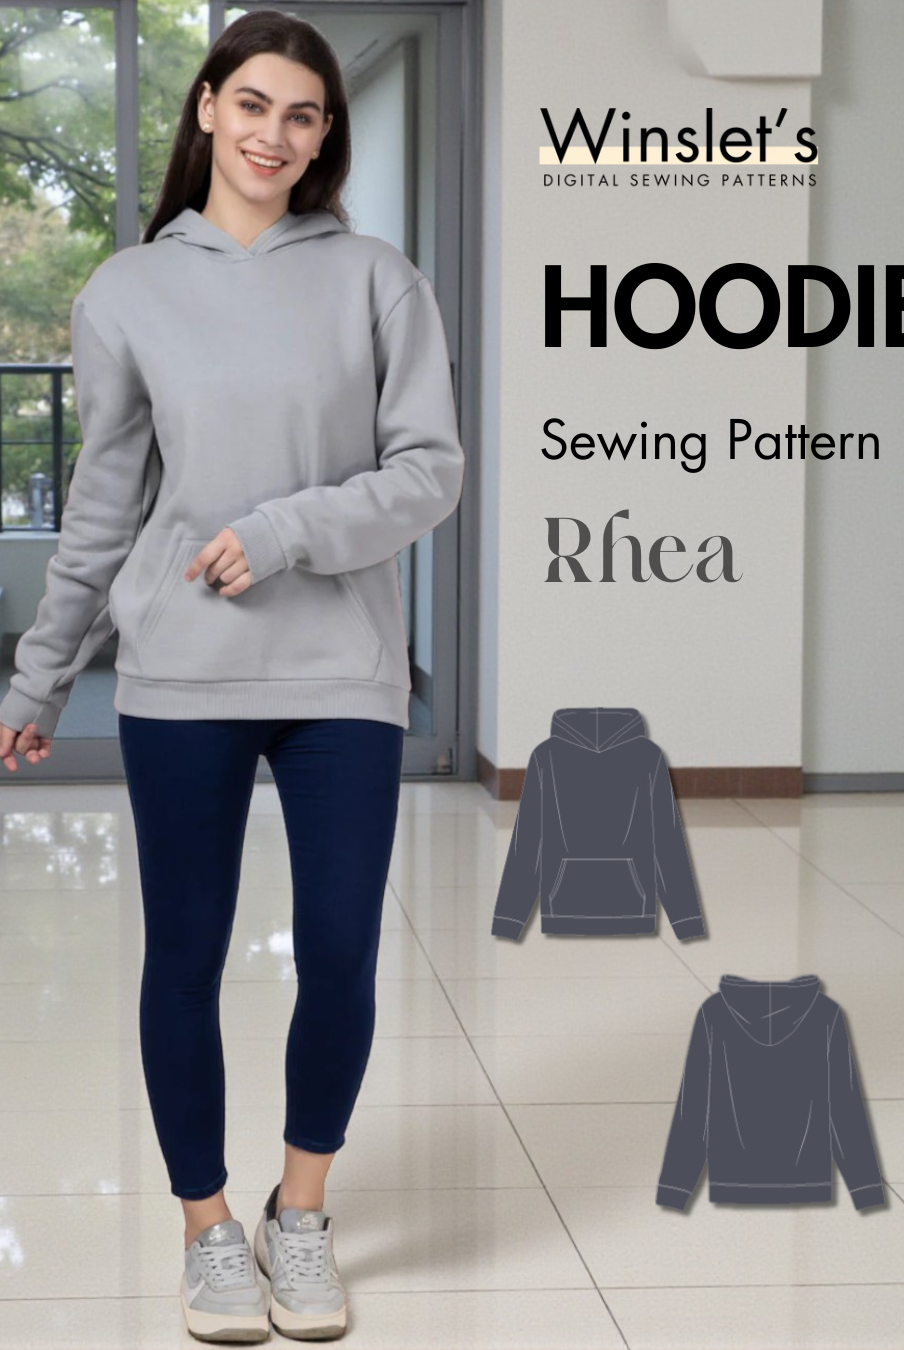
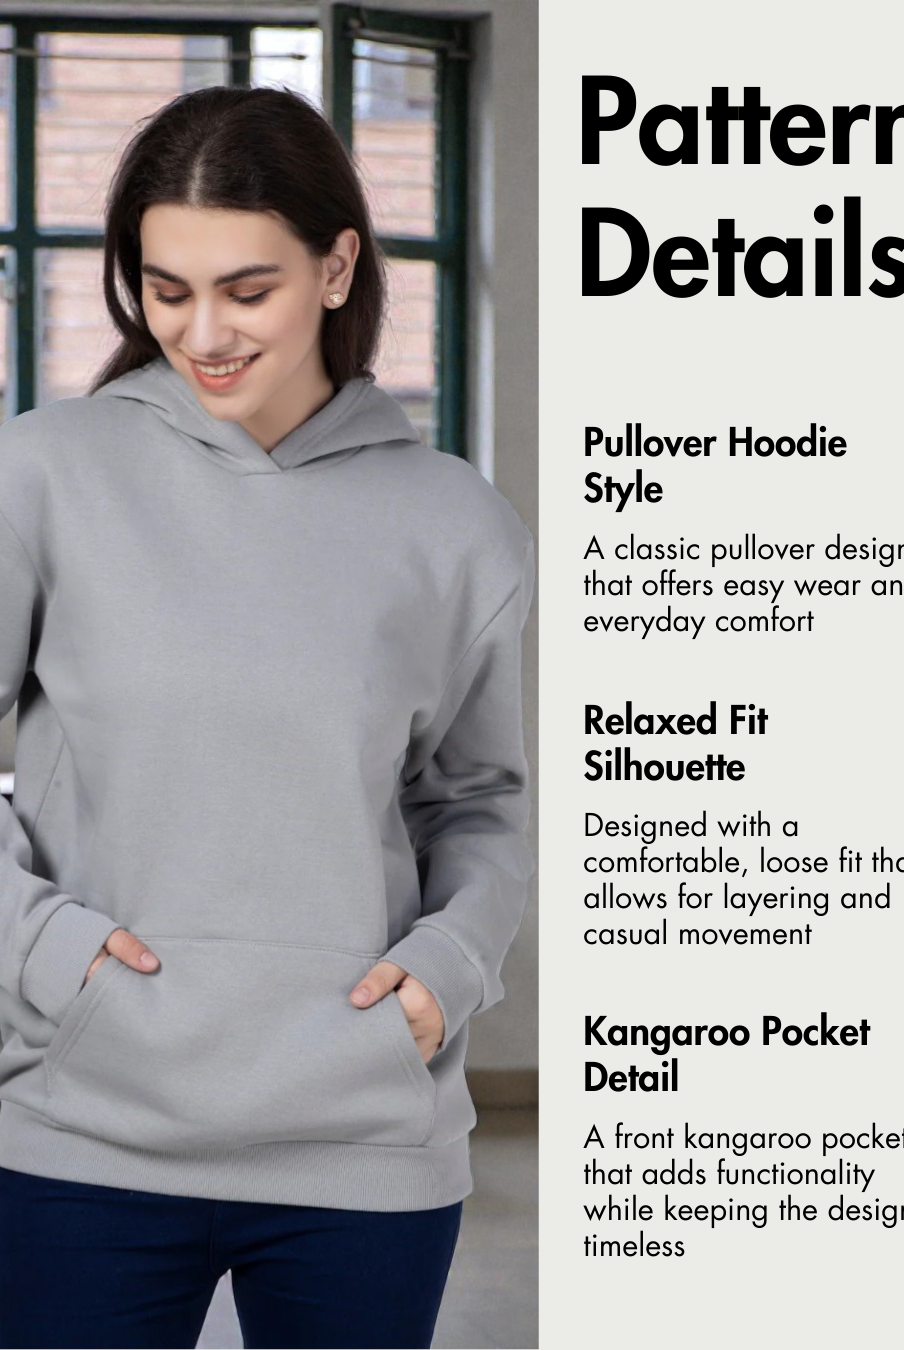
In this guide, I’ll walk you through how to sew a pullover hoodie with a kangaroo pocket, sleeve cuffs, and a lined hood. It’s the perfect project for confident beginners—and if you’re looking for the ideal pattern, the Rhea Hoodie Pattern by Winslet’s is the one I used.
Why You’ll Love Sewing Winslet's Rhea Hoodie Pattern
-
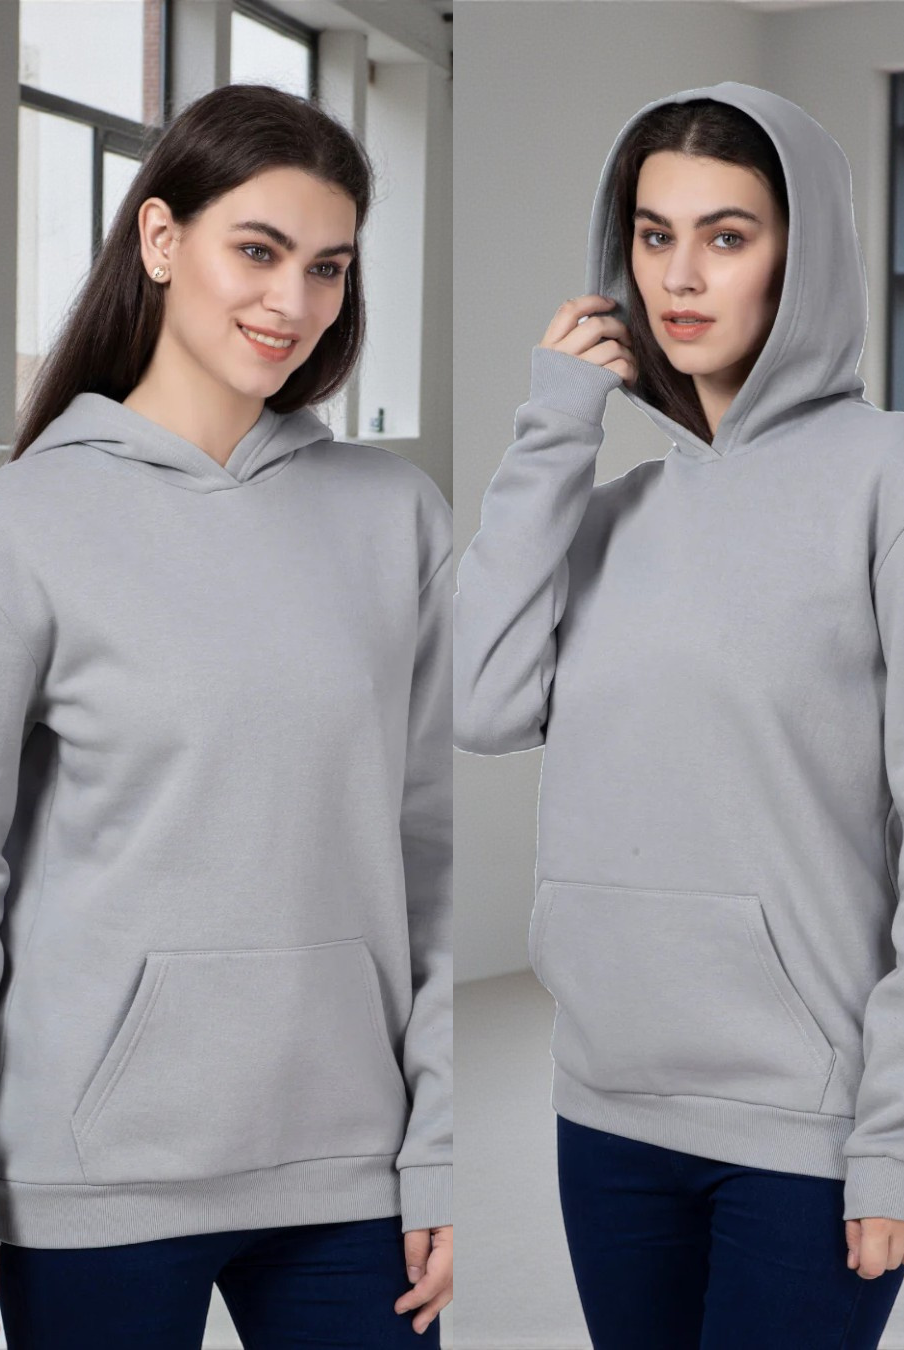
Comfy, roomy fit for everyday wear
-
Kangaroo pocket to keep hands warm
-
Lined hood with optional drawstring
-
Ribbed cuffs and waistband for that classic hoodie look
Step 1: Choose the Right Fabric to Sew a Hoodie
You’ll want a medium-weight stretch fabric with at least 5% spandex for best results. Some recommended options:
-
Polycotton fleece (used in the sample)
-
French terry
-
Sweatshirt fleece
-
Cotton jersey with ribbing for cuffs/waistband
The Rhea Hoodie Pattern was designed with these fabrics in mind—perfect for comfort and structure.
Step 2: Use a Pattern That’s Easy to Follow
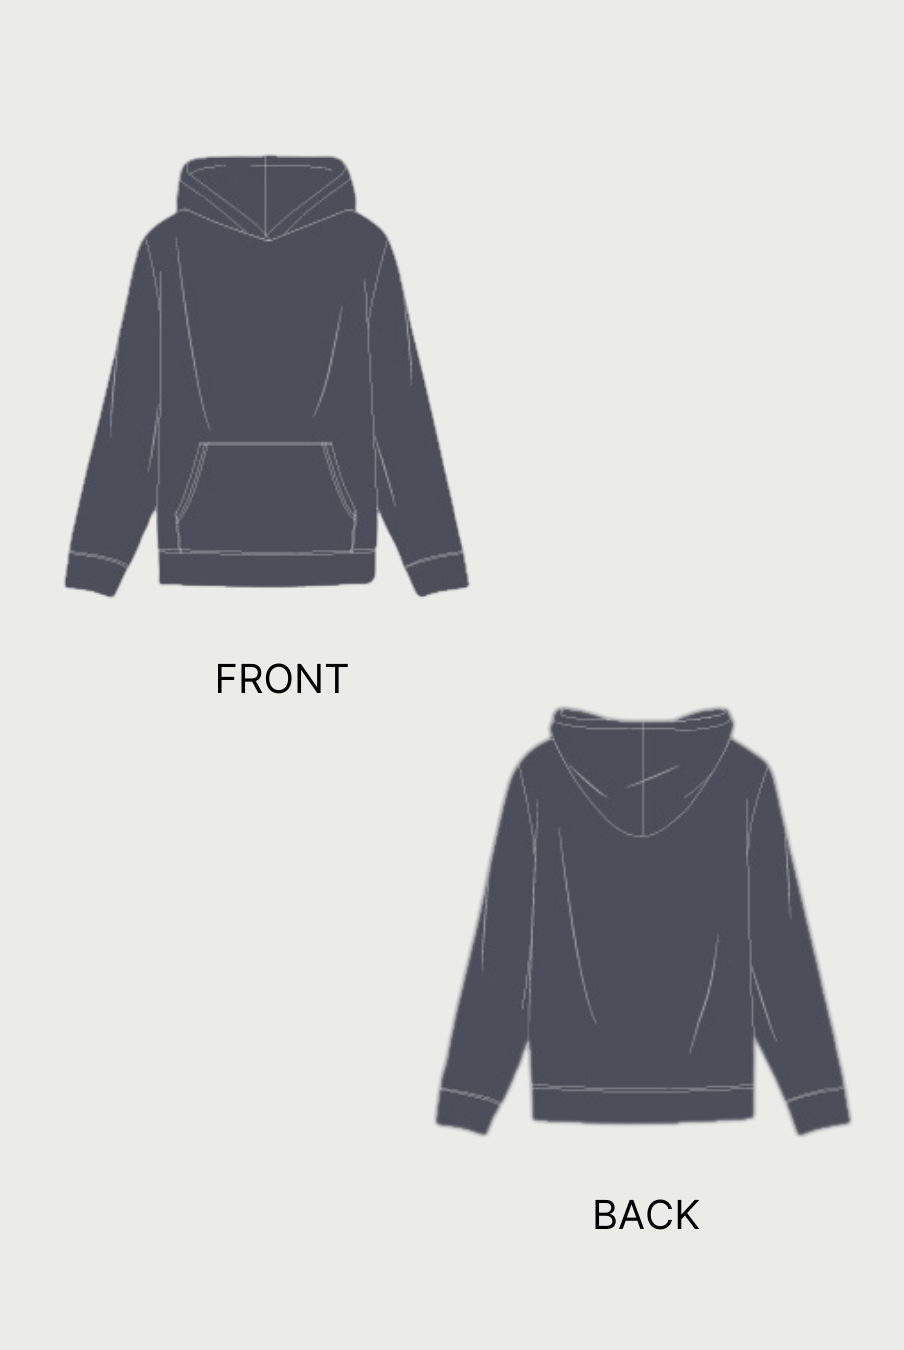
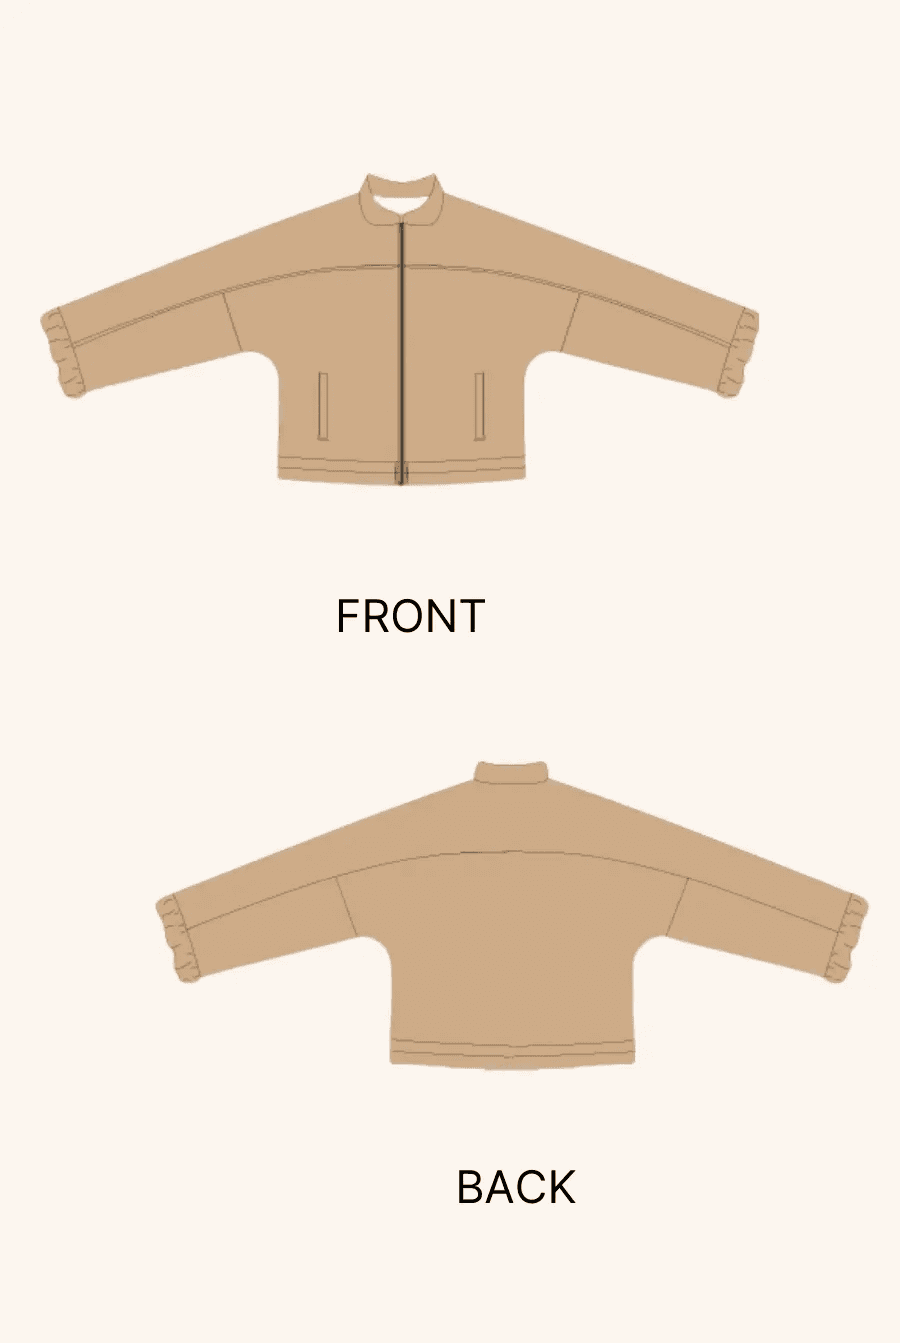
The Rhea Hoodie Pattern by Winslet’s includes:
-
Front and back bodice
-
Long sleeves
-
Lined hoodie with optional drawstring
-
Kangaroo pocket
-
Cuffs and waistband
-
Beginner-friendly sewing instructions with illustrations
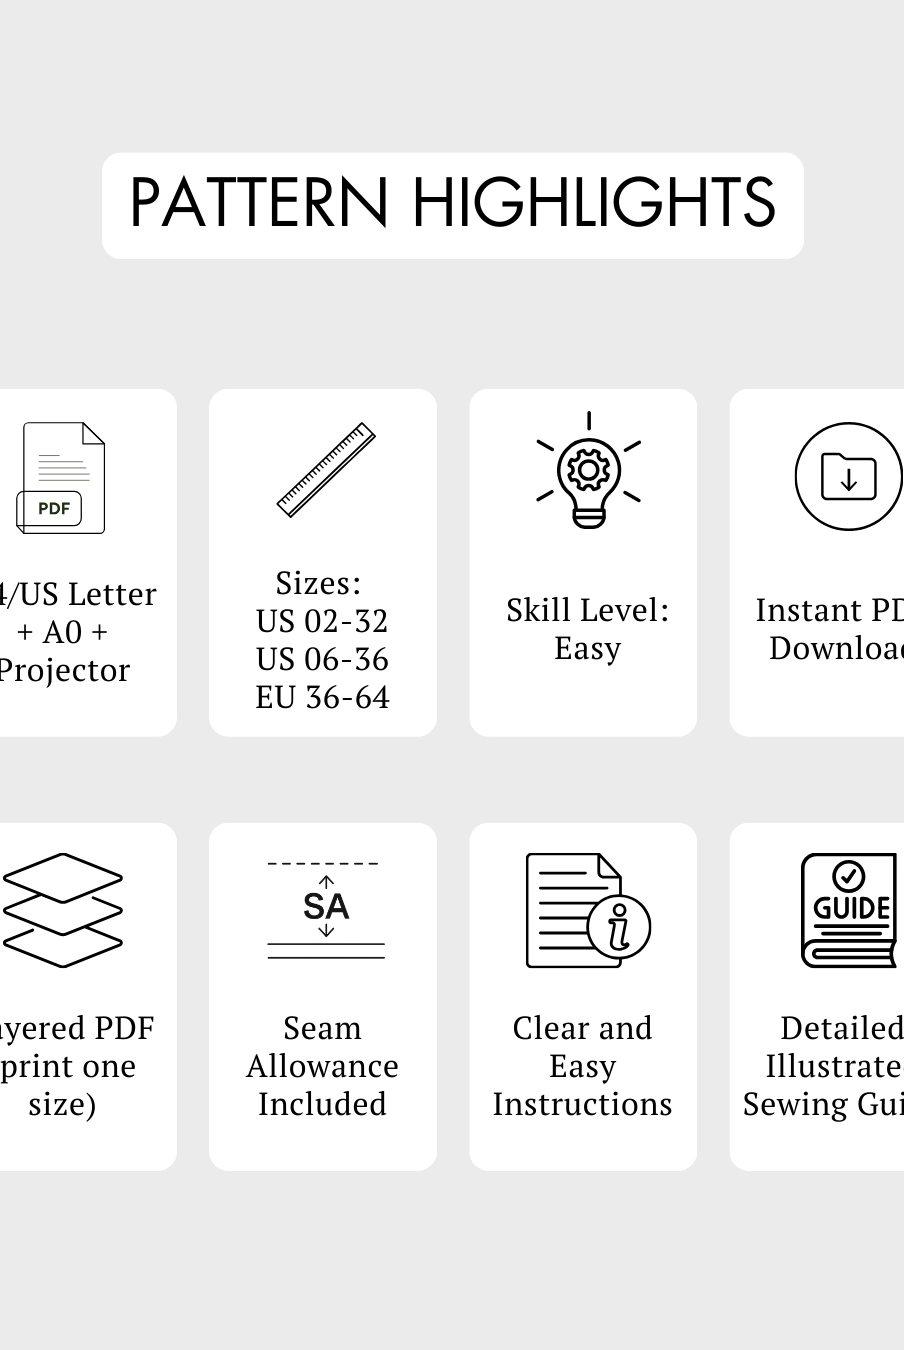
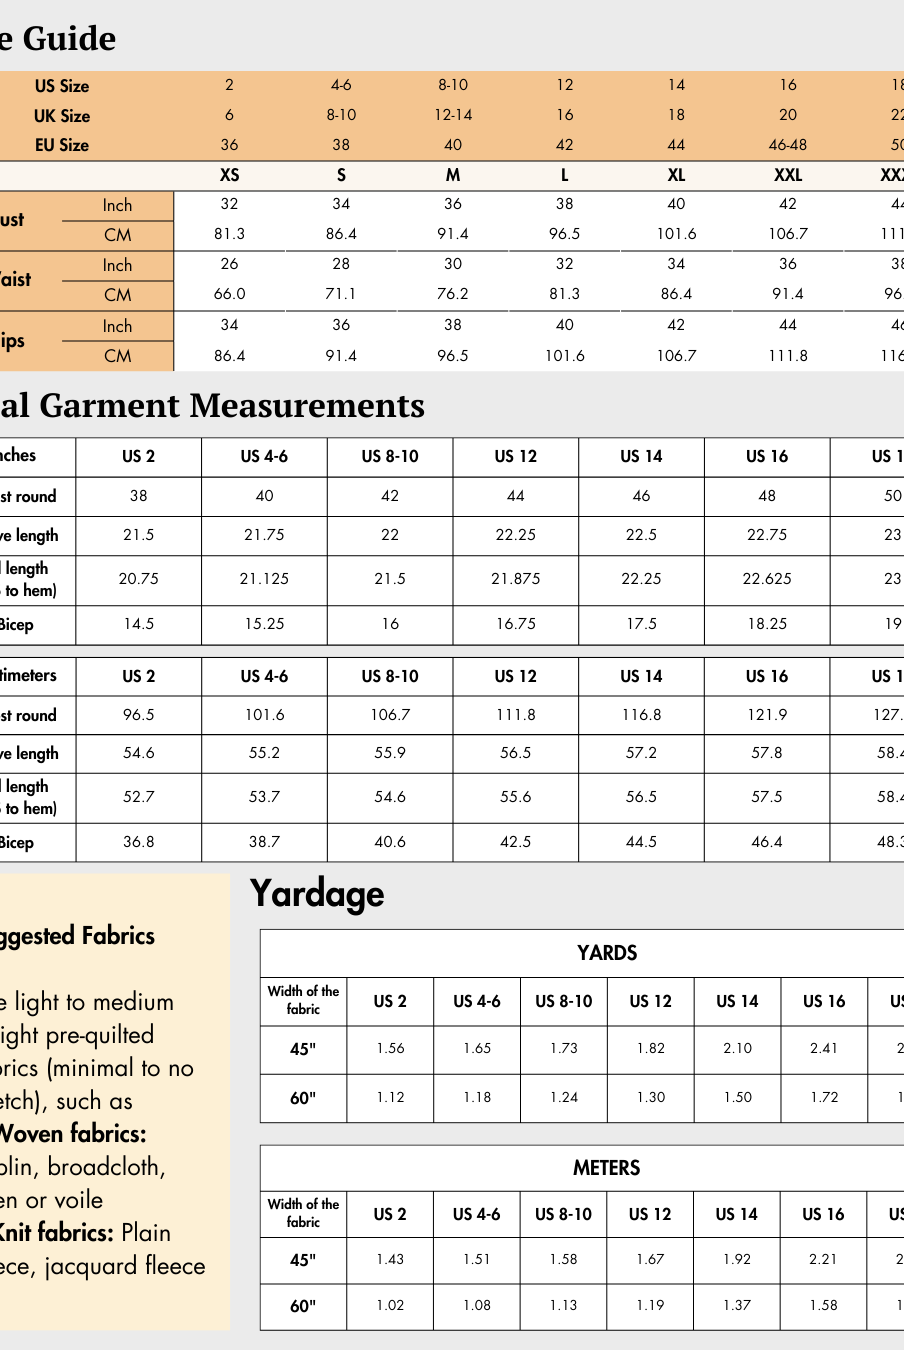
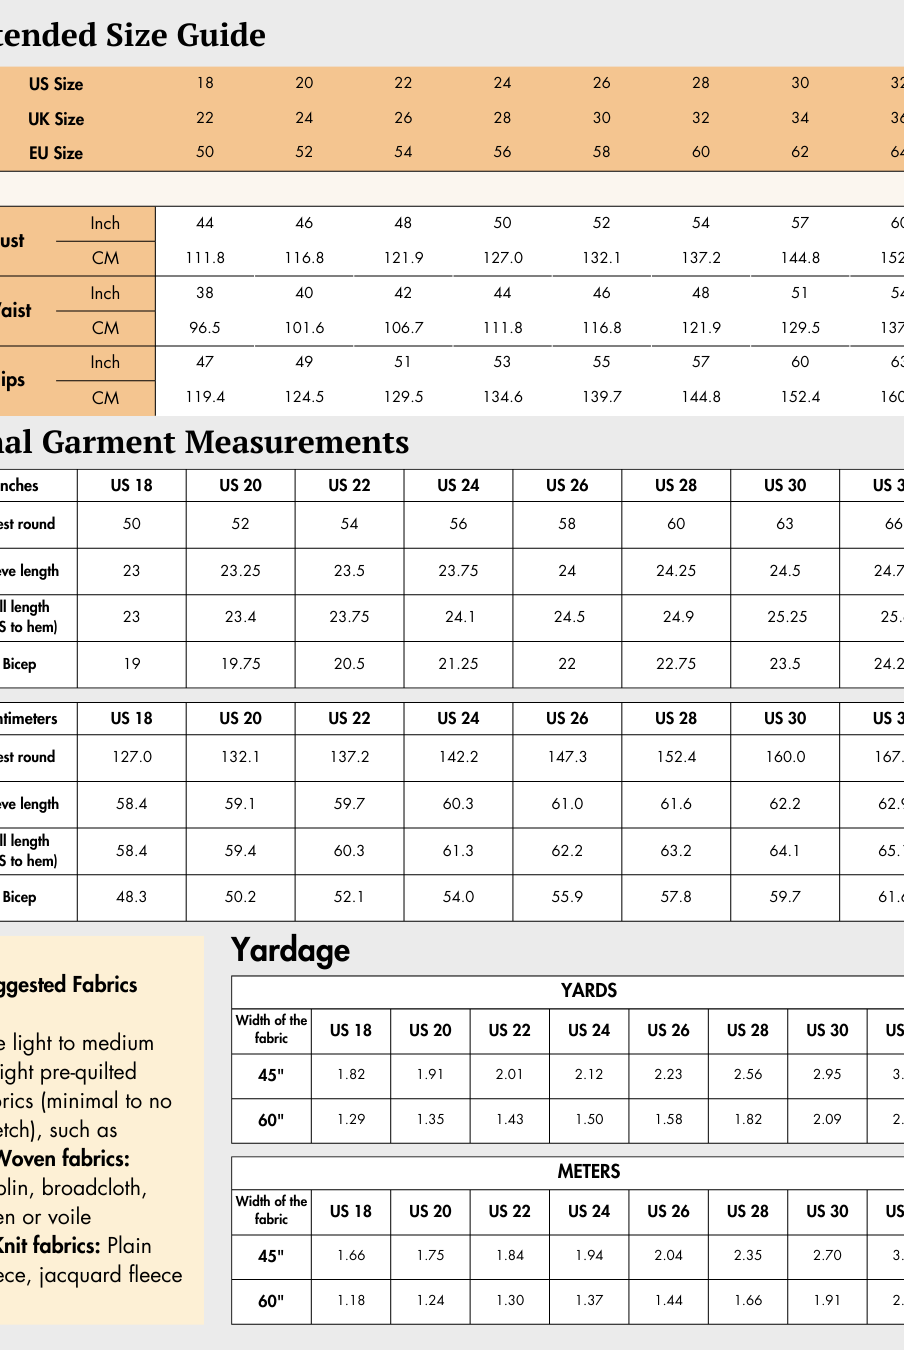
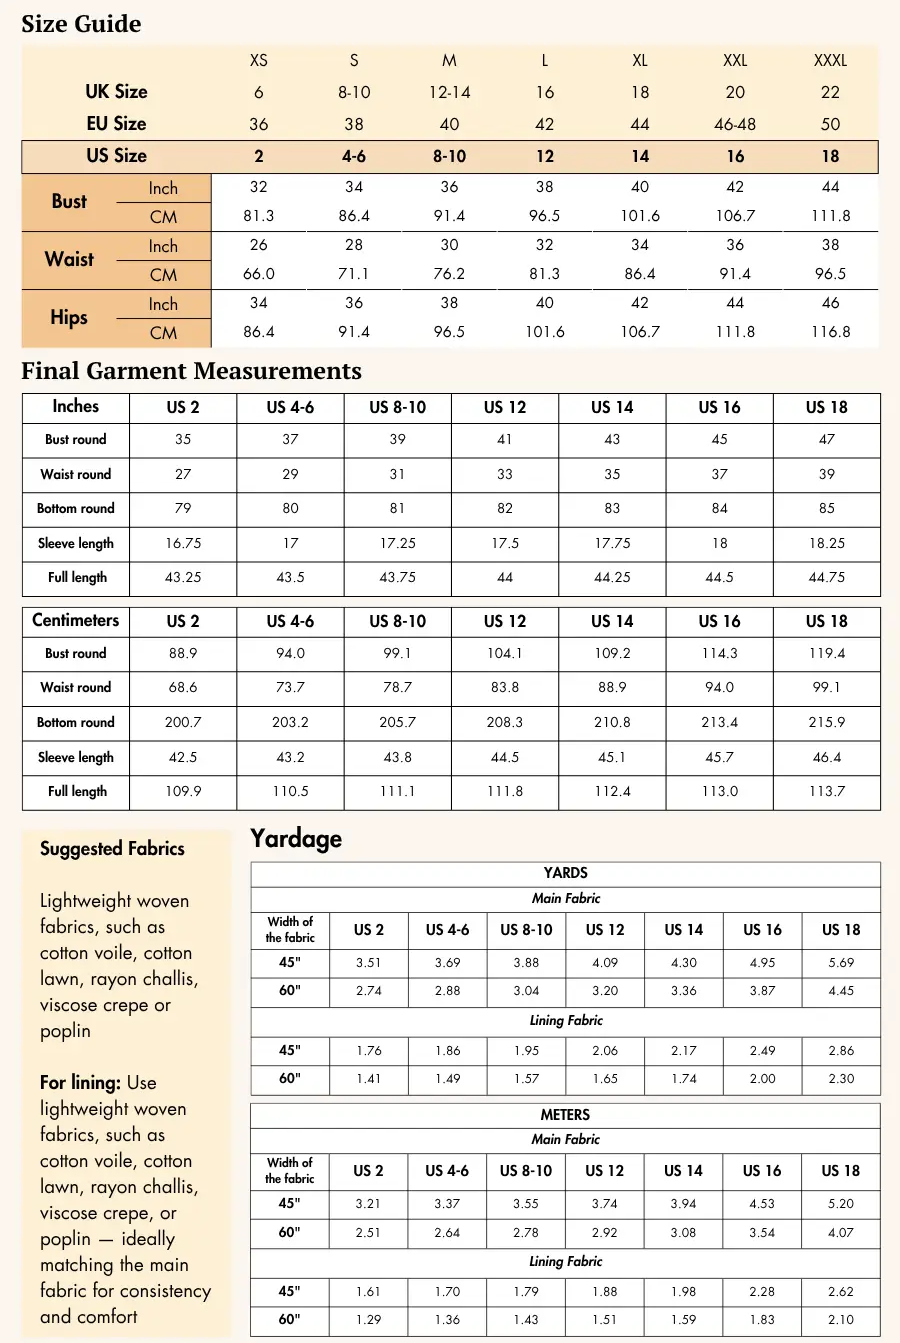
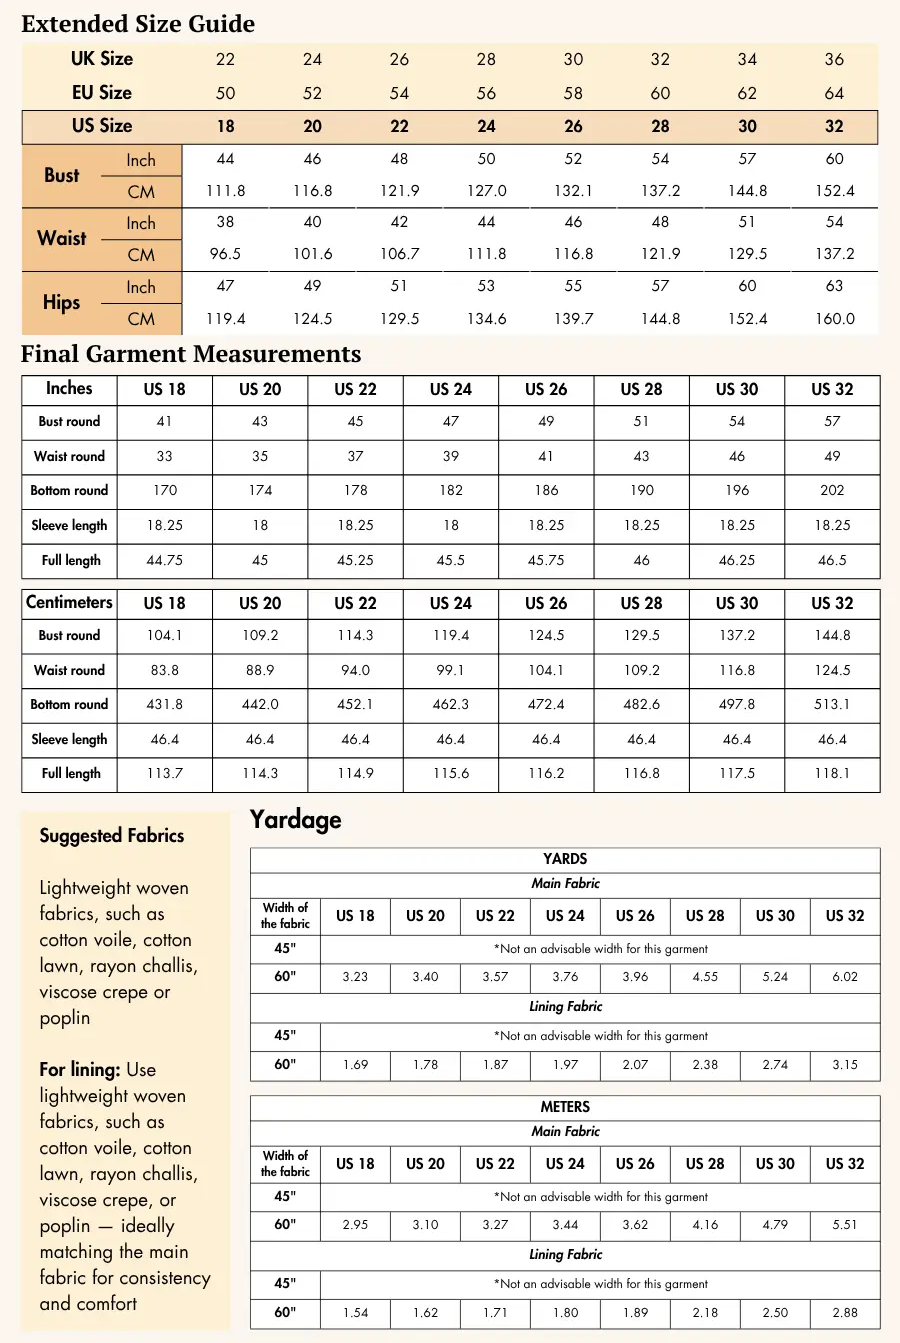
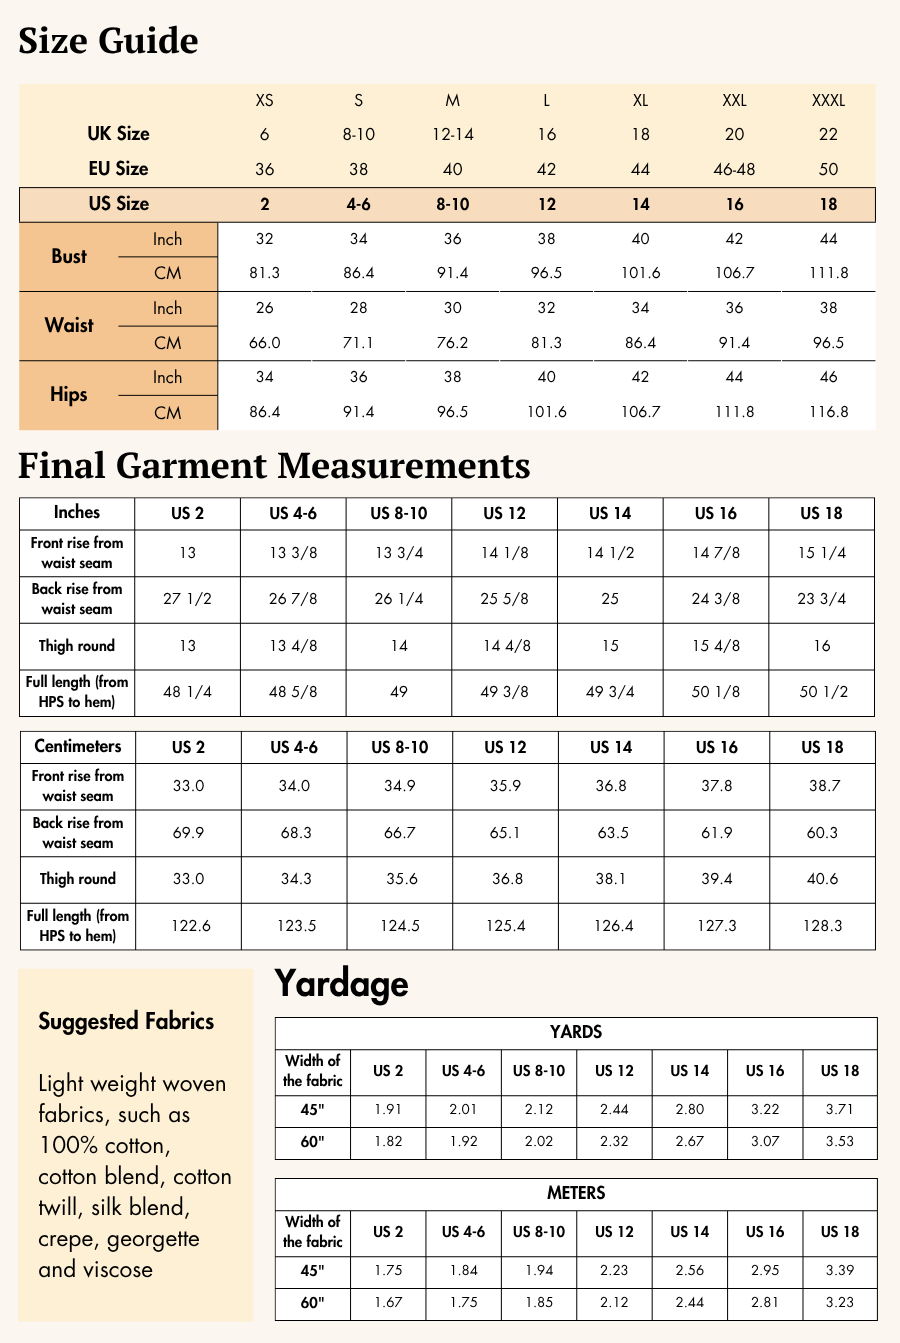
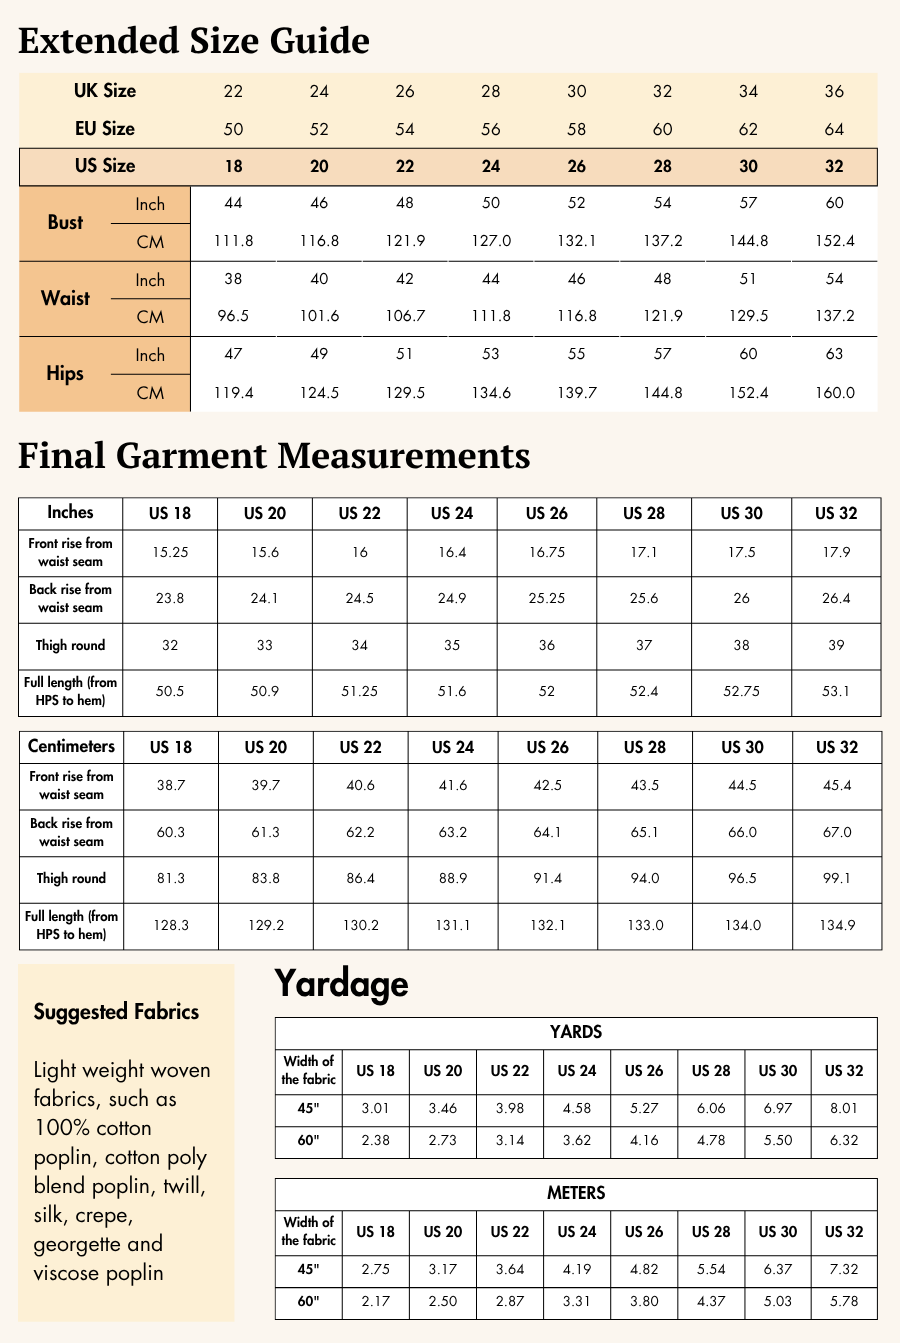
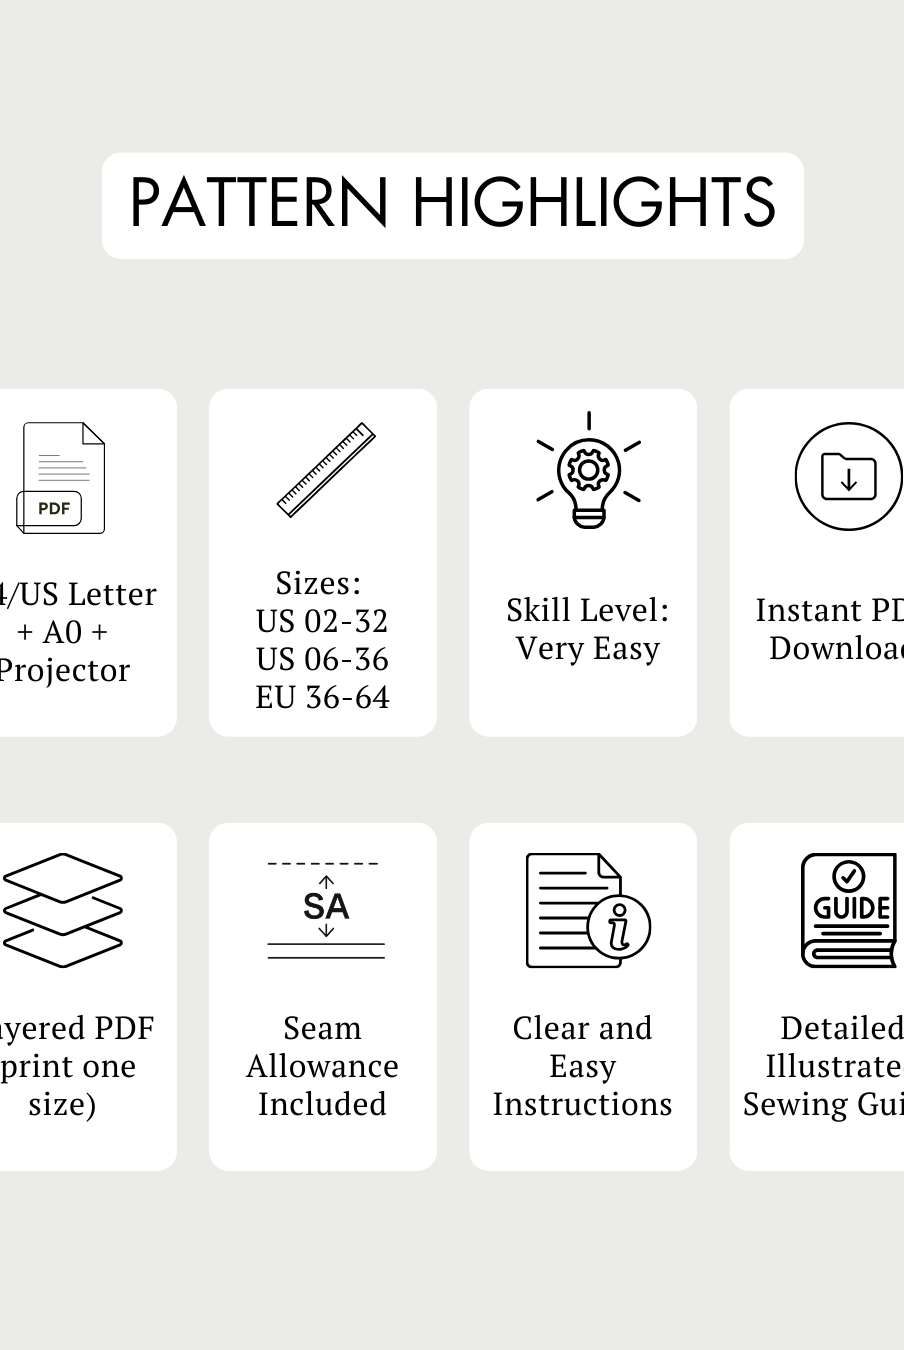
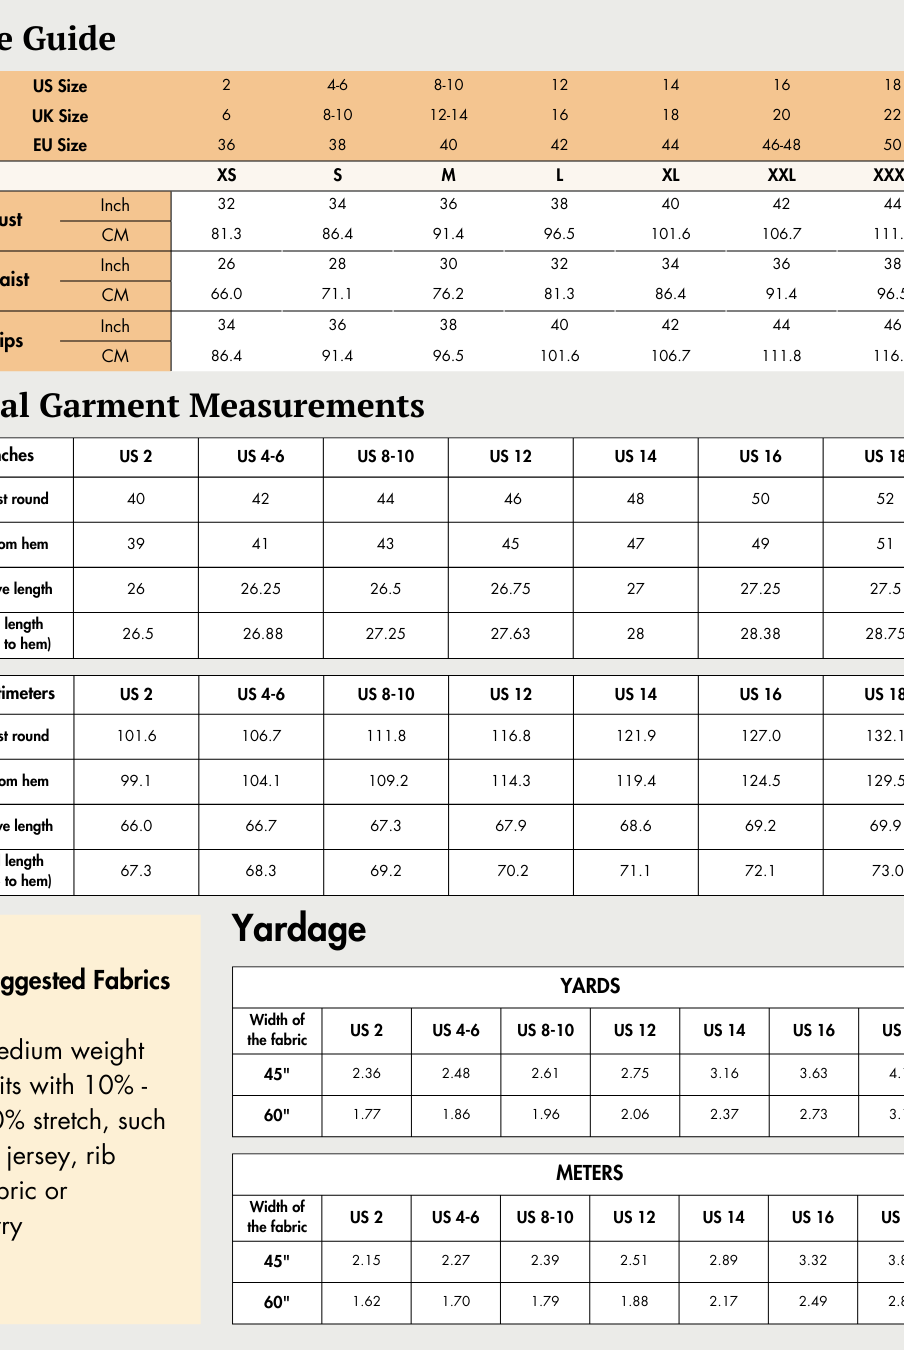
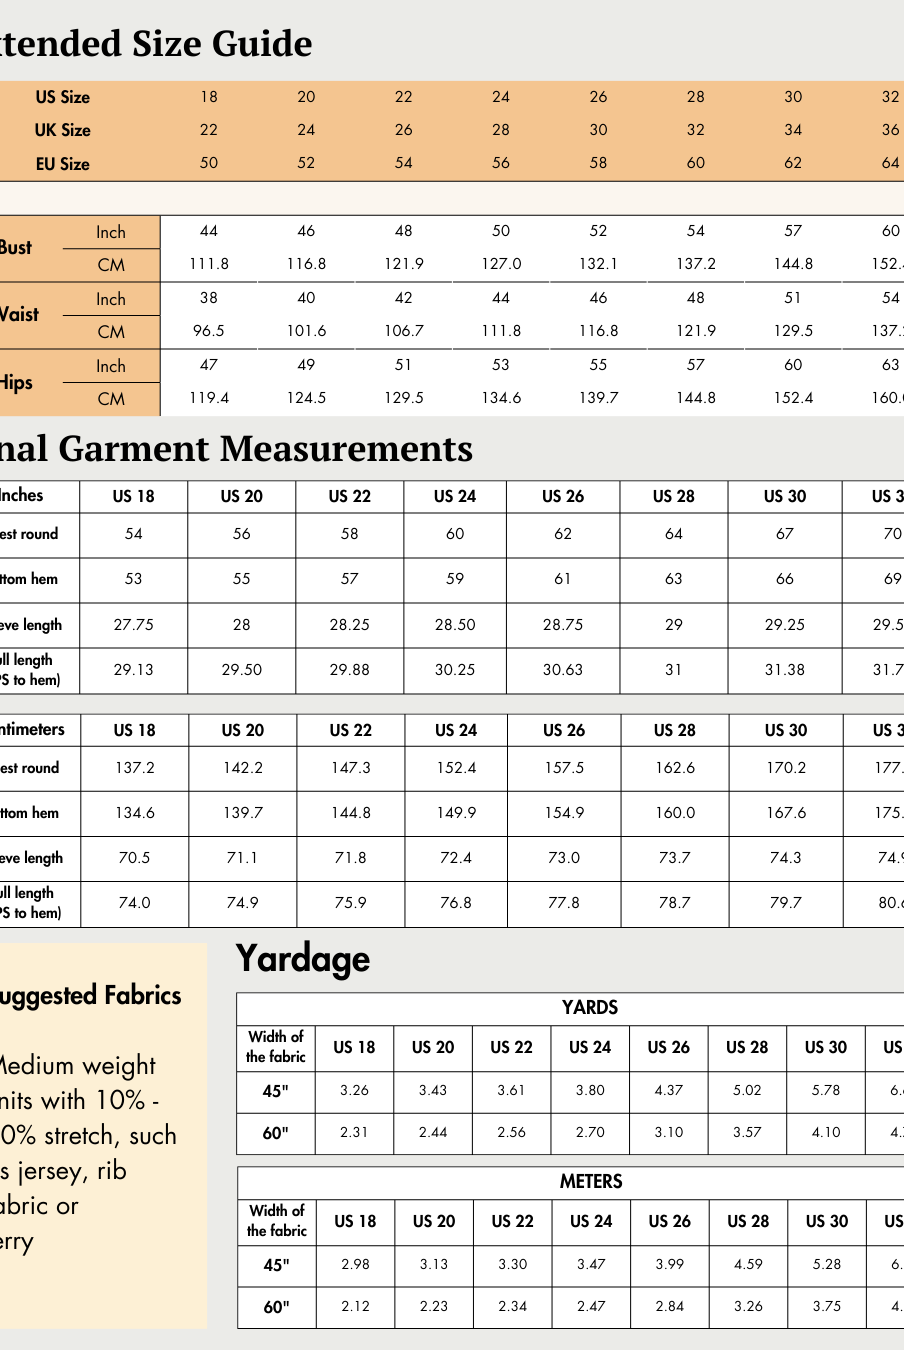
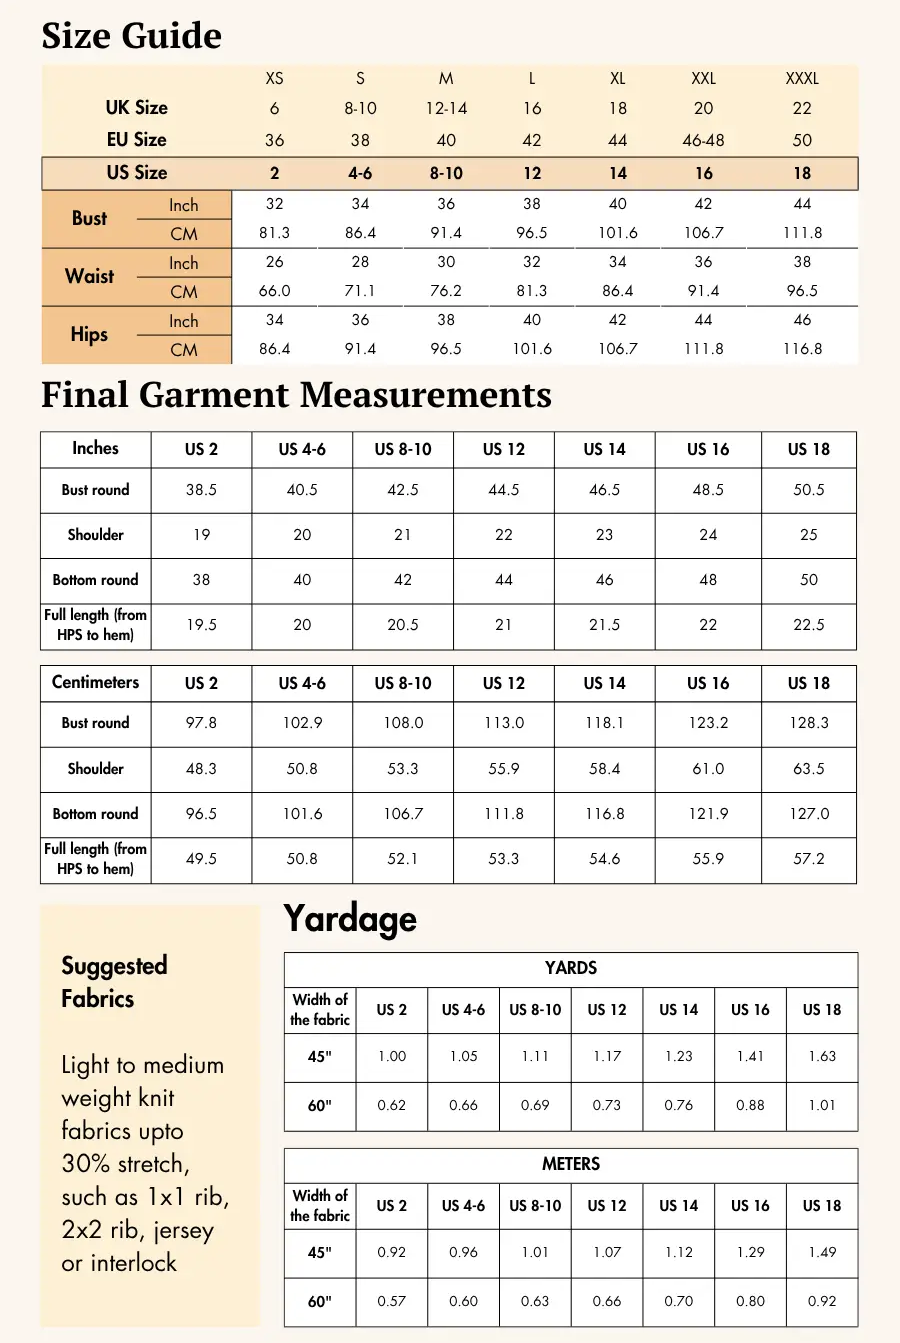
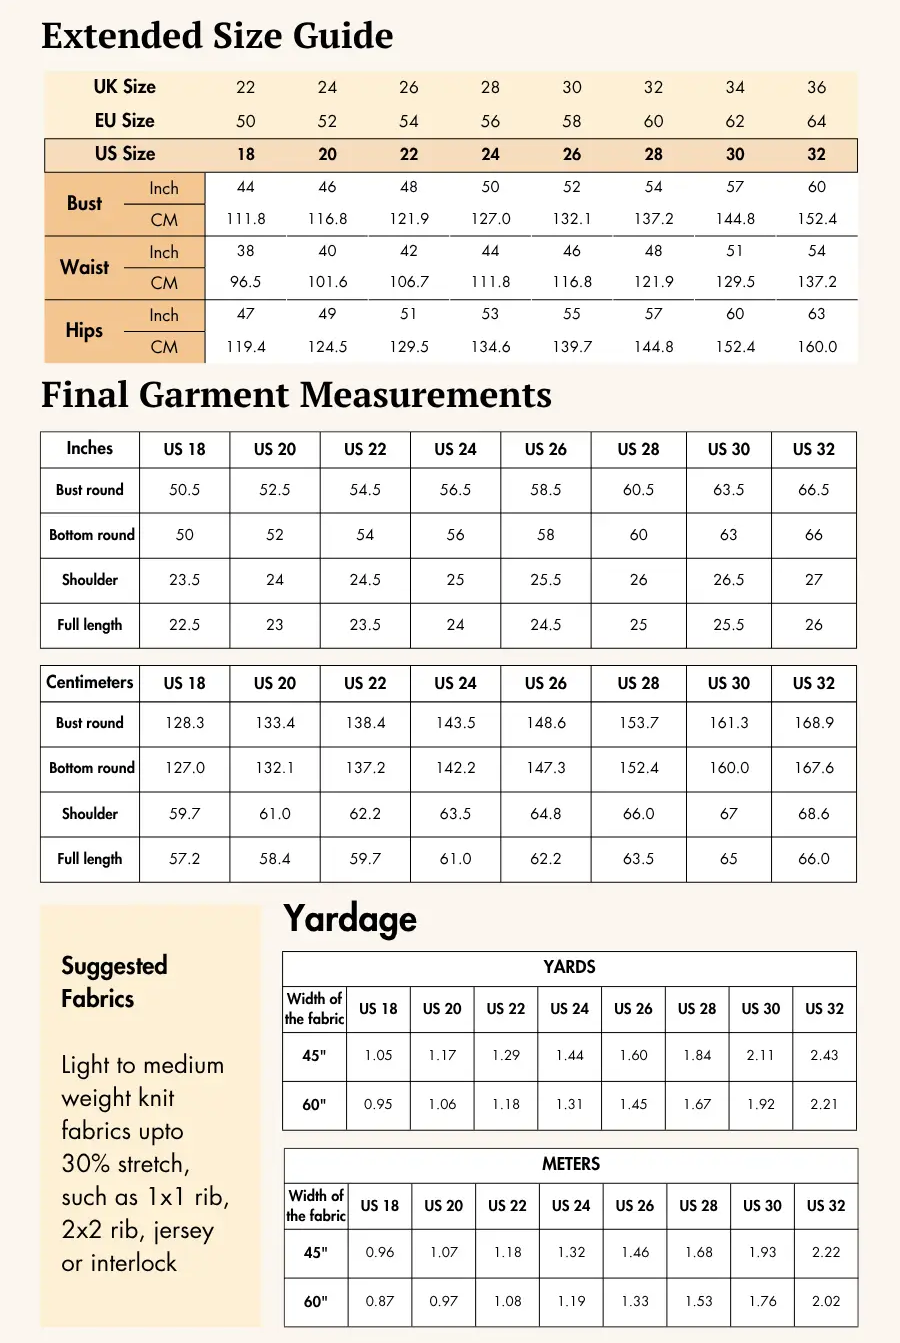
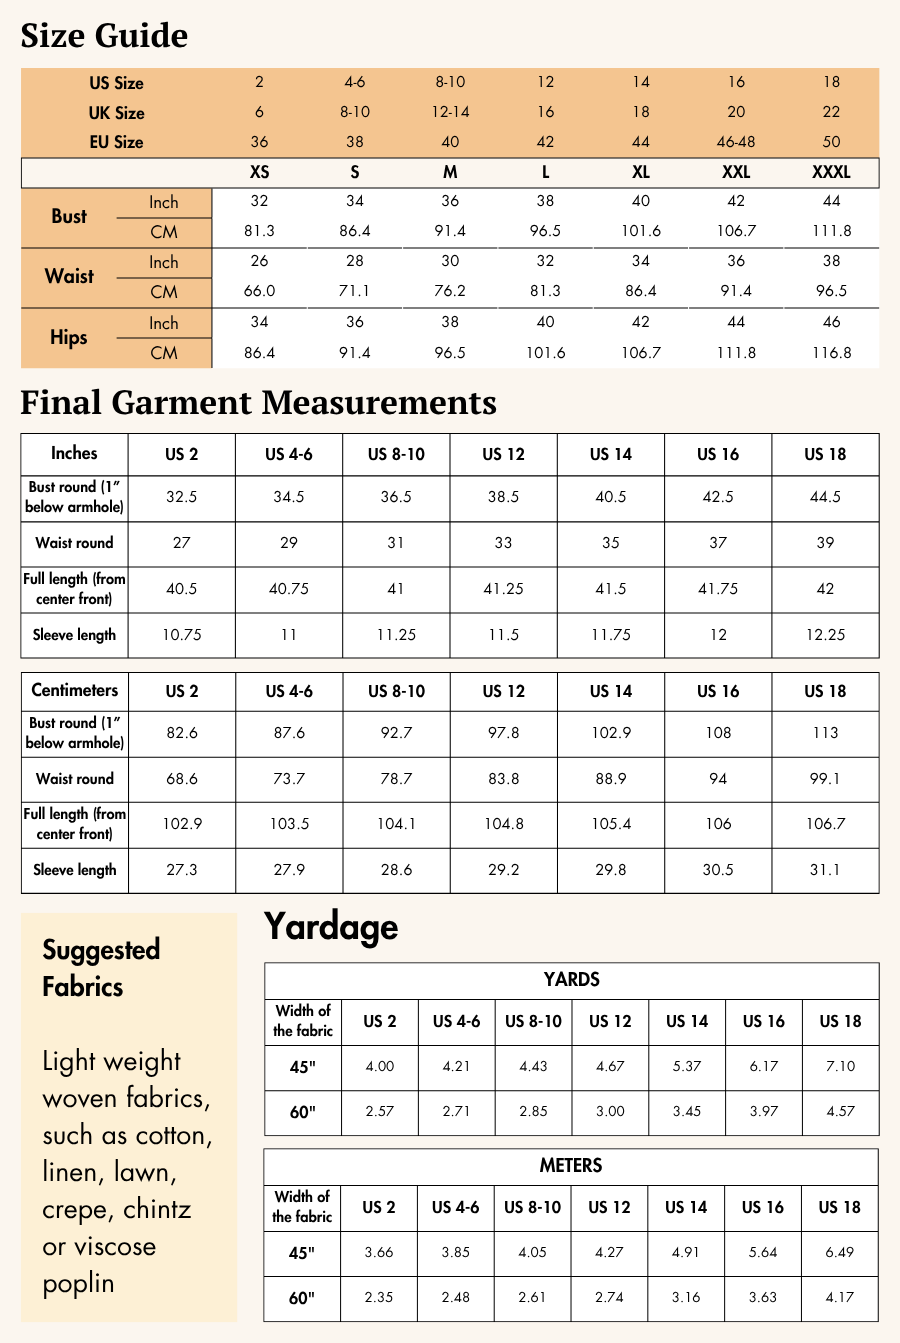
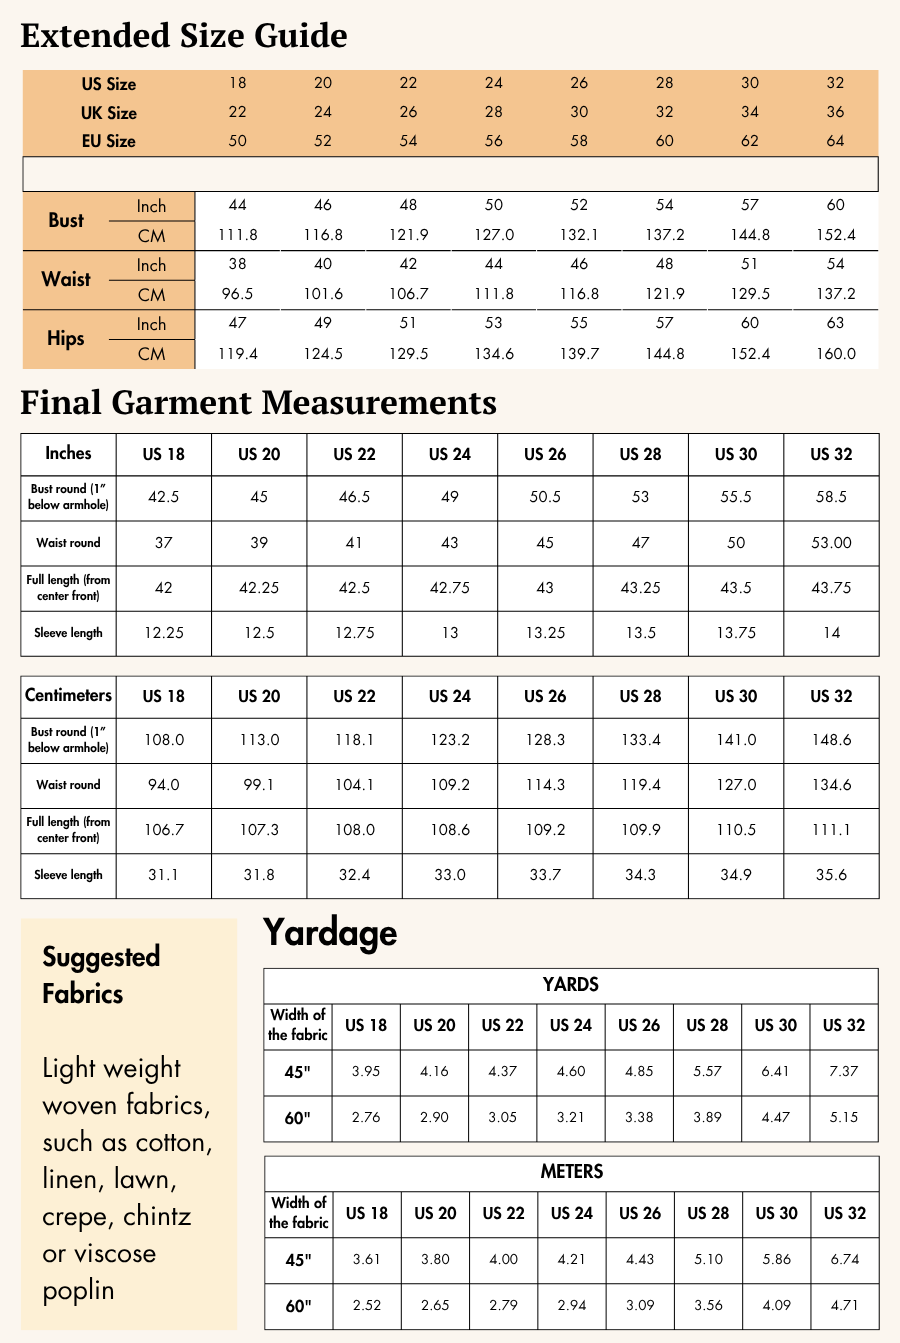
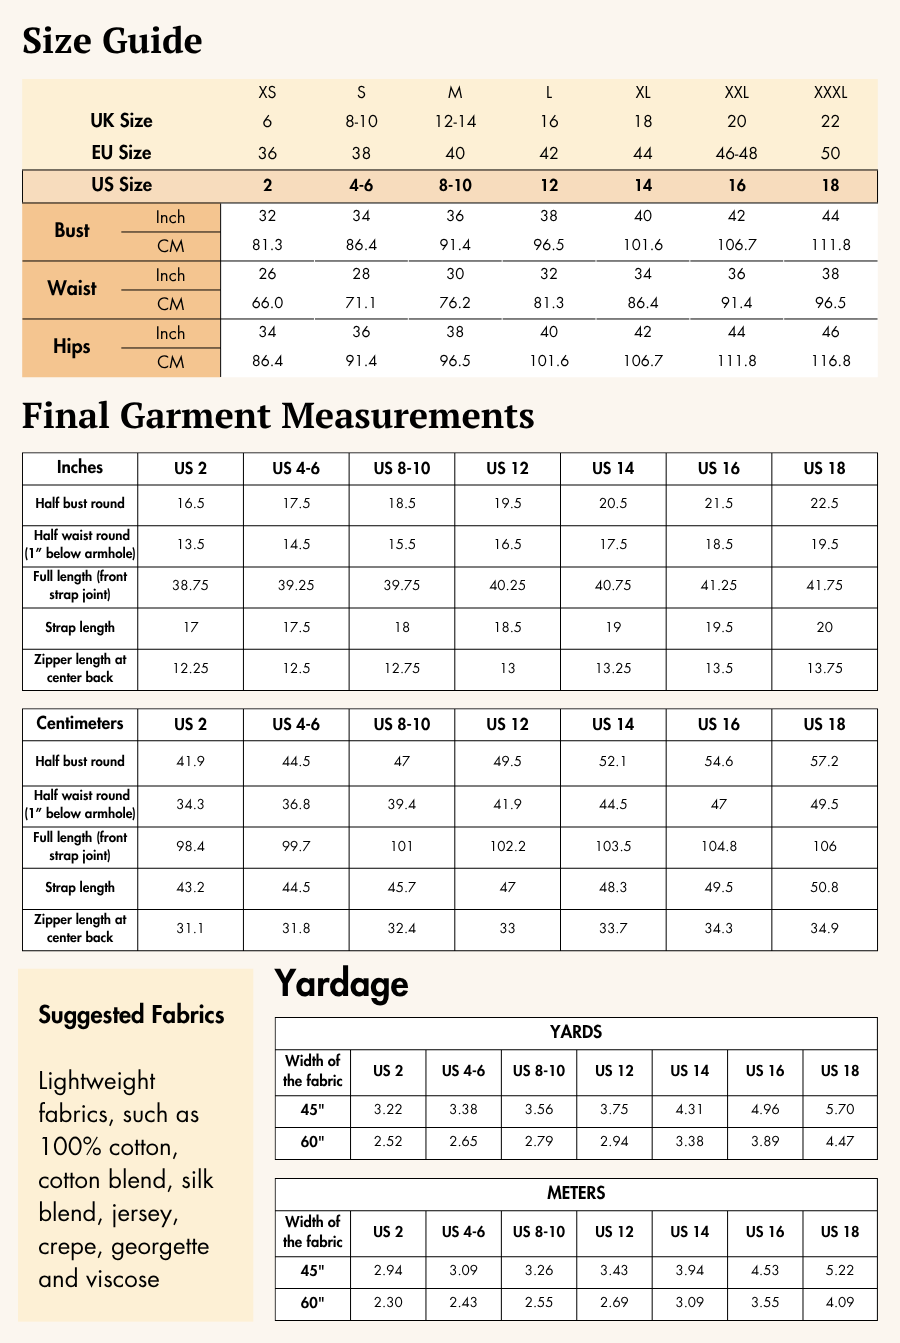
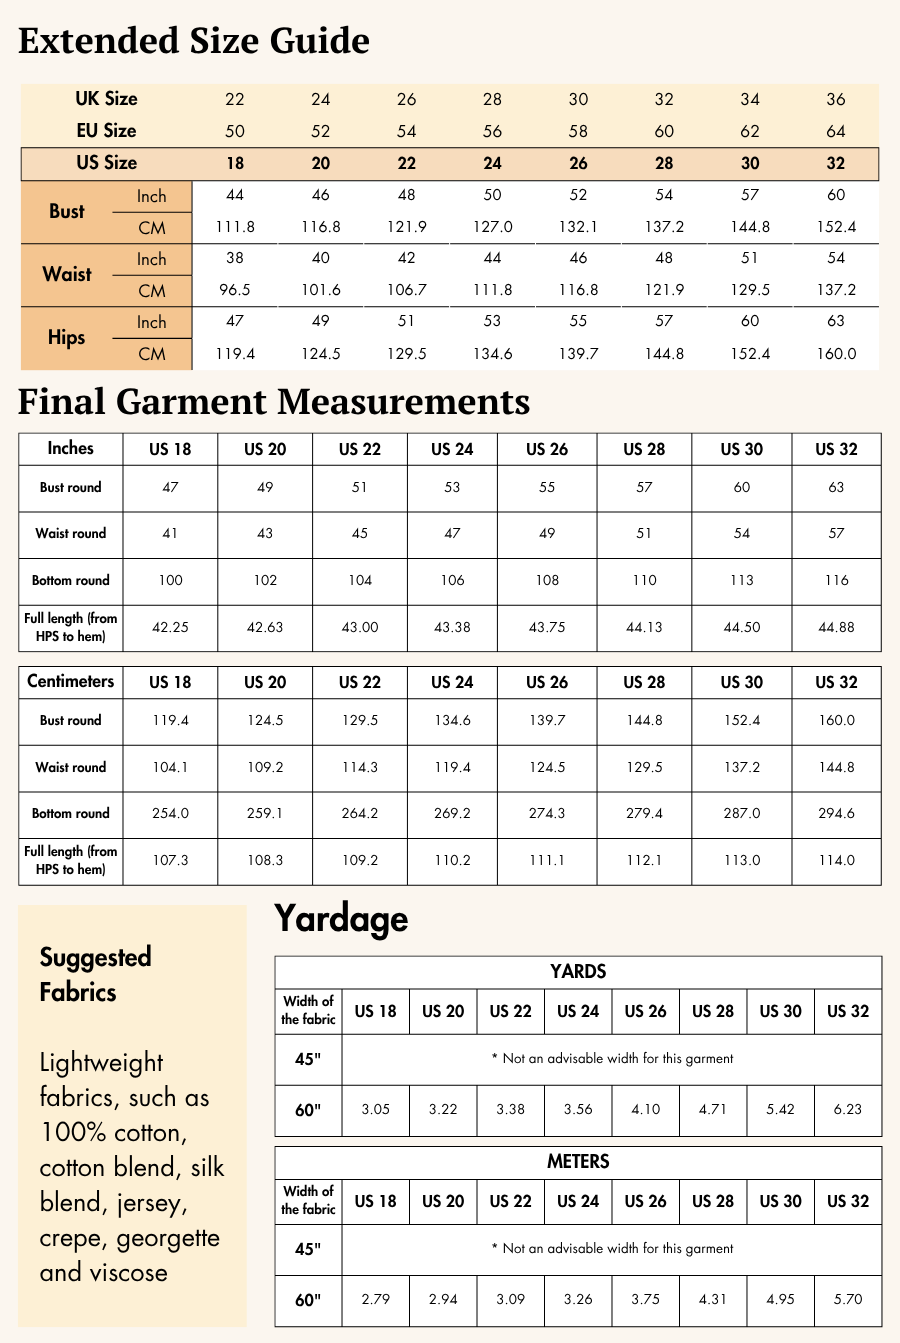
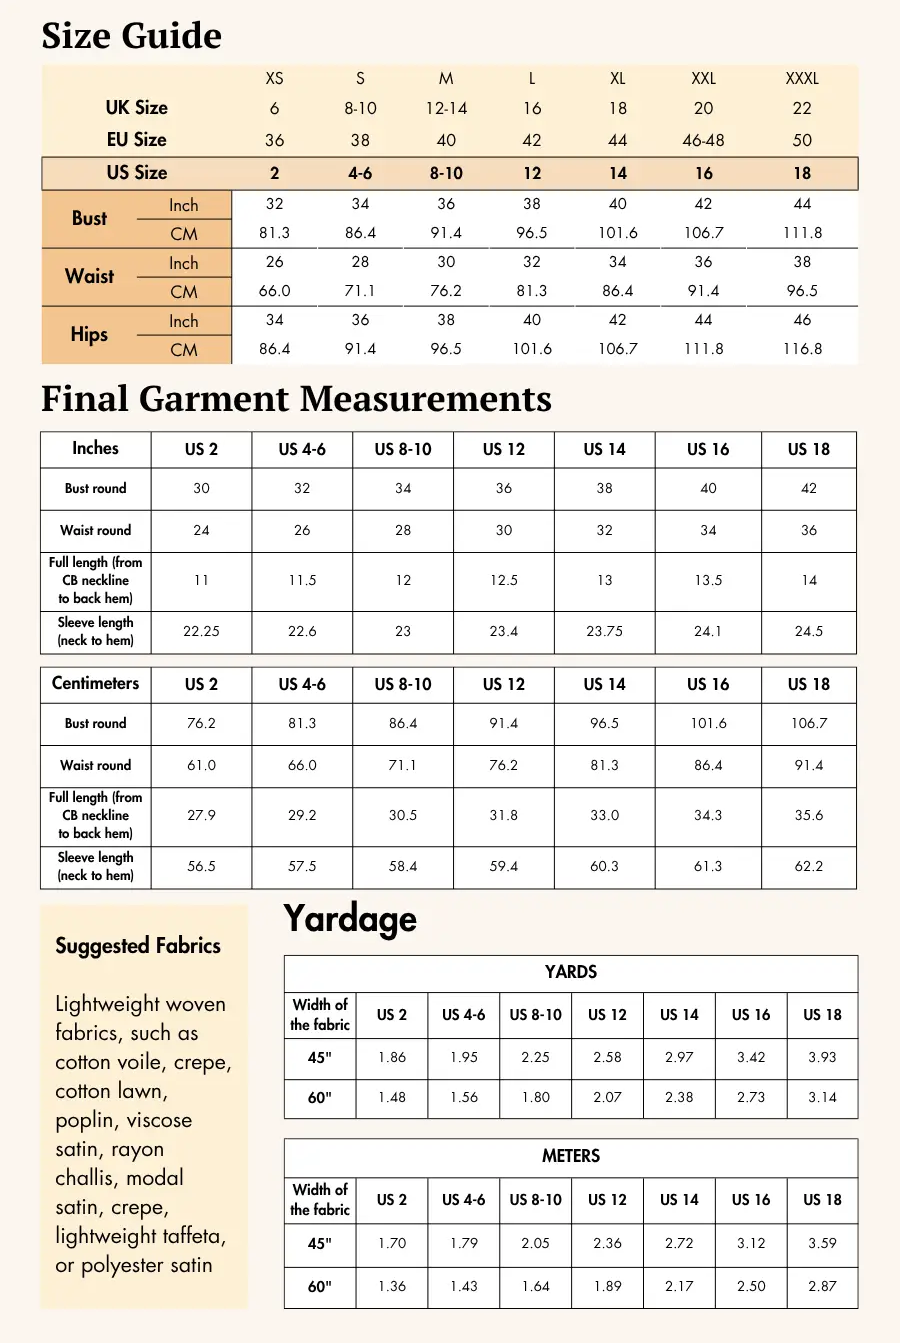
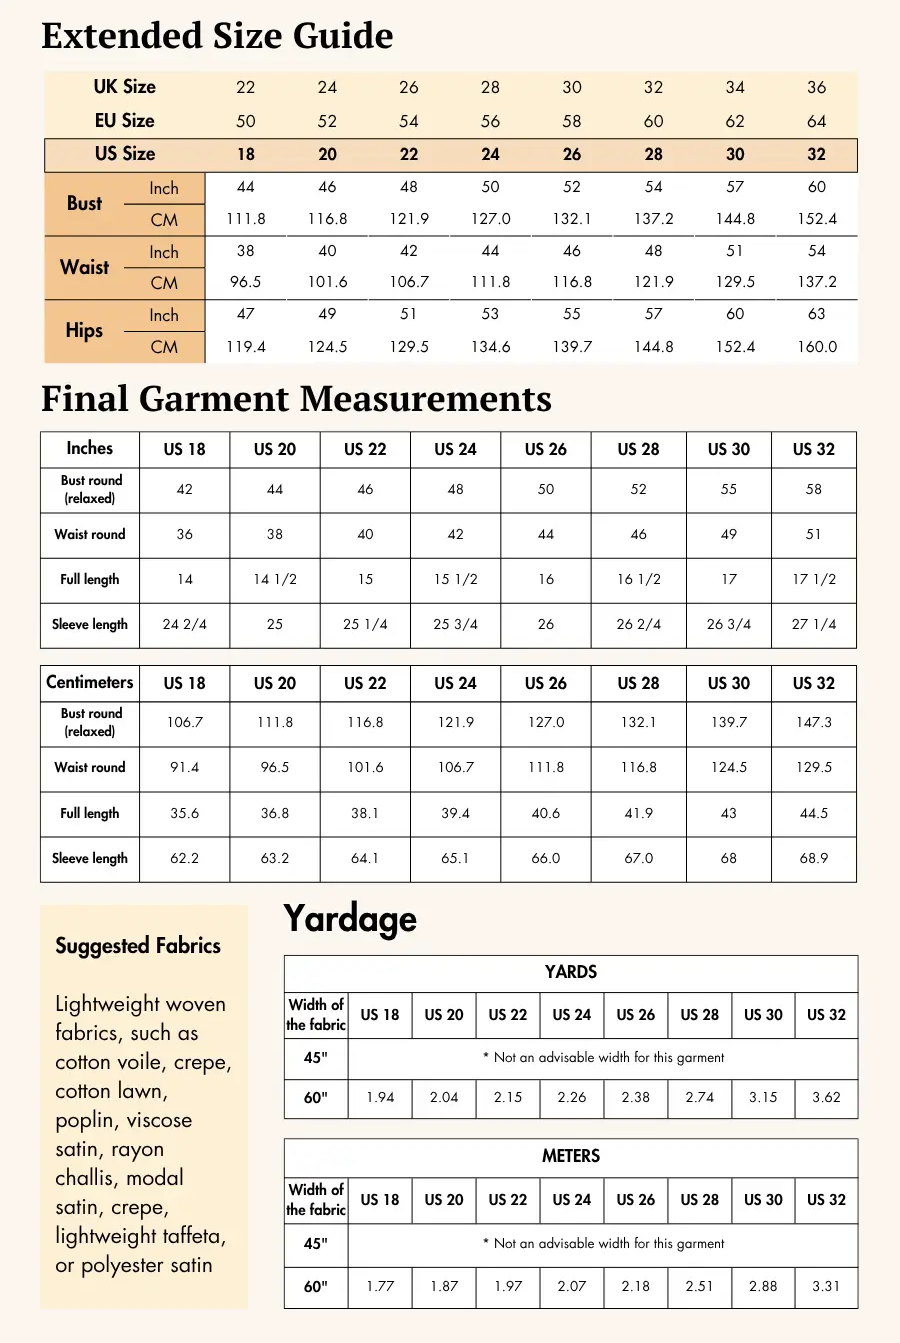
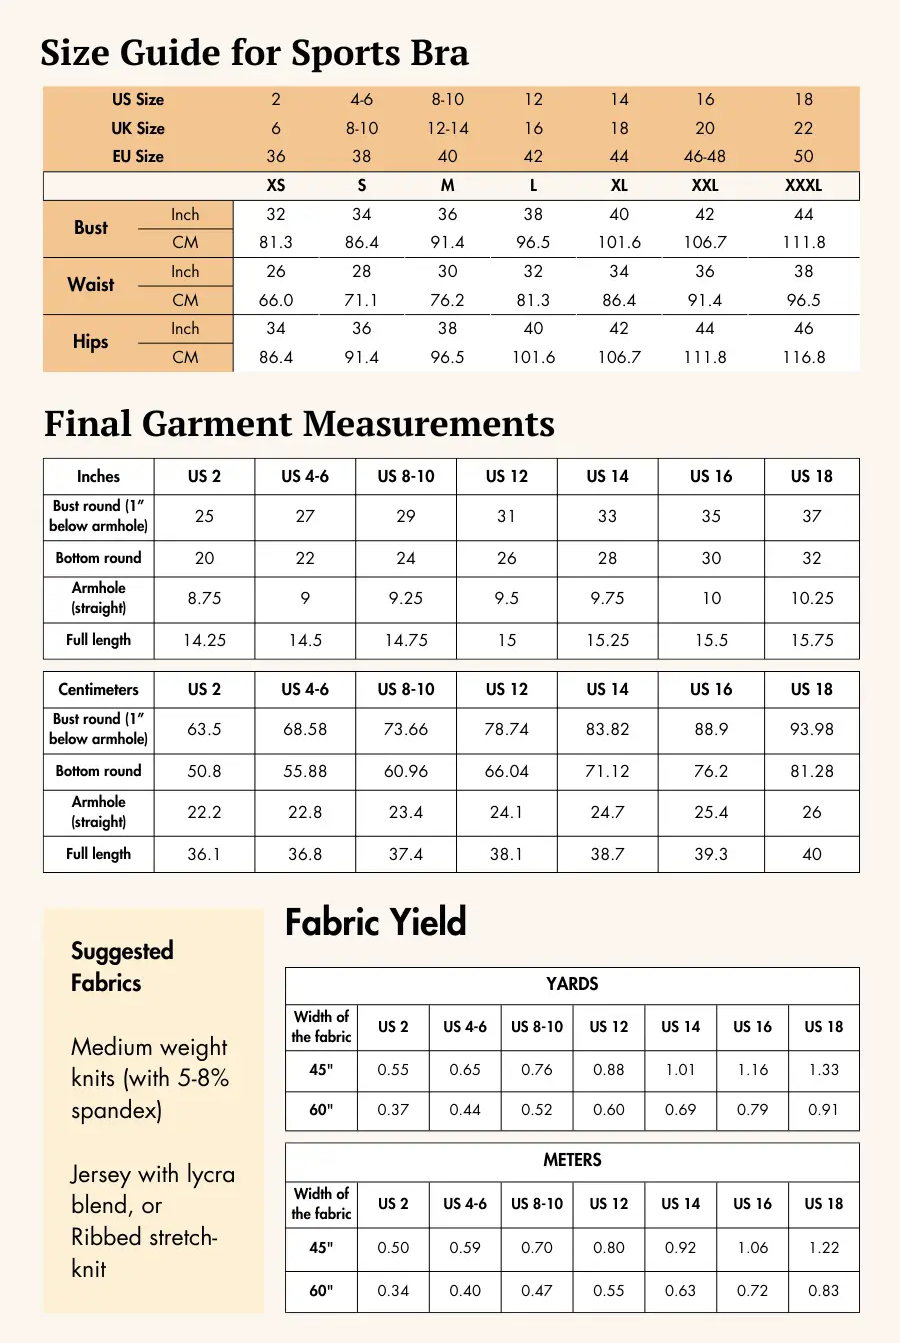
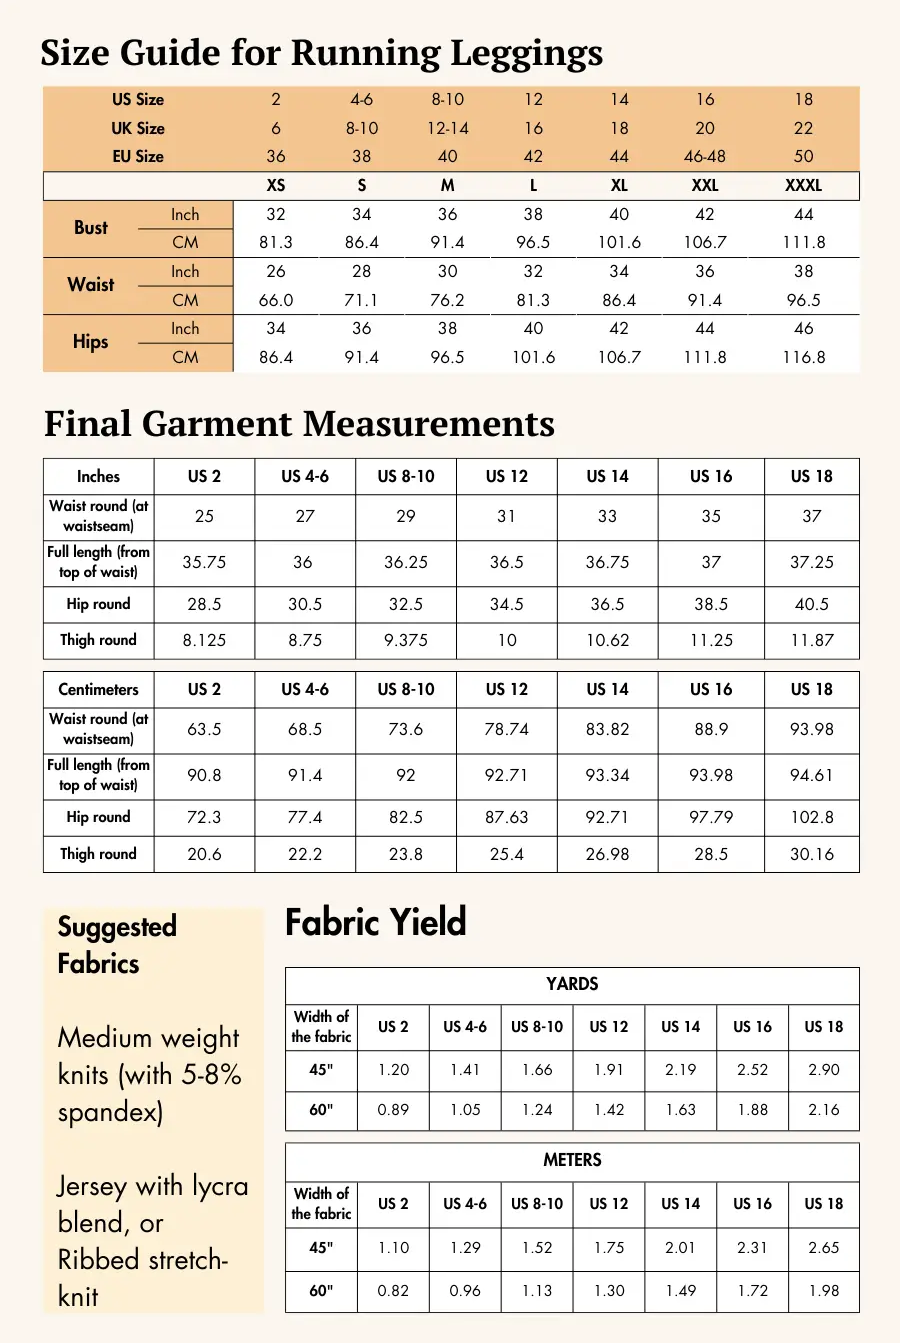
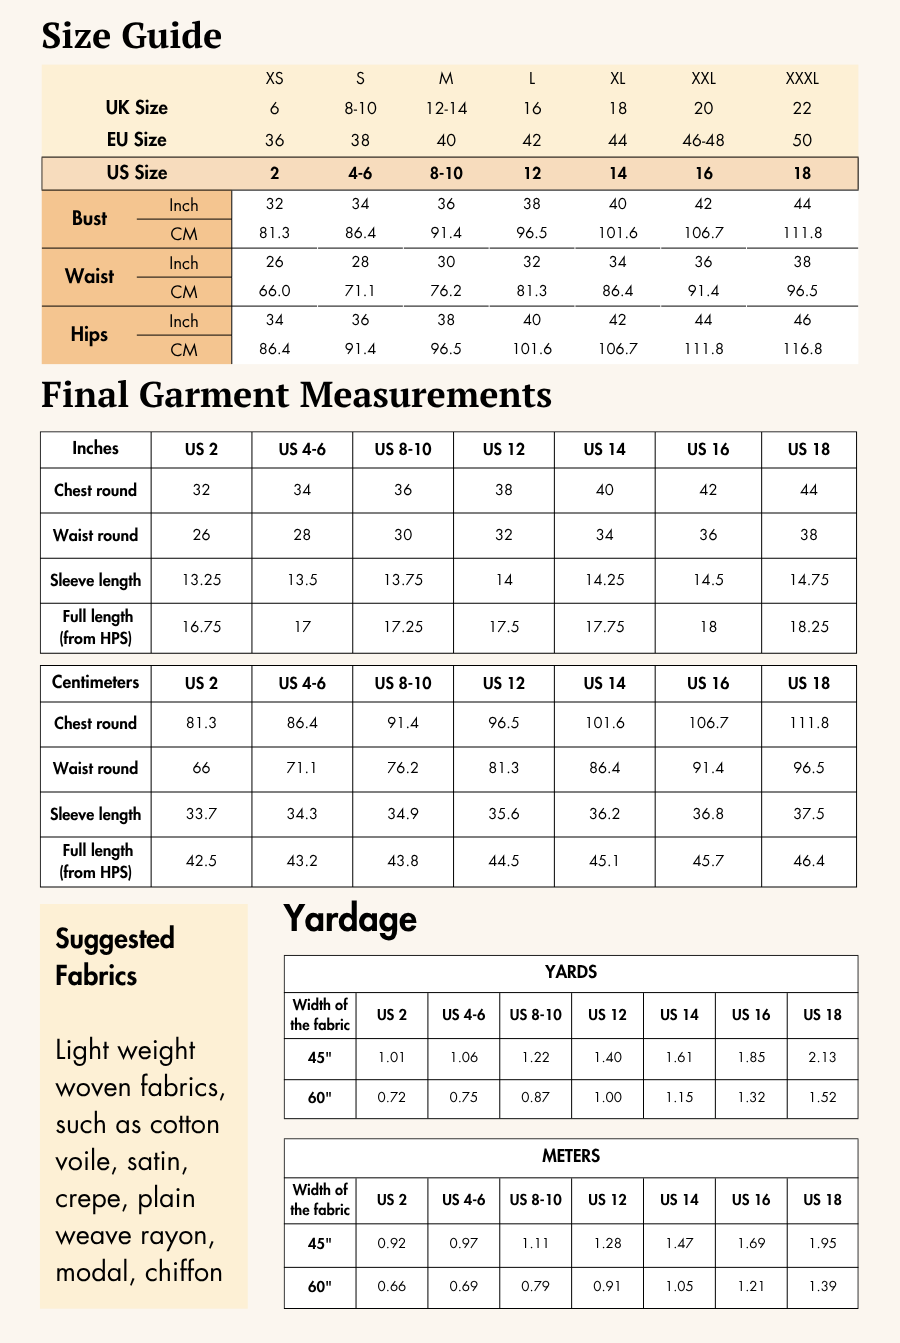
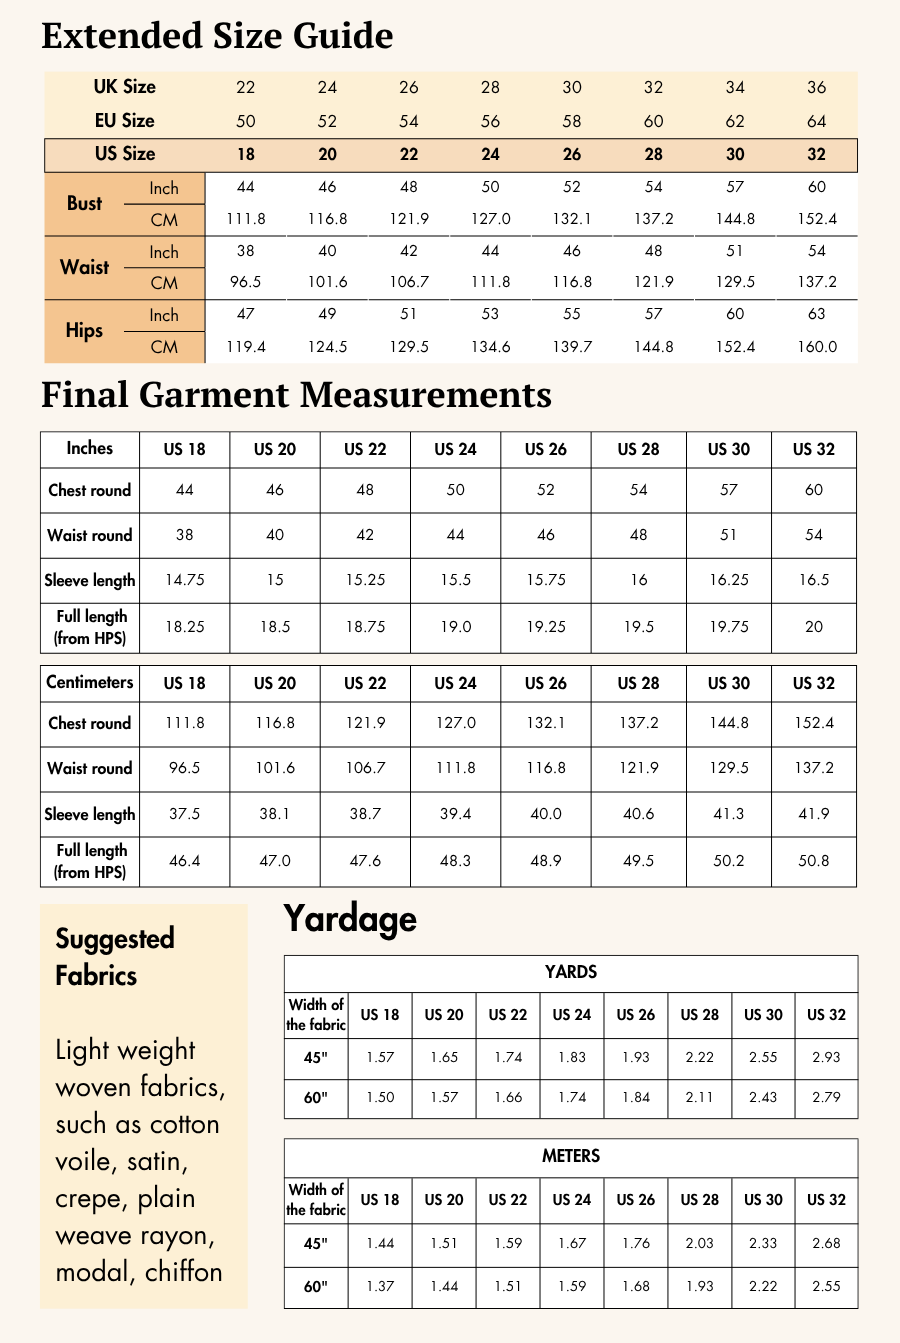
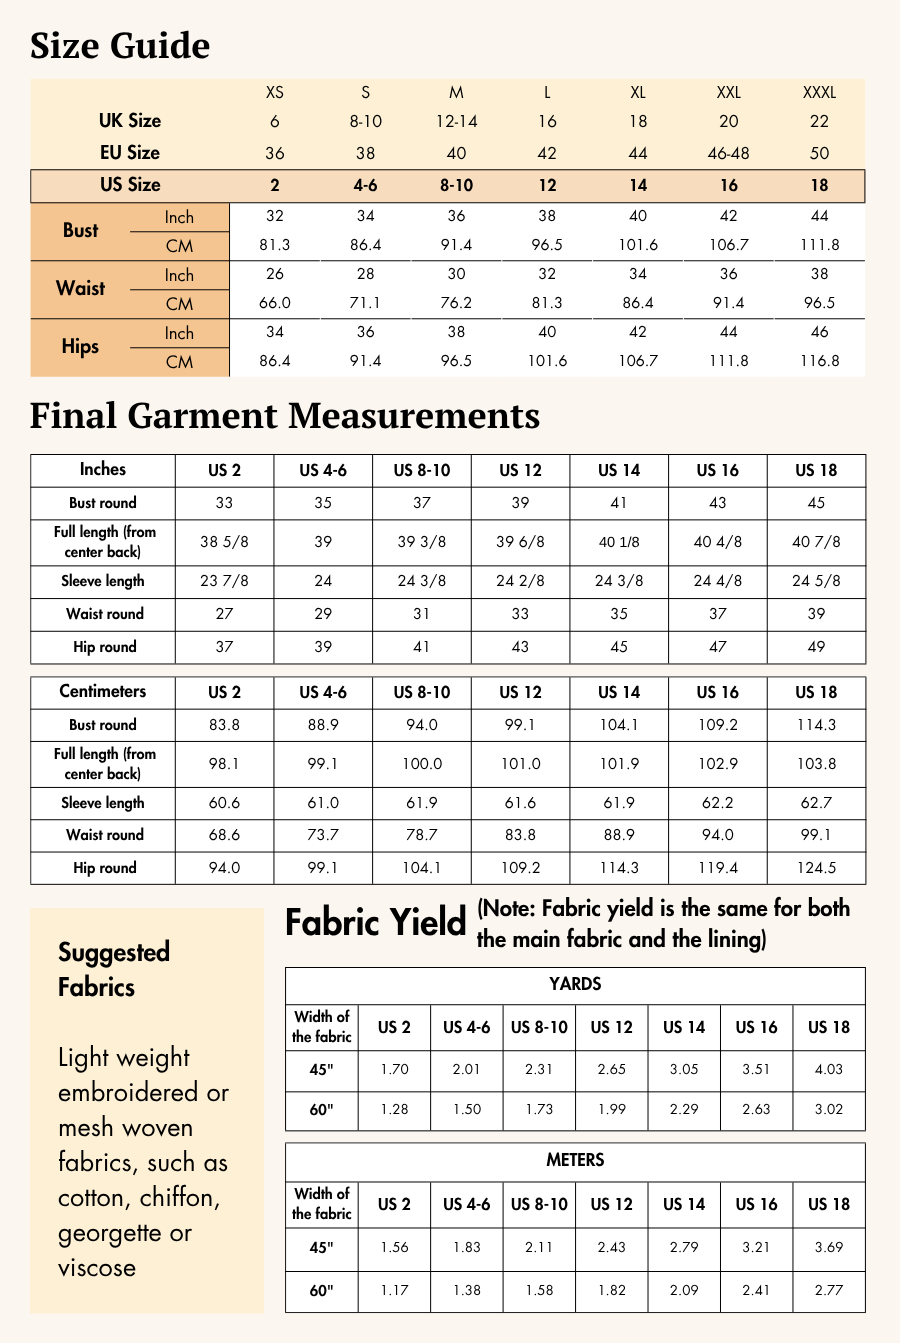
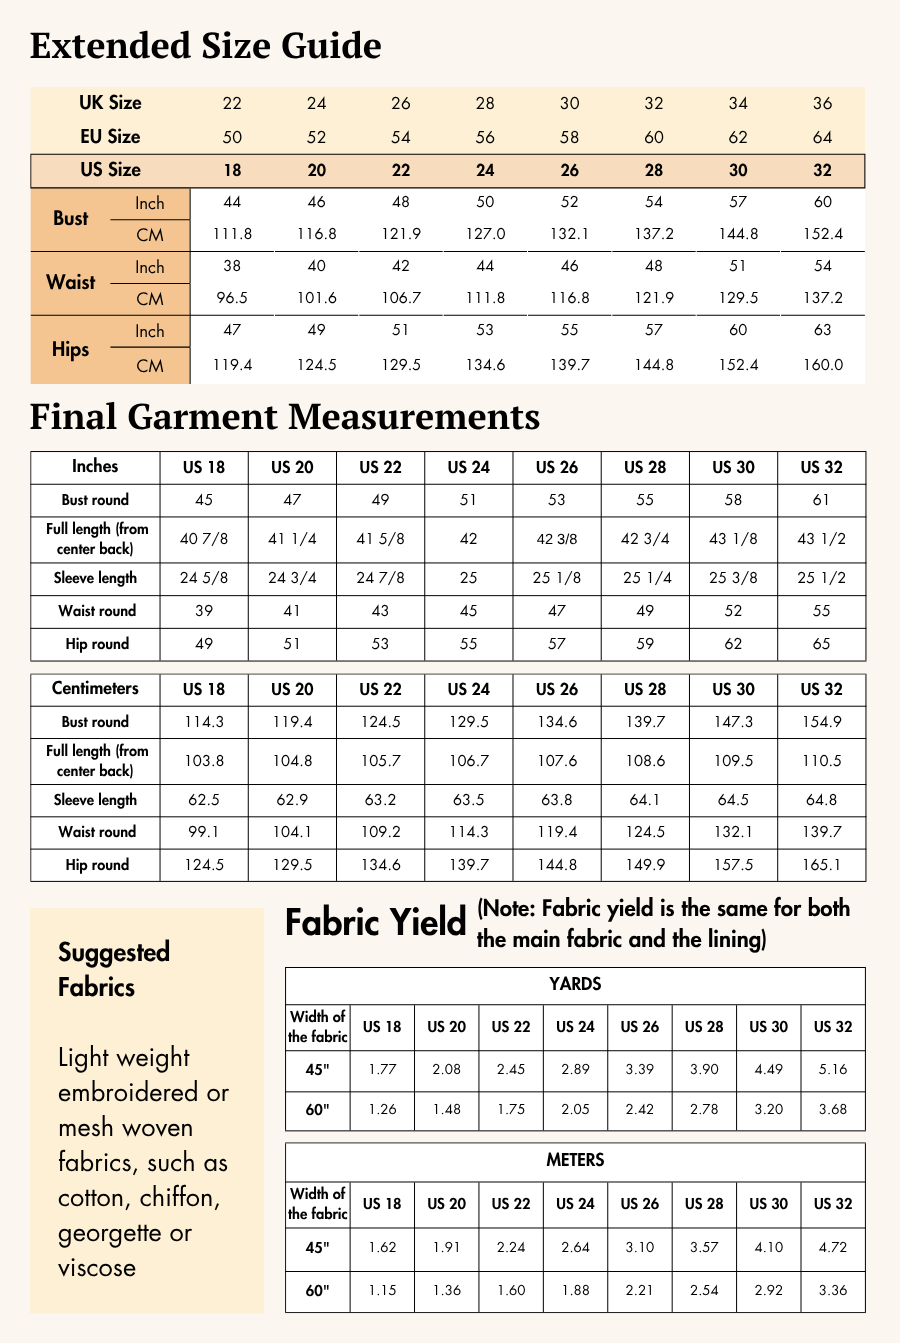
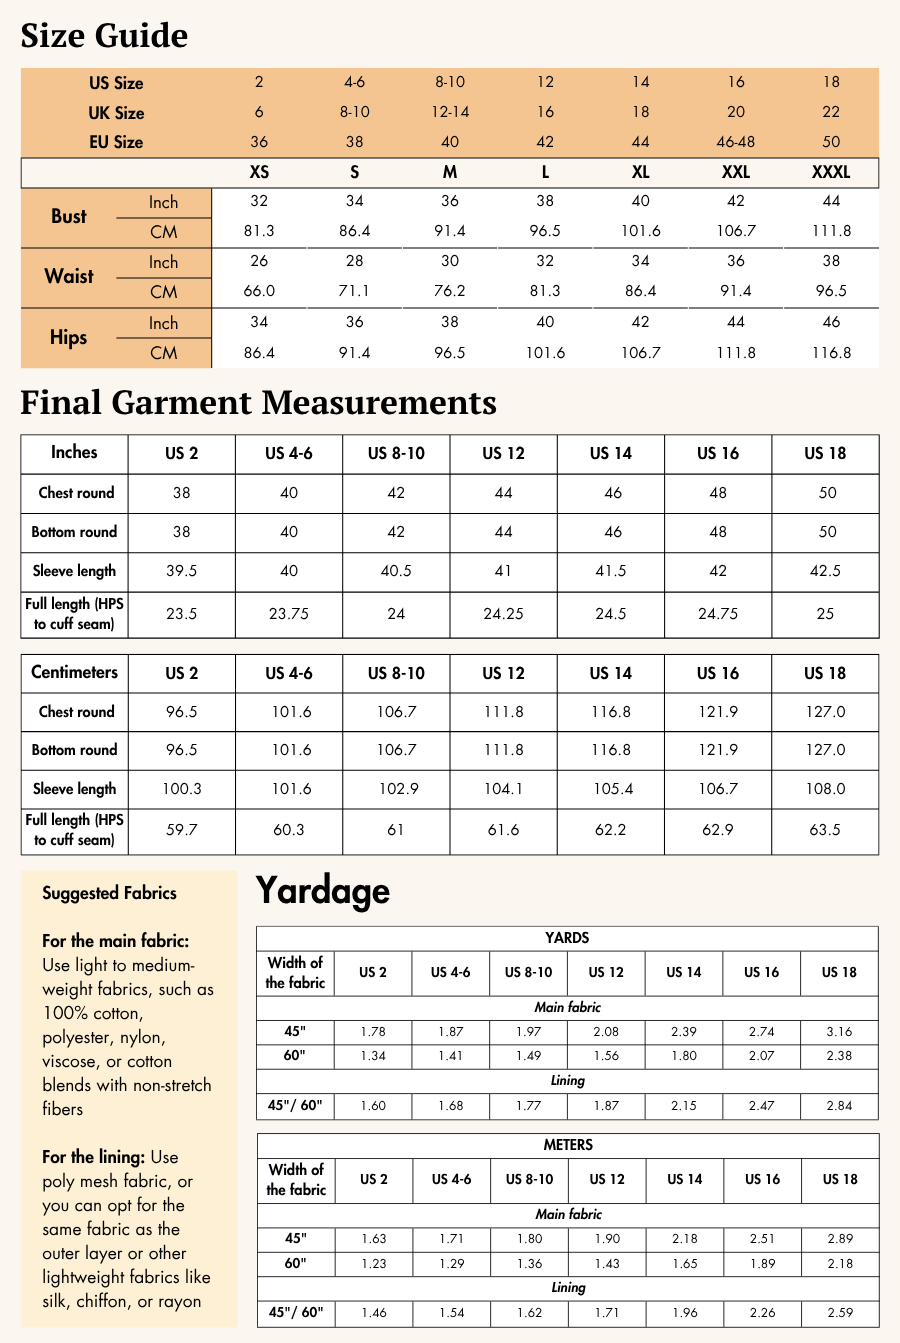
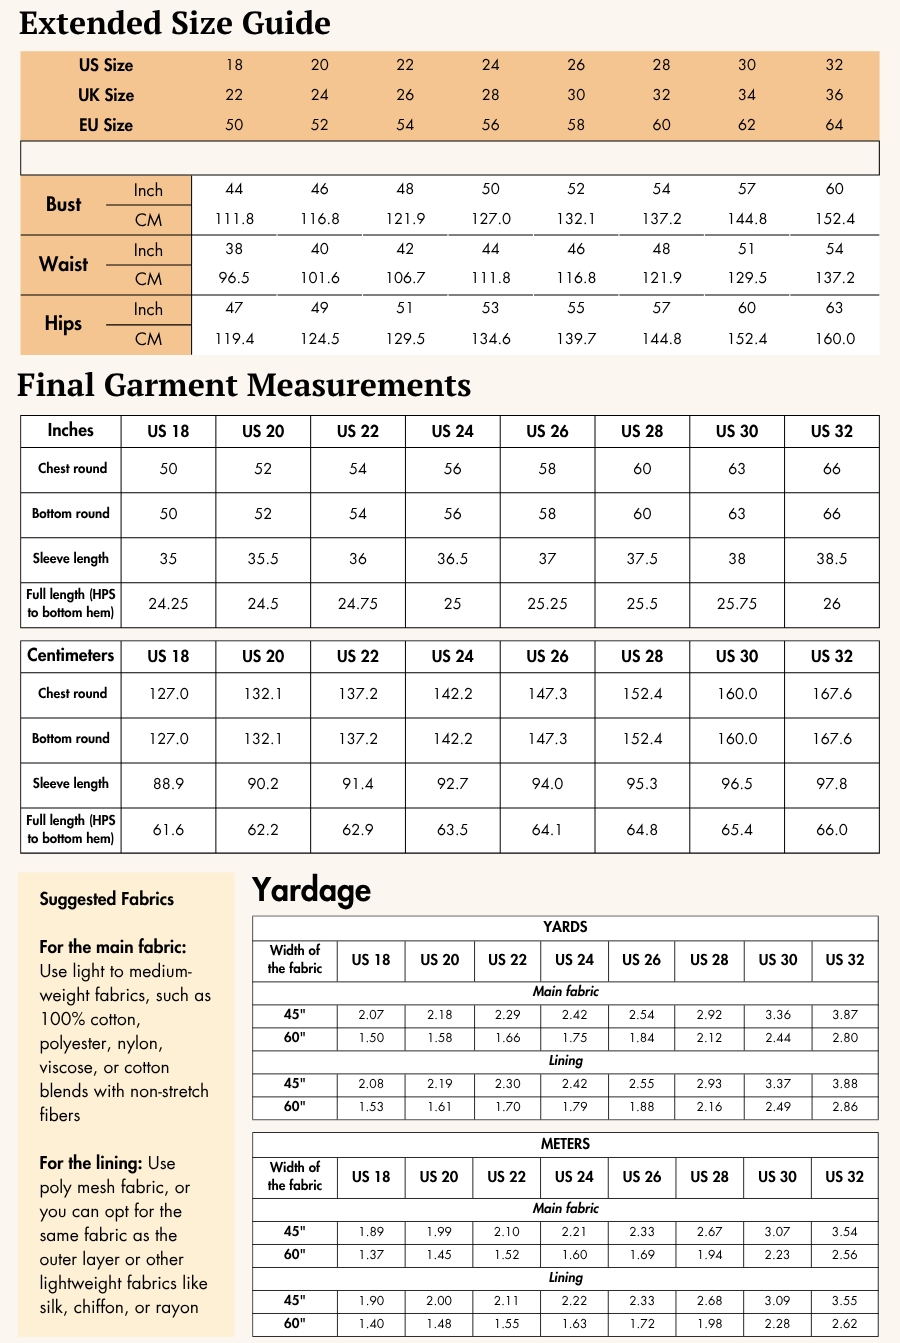
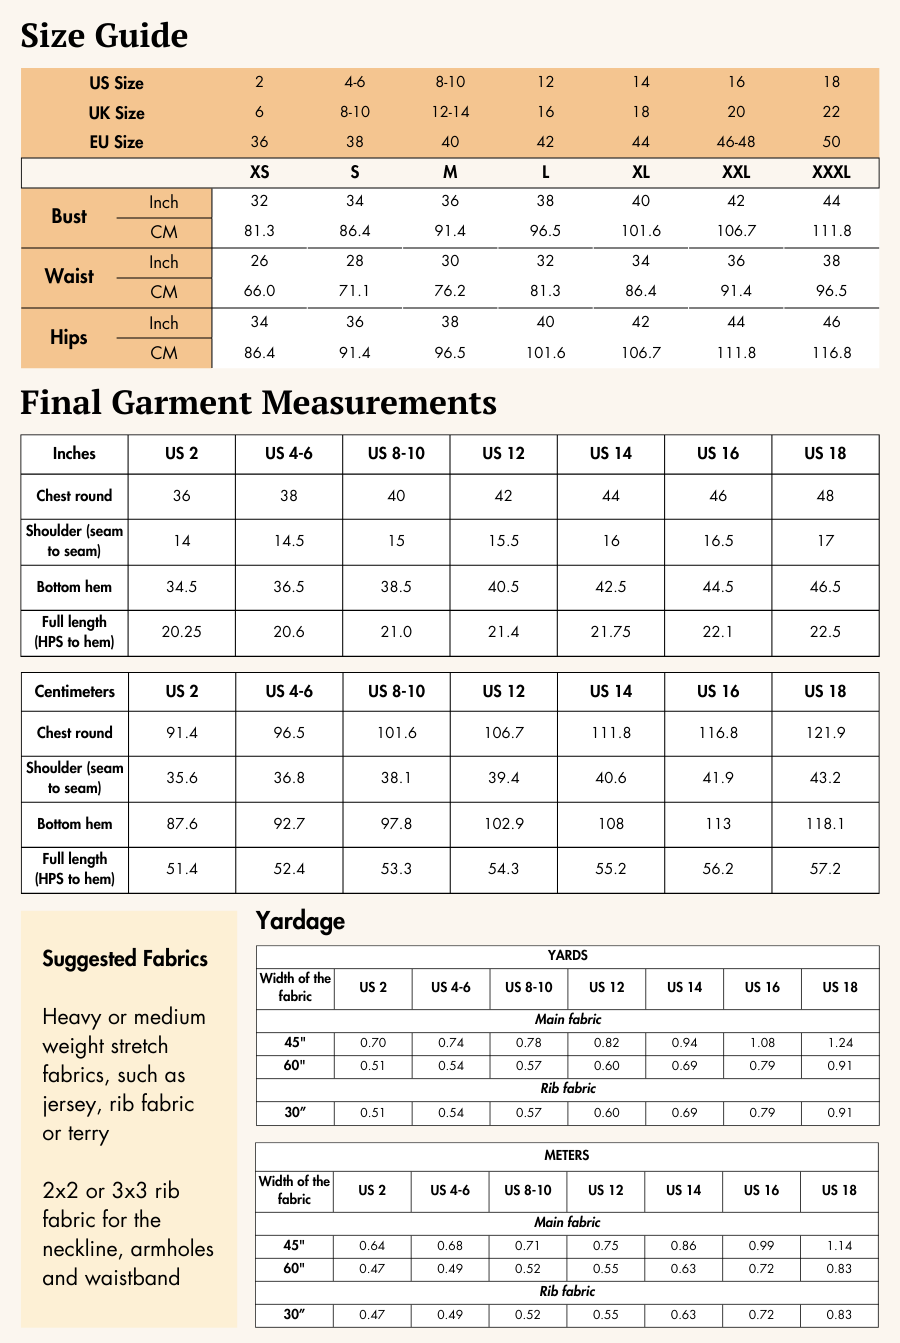
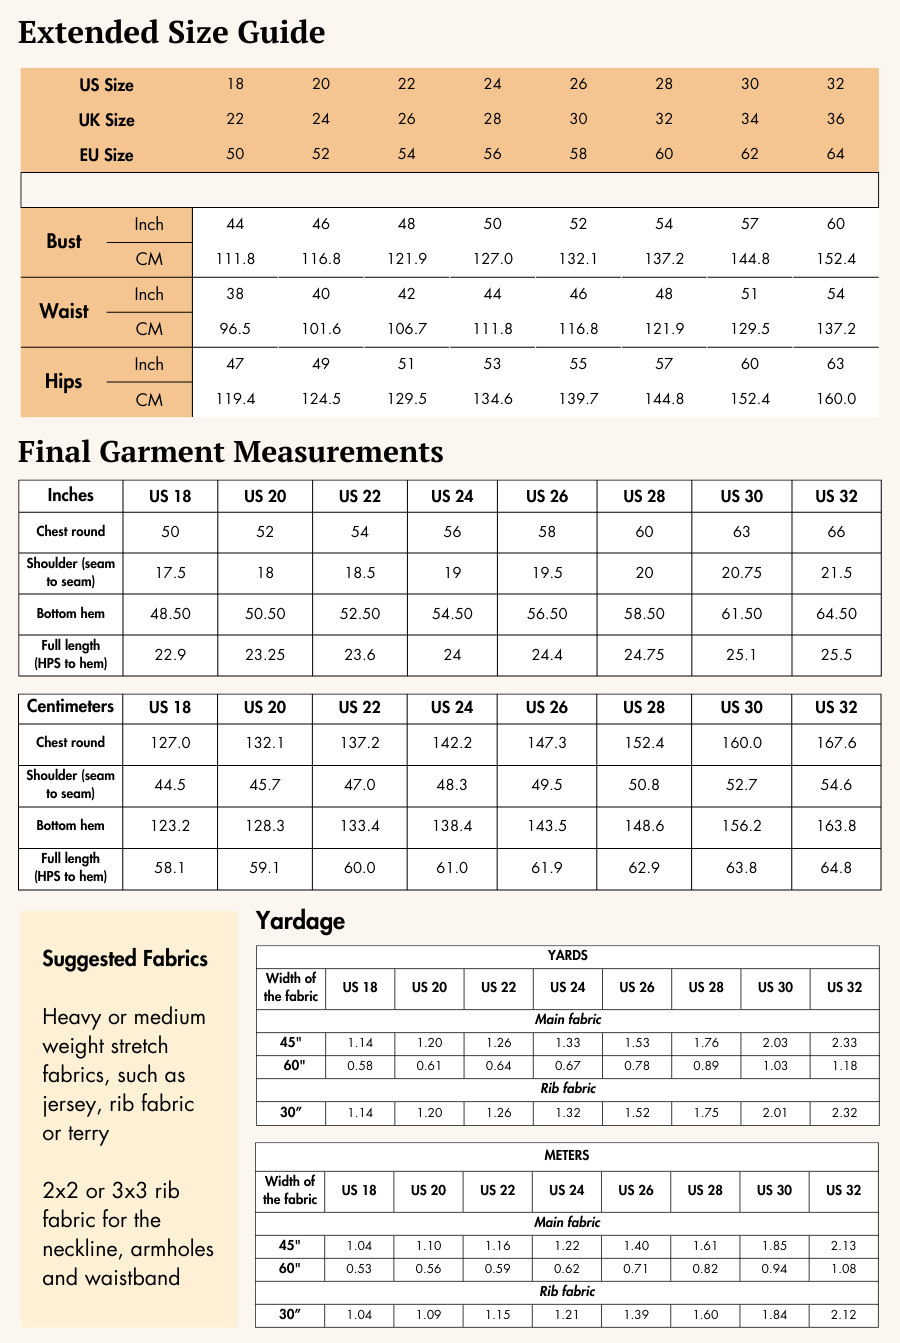
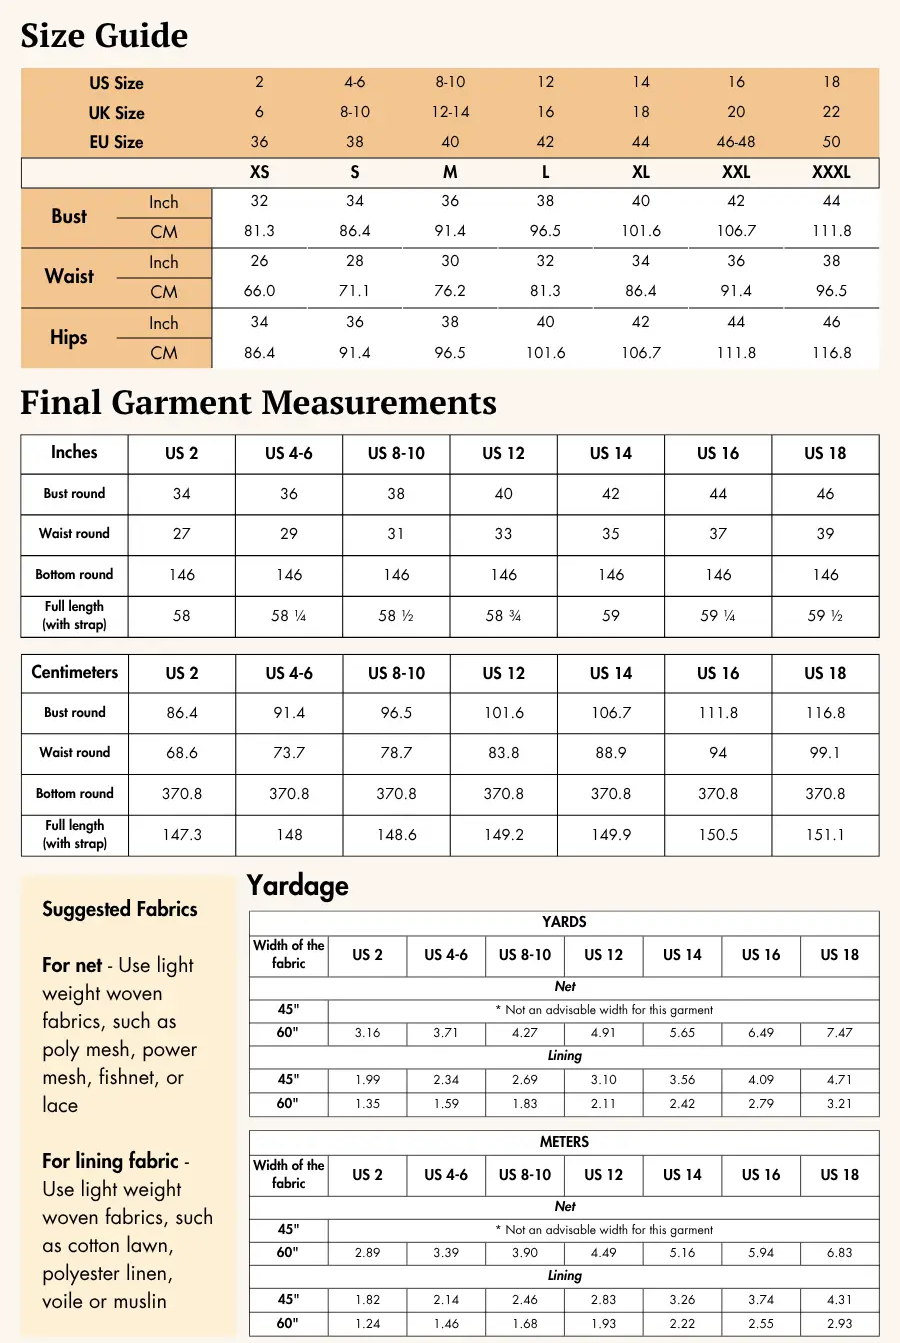
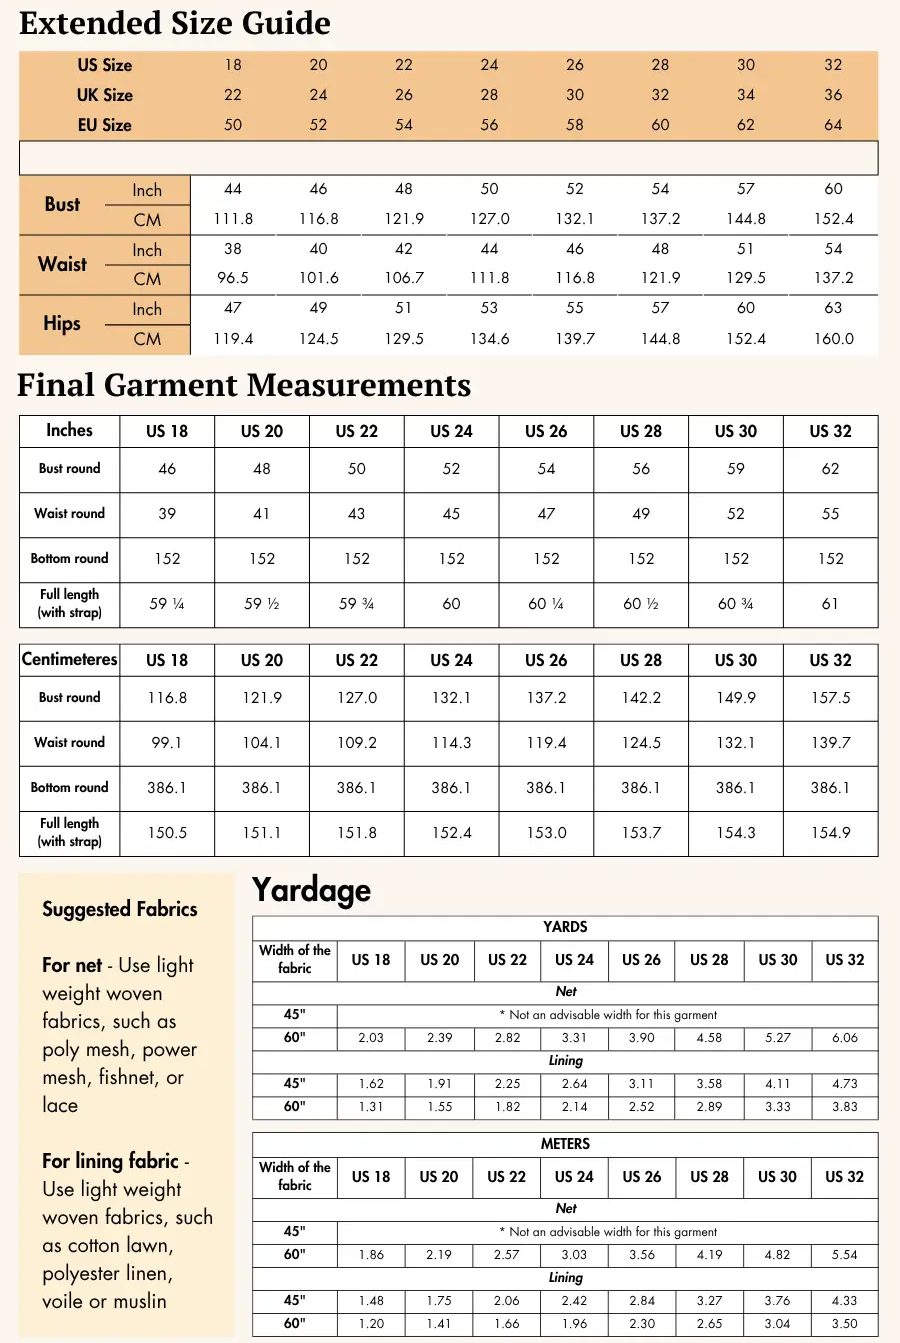
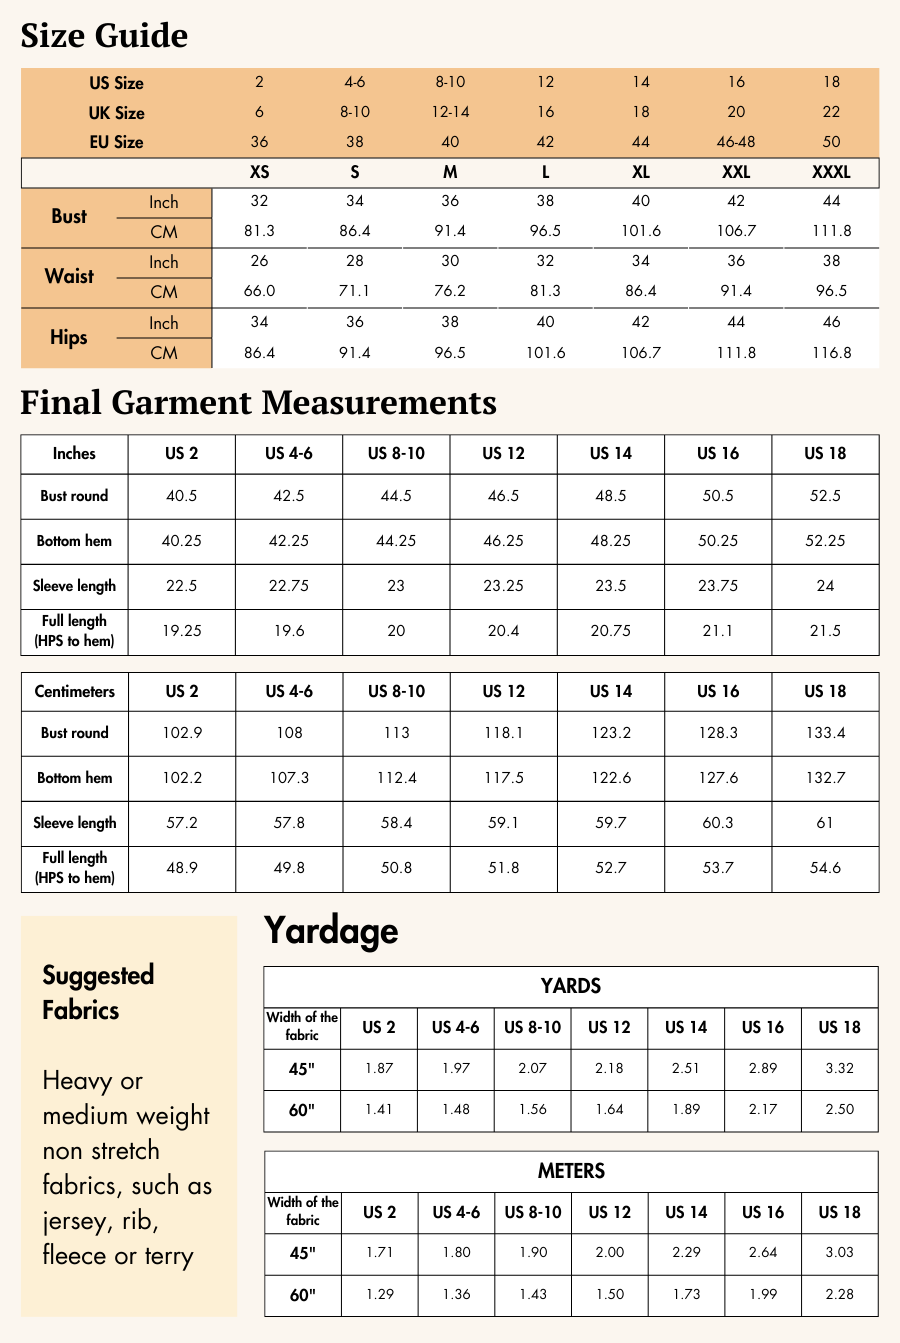
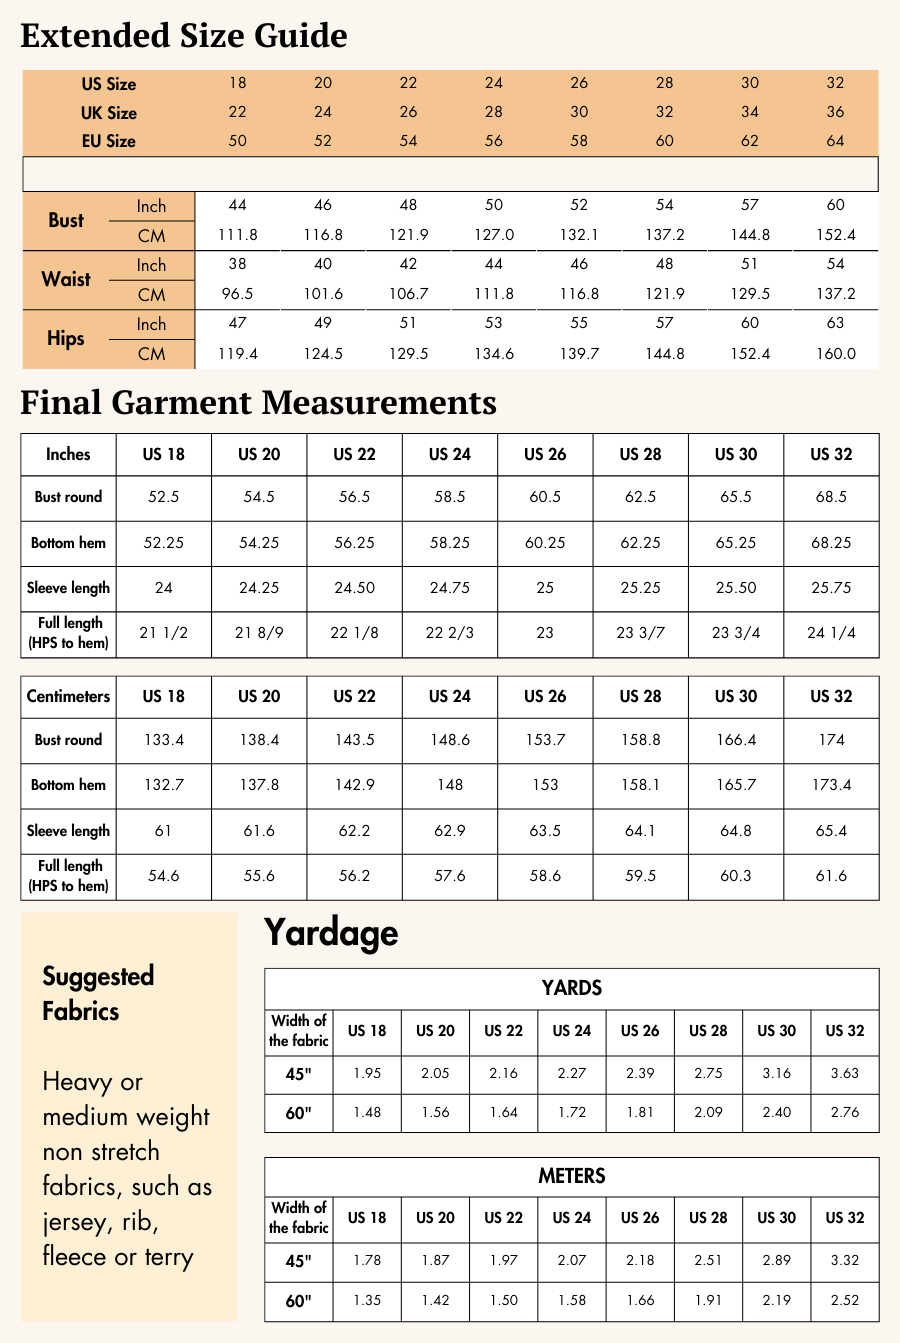
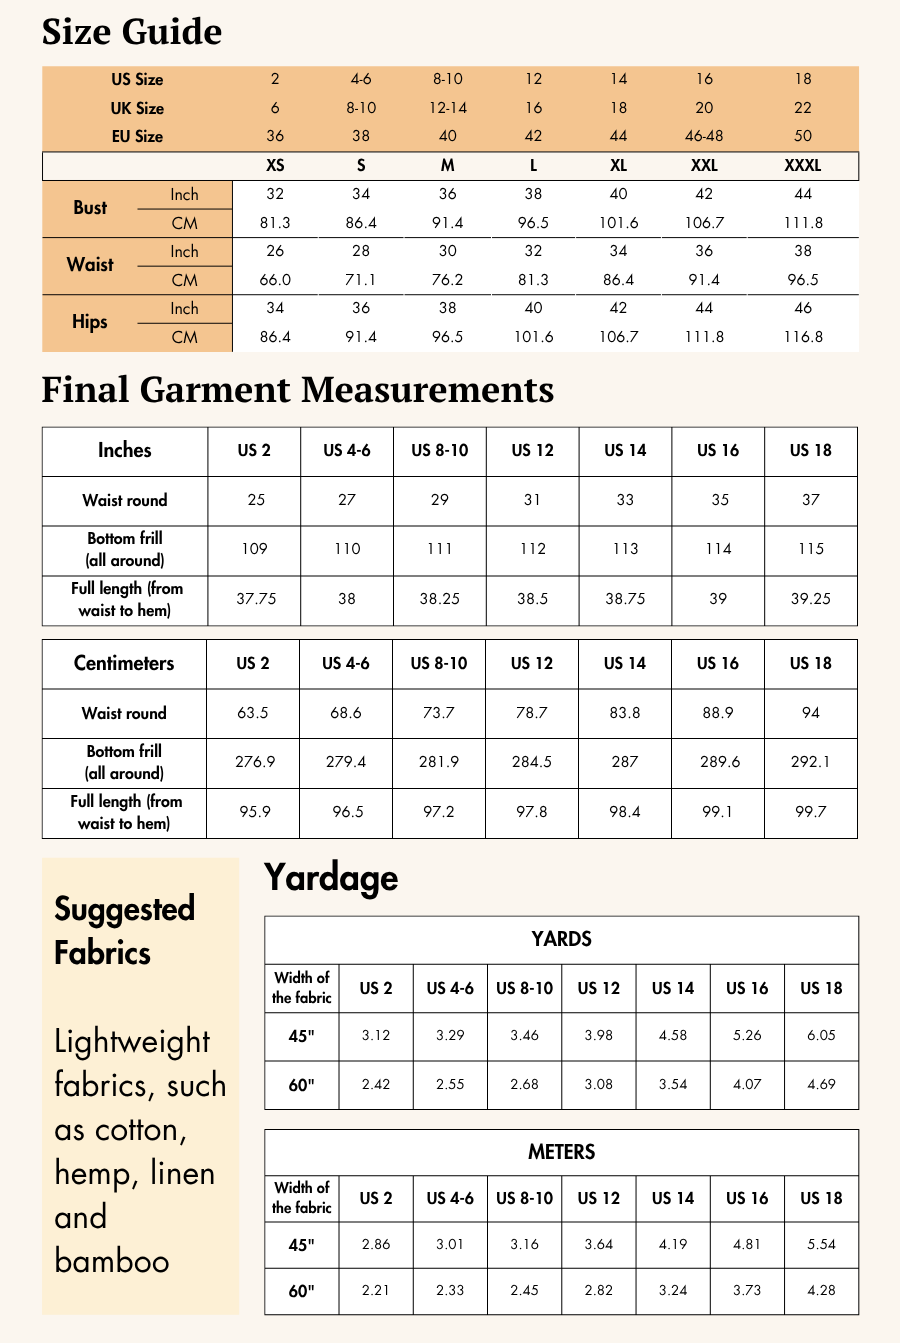
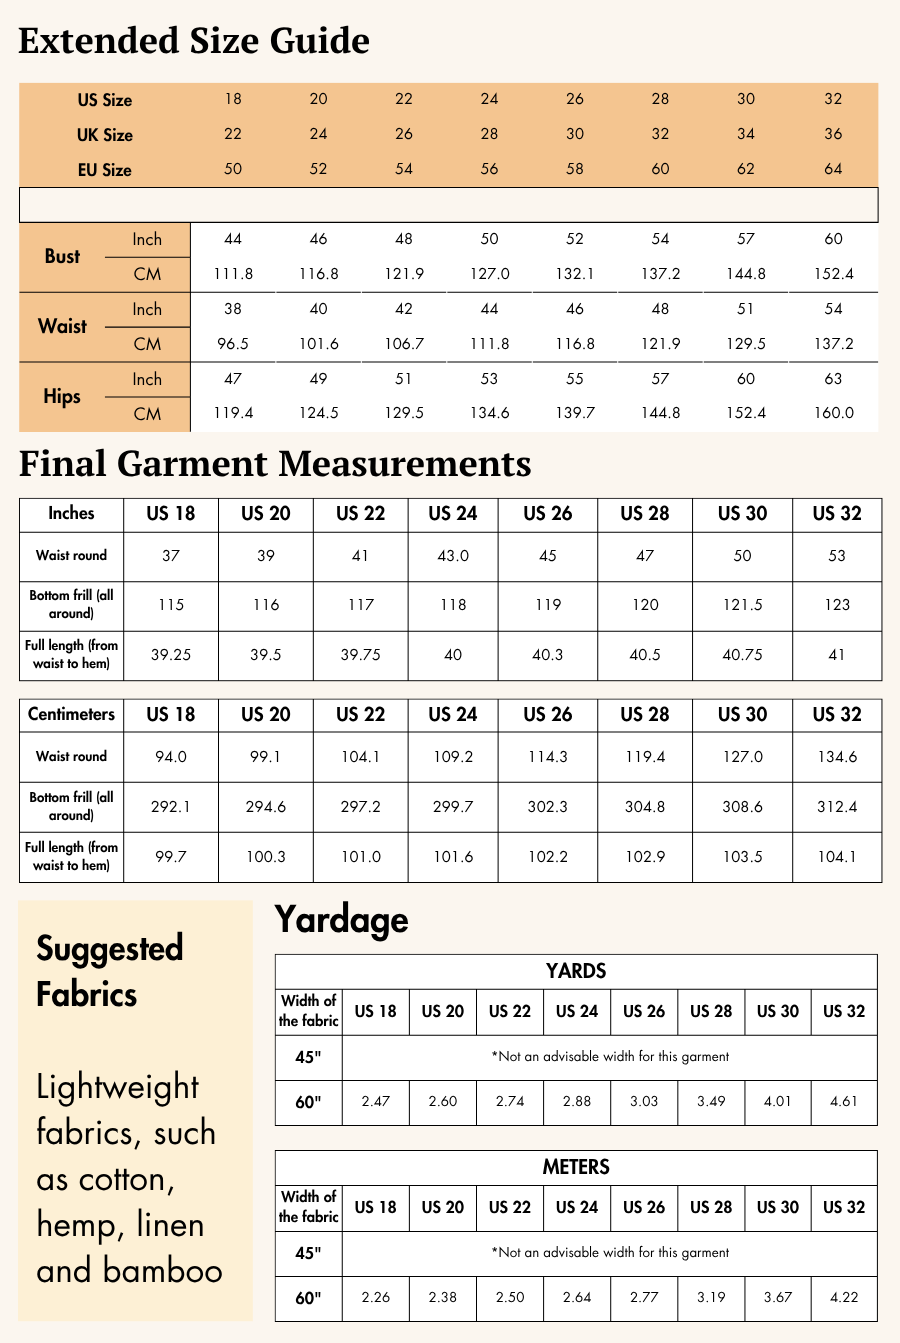
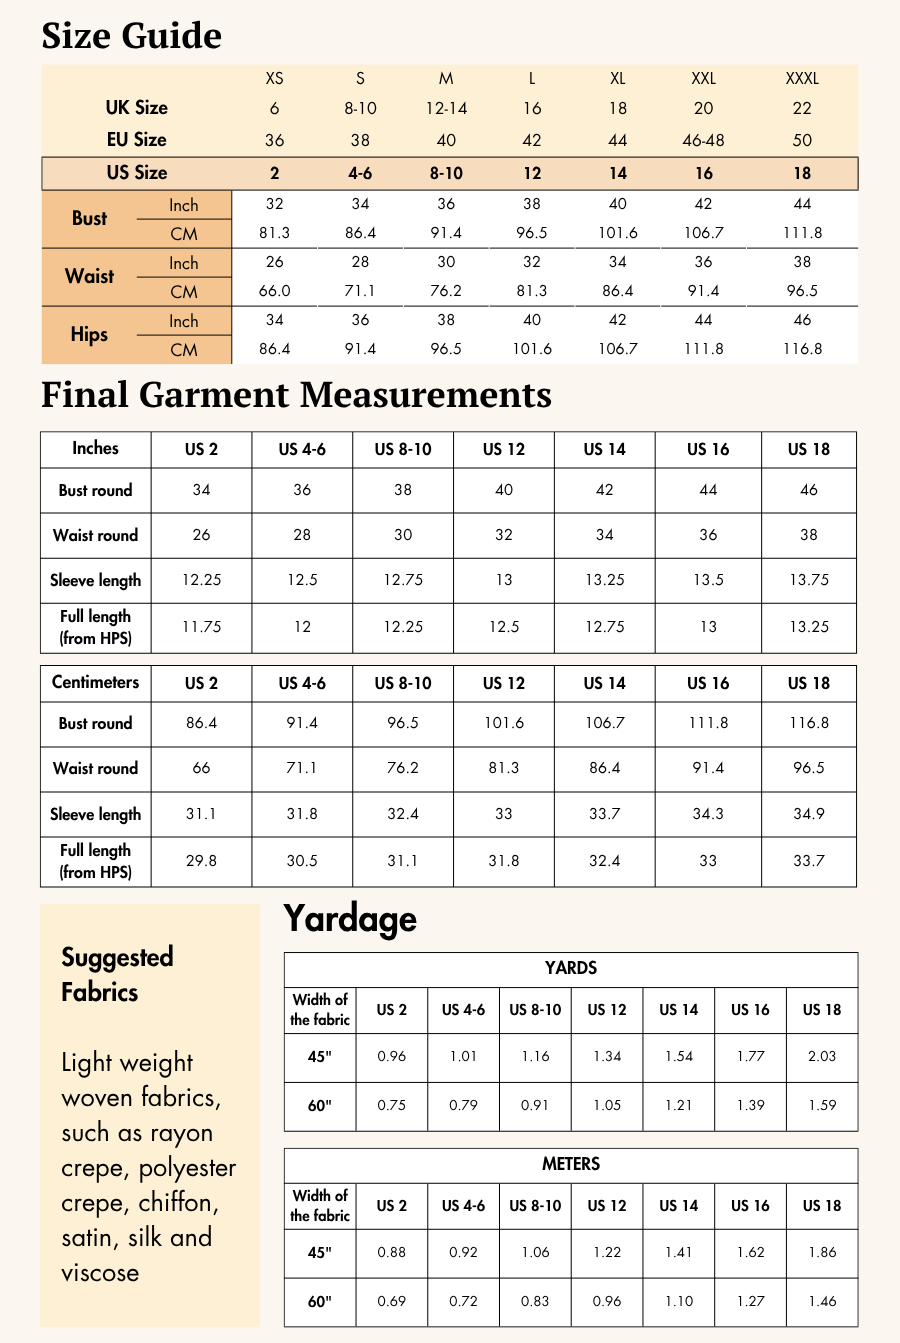
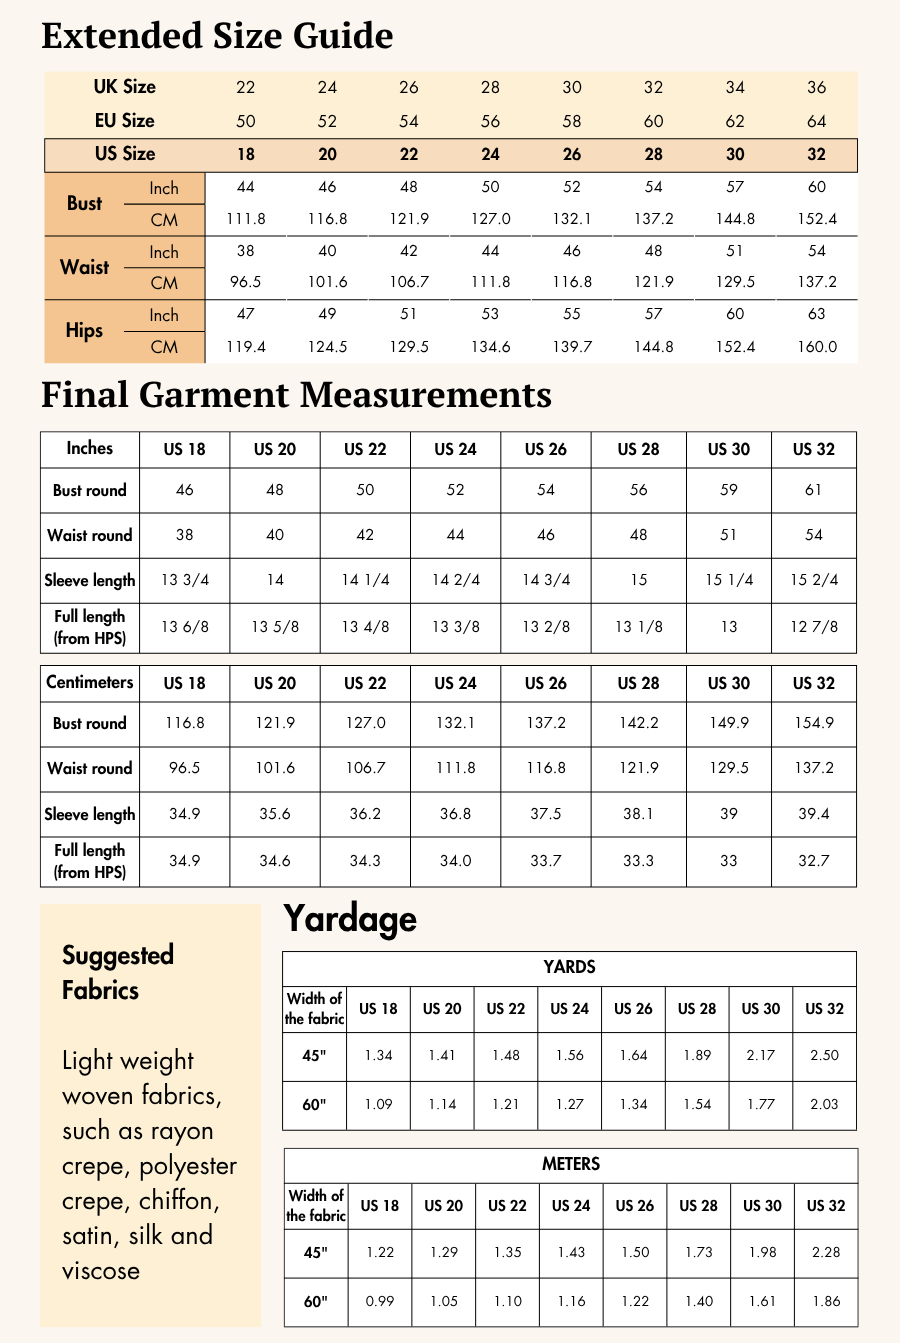
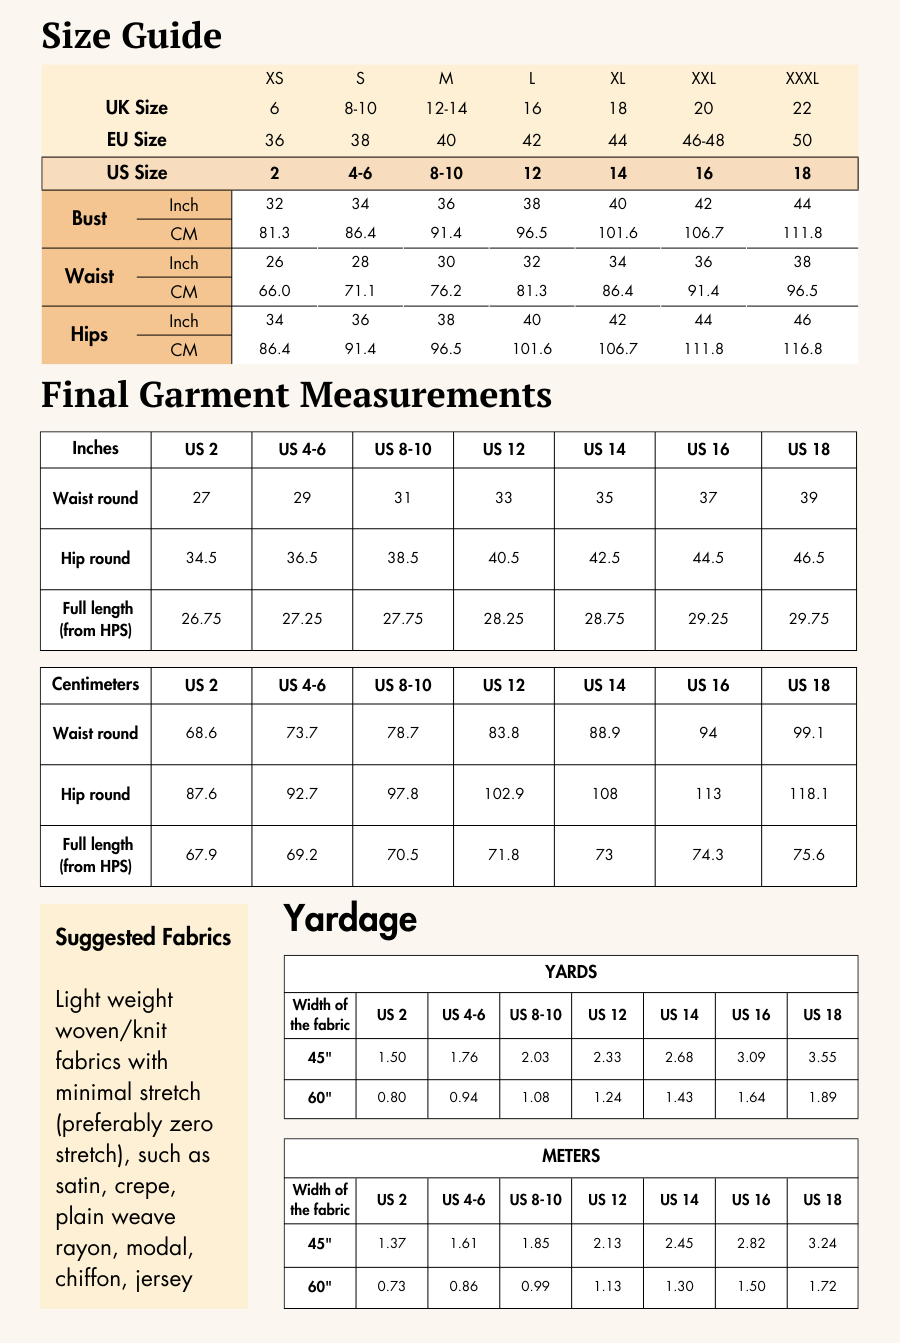
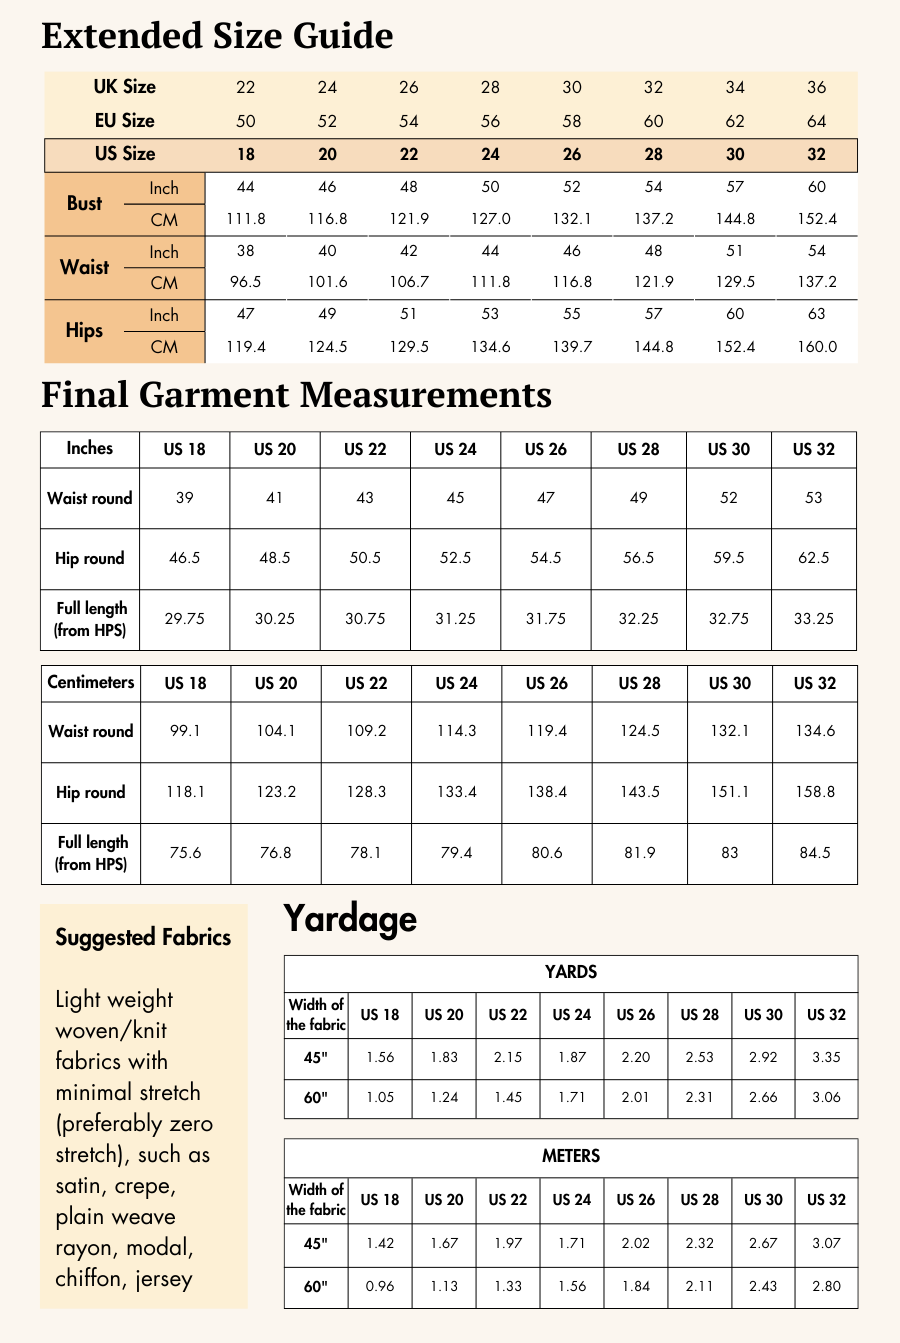
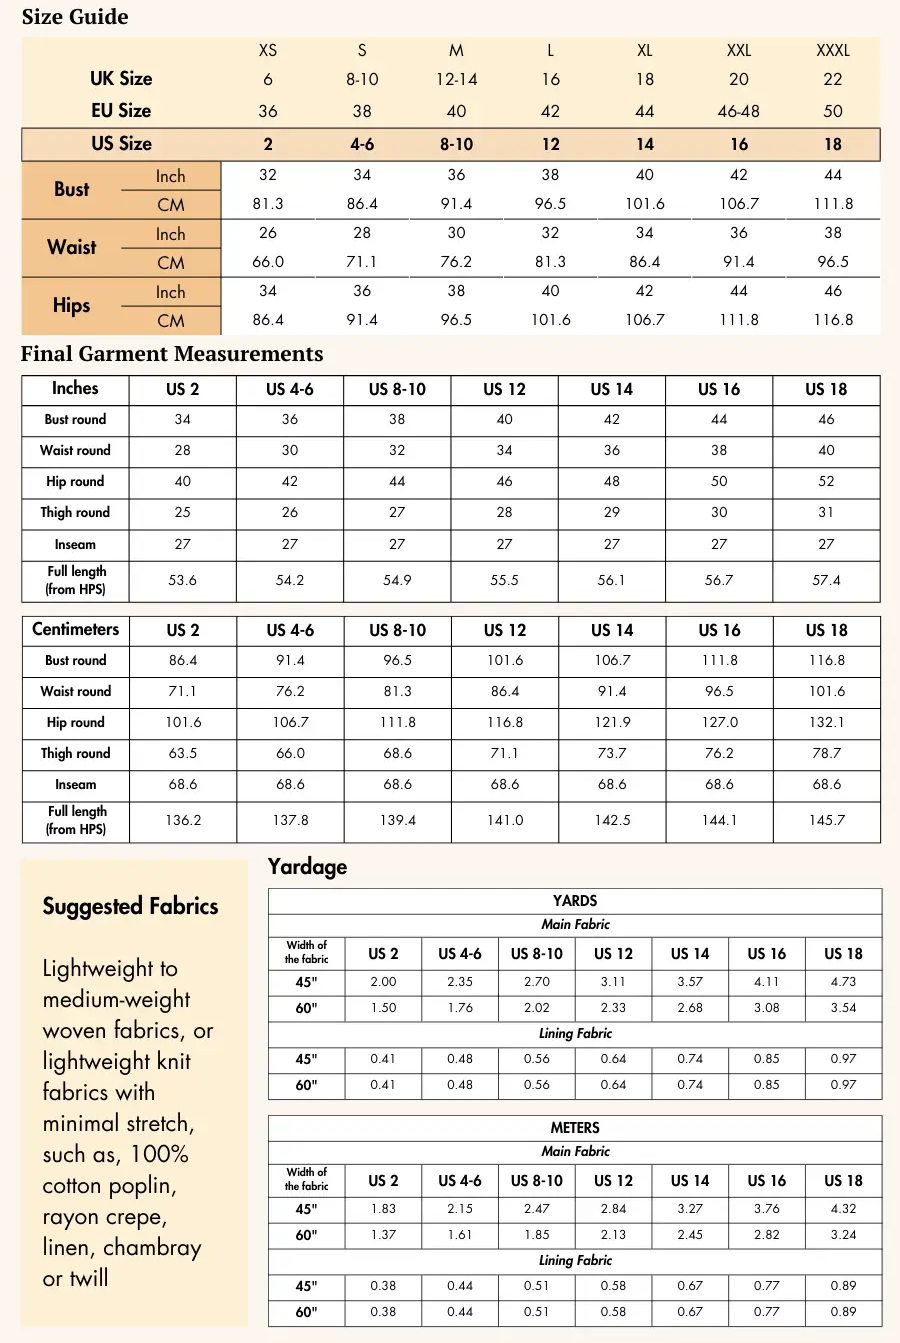
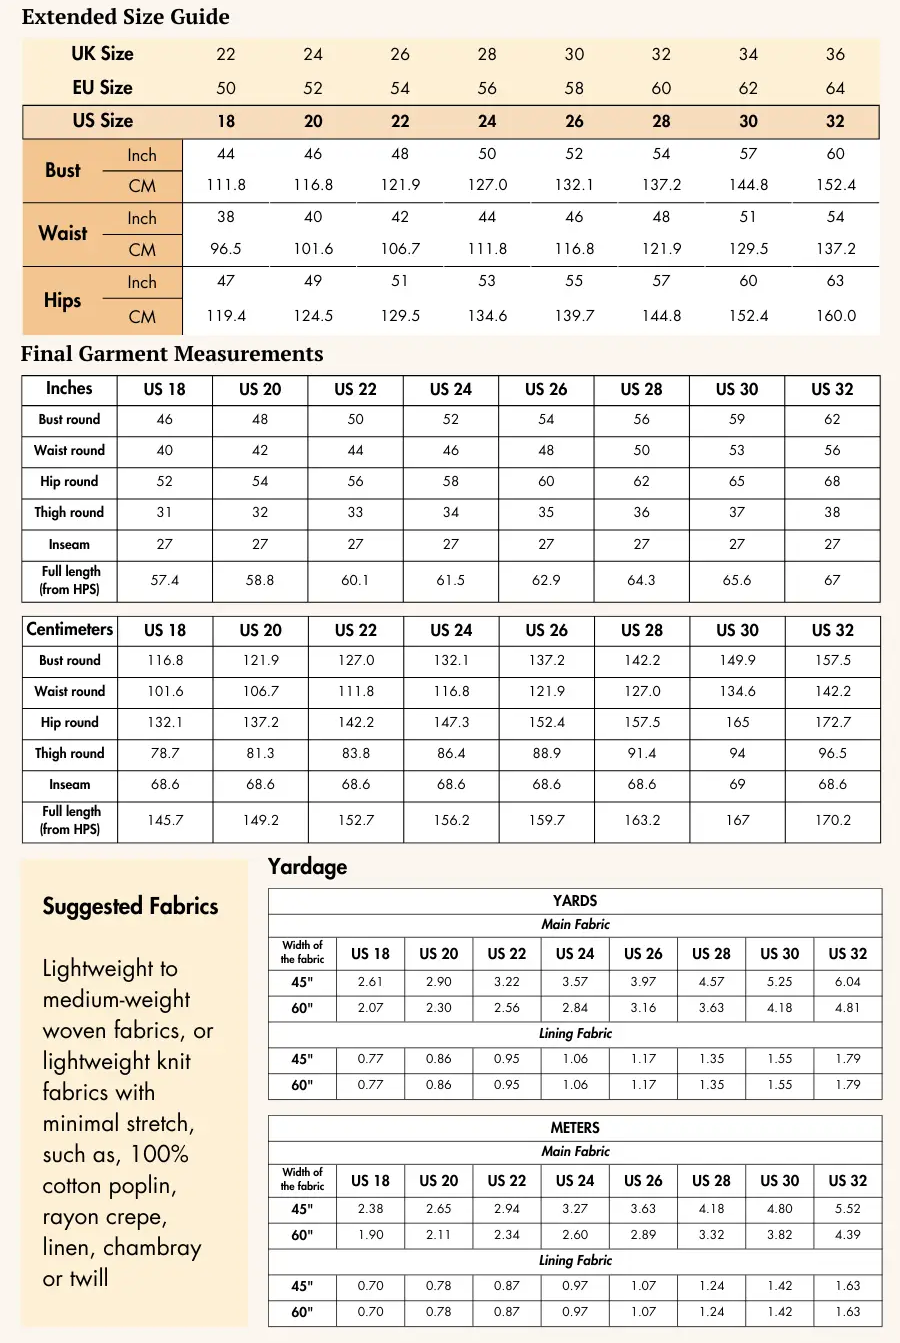
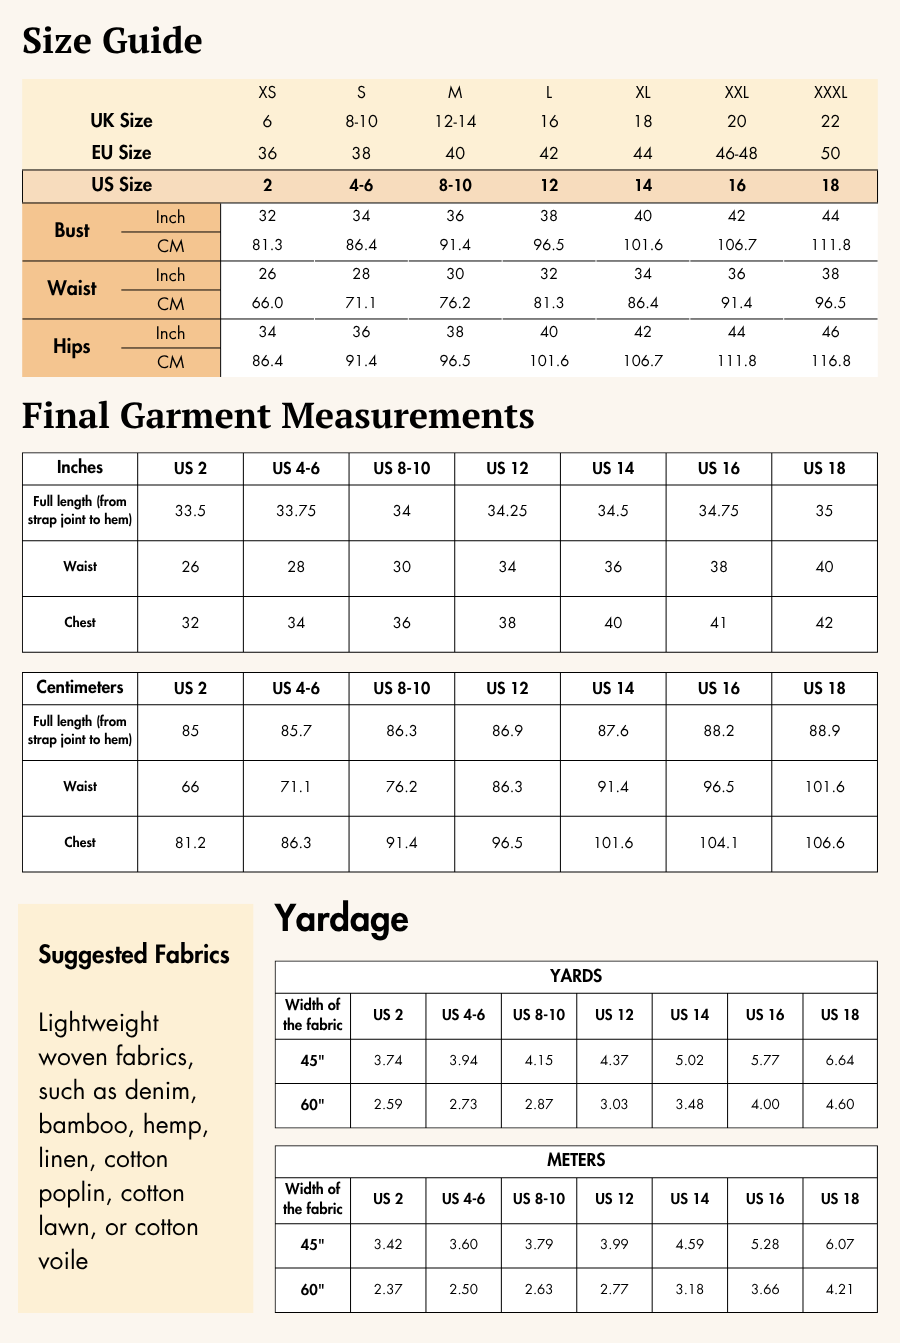
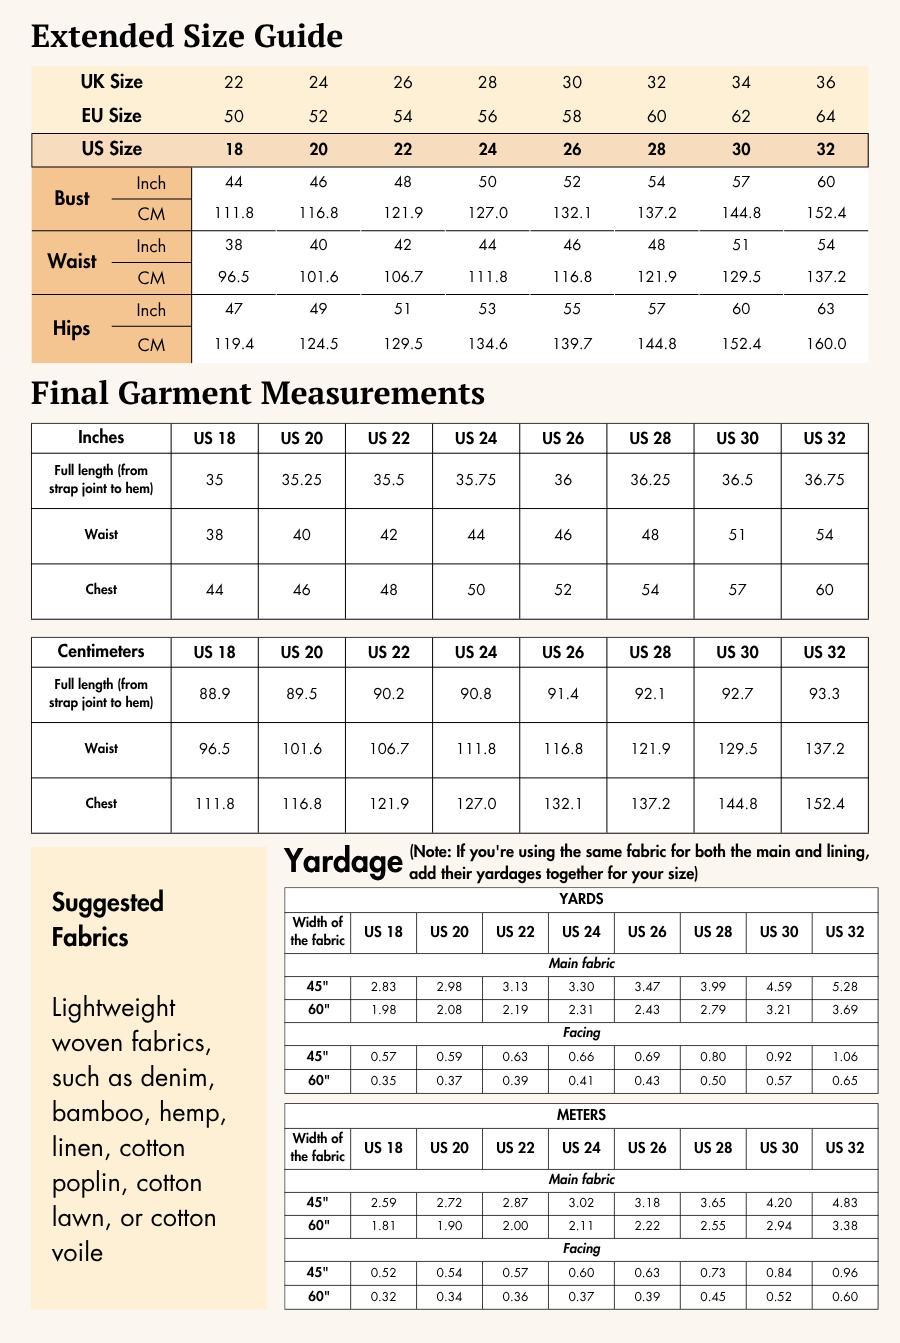
The Rhea hoodie pattern is available for sizes US 02 - US 32 | UK 06 - UK 36 | EU 36 - EU 64. Check the Rhea Hoodie Size Chart and measure yourself to select the correct size (see the garment and body measurement tables).
Verify how much fabric you need by referencing the fabric yield table.
Step 3: Printing Your Digital Sewing Pattern
Before cutting your fabric, print your digital pattern at 100% scale on the correct paper size (usually A0 or A4/US Letter). Once printed, trim and tape the pages together following the pattern guide. Now your pattern is ready to use!
If you want to learn more about how to Print Digital Sewing Patterns, click here.
Step 4: Pattern Inventory: What Pieces to Prepare
For sewing the Rhea Hoodie, cut all of these pieces:
A. Front - cut x1 fabric
B. Back - cut x1 fabric
C. Sleeve - cut x2 fabric
D. Waistband - cut x2 fabric
E. Cuff - cut x2 fabric
F. Hoodie - cut x4 fabric
G. Pocket - cut x1 fabric

Step 5: Pattern Marking


-
Lay out all pattern pieces as shown in the guide’s cutting diagram. Line up grainline arrows perfectly with the fabric selvage.
-
Transfer all markings: Notches, fold lines, center marks, pocket placement, circles, and any darts to the wrong side of the fabric using chalk, fabric pen, or tailor’s tacks.
-
Cut notches in each spot—these ensure perfect alignment during construction.
-
Mark the center front on all pieces cut on the fold to help with precise assembly.
Step 6: Cutting Layout
-
Reference the correct layout diagram in the Rhea Sewing Guide for your chosen size and fabric width (45” or 60”).

-
Directional prints or naps require extra fabric so you can place each piece in the correct direction.
-
Pin or use pattern weights to keep pieces from shifting while cutting.
-
Cut all pieces with precision and transfer any additional pattern markings needed.
Step 7: Fabric Cutting and Preparation
-
Cut out all pieces using fabric shears or a rotary cutter for best accuracy.
-
Cut all notches as marked on the pattern edges.
-
Verify that you have the full set of pieces in both fabrics before moving on.
Seam allowance: Follow the seam allowances as indicated on the pattern file layers. These are provided specifically for each piece to ensure accurate construction. This pattern uses a 1 cm (0.4 inch) seam allowance all around but 2 cm (3/4”) at the pocket opening for the pocket piece.
Step 8: Sewing Instructions

1. For preparing and attaching the pocket:
1a. Fold both the pocket opening seam allowance to wrong side. Iron it.
1b. Use a flat lock stitch, sew along the edge of the seam allowance such that two stitch lines would appear on right side.
1c. Fold the pocket top seamline and sides of the pocket to wrong side. Iron it.

1d. Place the prepared pocket on the front pocket marking. Pin them together. Sew along the pocket top edge, pocket sides and hemline with a lock stitch.

2. Place the front and back pieces with the right sides facing each other. Align the shoulder seams and overlock them together to achieve figure 2a. Repeat the same process for attaching the other side shoulder seams (fig. 2).

3. For attaching the sleeve:
3a. Spread open the prepared sweatshirt and press the shoulder seam. Align the center armhole notch of the sleeve with the shoulder seam, ensuring the right sides are facing each other. Ensure the back armhole denoted by the notch is aligned with the back piece armhole.

3b. Pin the armhole of the sleeve to the armhole of the prepared sweatshirt. Overlock the armhole seam.

3c. Repeat the same process for attaching the other sleeve to the opposite side of the prepared sweatshirt.

4. For preparing and attaching hoodie:
4a. Place 2 mirror imaged hood pieces facing right sides together.
4b. Align the hoodie curve and pin them together. Overlock the hoodie curve. Repeat the same process for other two hoodie pieces.
4c. Insert one pair of hoodie pieces inside the other such that the right sides are facing each other.
4d. Align the hoodie lining seamline together. Pin them. Sew with a lock stitch along the hoodie lining seamline.

4e. Turn the hoodie right side out.
4f. Sew along the hoodie opening seamline using a lockstitch.

4g. Place the prepared hoodie onto the sweatshirt neckline with right sides together. Align and match the neckline notches to the shoulder seams, and pin them in place. Overlap the neckline ends, positioning the left end underneath the right. Use an overlock stitch to sew
the neckline together.

5. Align both side seams of the prepared sweatshirt with the right sides facing each other. Overlock from the sleeve hem down to the bottom hem.

6. For preparing the waistband:
6a. Place the waistband pieces with right sides together.
6b. Align the side edges of the waistband and overlock them together.
6c. Fold the waistband in half lengthwise, with the right side facing out.

7. For preparing the cuffs:
7a. Fold the cuff in half at the center notch, with right sides together.
7b. Overlock the side edge to close the cuff.
7c. Fold the cuff in half, with the right side facing out.

8. For attaching prepared waistband and cuffs:
Place the open edge of the waistband along the right side of the hemline of the prepared sweatshirt. Align and match the center notch of the waistband with the center of the front and back hemline and align the side seams with the sides of the waistband. Pin evenly around the hemline. Overlock them together.
Similarly, place the prepared cuff over the right side of the sleeve hem. Align the cuff’s side seam with the sleeve’s side seam. Overlock them together. Repeat the same process for the other prepared cuff and the other sleeve.

9. Optional Stitching:
Sew along the edge of the waistband and sleeve cuffs for a clean finish. This is known as an understitch.

Winslet’s Sewing Guide for Rhea Hoodie includes clear diagrams that walk you through each step, making it easy to follow and complete your project with confidence.
For an overview of Winslet’s Sewing Guides, click here.
Why We Recommend the Rhea Hoodie Pattern
Whether you're making your first hoodie or your tenth, the Rhea pattern delivers on style, ease, and comfort.
✅ Designed for fleece, terry, and sweatshirt knits
✅ Clear instructions and visuals
✅ Functional pocket and drawstring hood
✅ Includes waistband and cuffs for a ready-to-wear finish
✅ Printable in all standard formats
👉 Download the Rhea Hoodie Pattern here and start sewing your new favorite layer.
Show Off Your Make!
Show your creation on Instagram or Facebook with #MadeWithWinslets for a chance to be featured! For any questions or issues, email the Winslet’s support team at support@winslets.com.

 Get the pattern

