Wondered how to sew a casual square neck top?
In this post, I’ll show you how to sew a chic square neck crop top. You can pair this crop top with your favorite high-waisted skirts or shorts or just jeans! This is an easy project so let's dive in.
What sewing supplies do you need to sew a square neck crop top?
Before diving into the creative process of sewing your broad neck crop top, it’s essential to gather all the necessary supplies and notions to ensure a smooth and enjoyable sewing experience. Here’s a comprehensive list to guide you as you prepare to embark on this DIY journey:
Sewing Pattern: Sewing pattern for the top. I used the BLAZE Square Neck Crop Top Pattern. With easy-to-follow instructions, you’ll be able to complete the entire sewing process efficiently.

In addition to the pattern, don't forget your sewing machine, tape measure, chalks, pins, shears, iron, needles, thread, and thread cutter.
Fabric Recommendation
Let’s talk about fabrics for this super easy crop top. Go for light-weight knit fabrics like rayon, rib, jersey, unbrushed fleece, and comfy elastane-blend cotton. These fabric choices not only make the sewing process easier but also result in a soft and comfortable crop top that you’ll adore wearing.
If you’re new to stitching knit materials, try not to get too nervous! With all the necessary instructions provided below, this project is ideal for novices.
The captivating photograph above showcases a model in a viscose elastane fabric crop top made with the BLAZE Square Neck Crop Top Pattern. The fabric is celebrated for its beautiful drape, comfort, breathability, and easy care, making it a stylish and practical wardrobe choice.
Size Charts
Choose the size (XS, S, M, L, XL, 2XL, or 3XL) that most closely matches your body measurements using the size charts below.
For the breast and hips, measure at the largest region of the body; for the waist, measure at the narrowest part of the body, which is just above the belly button.
It is important to note that you might wish to order a size higher if the table below does not contain your exact measurements.
Both inches and centimeters are used to measure the sizes in the table below.
Body Measurements
| XS (inches) | XS (cm) | S (inches) | S (cm) | M (inches) | M (cm) | L (inches) | L (cm) | XL (inches) | XL (cm) | 2XL (inches) | 2XL (cm) | 3XL (inches) | 3XL (cm) | |
| Bust | 32 | 81.3 | 34 | 86.4 | 36 | 91.4 | 38 | 96.5 | 40 | 101.6 | 42 | 106.7 | 44 | 111.8 |
| Waist | 26 | 66.0 | 28 | 71.1 | 30 | 76.2 | 32 | 81.3 | 34 | 86.4 | 36 | 91.4 | 38 | 96.5 |
Final Garment Measurements
| XS (inches) | XS (cm) | S (inches) | S (cm) | M (inches) | M (cm) | L (inches) | L (cm) | XL (inches) | XL (cm) | 2XL (inches) | 2XL (cm) | 3XL (inches) | 3XL (cm) | |
| Chest | 14.78 | 37.54 | 15.78 | 40.08 | 16.78 | 42.62 | 17.78 | 45.16 | 18.80 | 47.75 | 19.77 | 50.22 | 20.80 | 52.83 |
| Full Length | 14.76 | 37.49 | 15.02 | 38.15 | 15.21 | 38.63 | 15.49 | 39.34 | 15.78 | 40.08 | 16.00 | 40.64 | 16.23 | 41.22 |
| Sleee Length | 23.32 | 59.23 | 24.28 | 61.67 | 24.60 | 62.48 | 25.07 | 63.68 | 25.39 | 64.49 | 25.78 | 65.48 | 26.12 | 66.34 |
Fabric Yield
| Width of the Fabric | XS (yards) | XS (meters) | S (yards) | S (meters) | M (yards) | M (meters) | L (yards) | L (meters) | XL (yards) | XL (meters) | 2XL (yards) | 2XL (meters) | 3XL (yards) | 3XL (meters) |
| 45” | 0.84 | 0.77 | 0.99 | 0.91 | 1.17 | 1.07 | 1.34 | 1.23 | 1.54 | 1.41 | 1.78 | 1.62 | 2.04 | 1.87 |
| 60” | 0.57 | 0.52 | 0.67 | 0.62 | 0.79 | 0.73 | 0.91 | 0.83 | 1.05 | 0.96 | 1.21 | 1.10 | 1.39 | 1.27 |
Understanding Your Patterns: Assembly and Marking of the Square Neck Crop Top Pattern
To make your fabulous broad neck crop top, getting accustomed with your pattern is key! Start by laying your fabric on a flat surface, checking for any directional patterns. Flip through your pattern instructions and stick to the layout guide like your sewing BFF.
Once your fabric is prepped and ready, it’s time to dive into the pattern-marking phase! Place those pattern pieces, line up the arrows with your fabric’s vibes, and secure with weights or pins – no slipping allowed! Remember, mark it up on the wrong side to keep the finished look flawless.
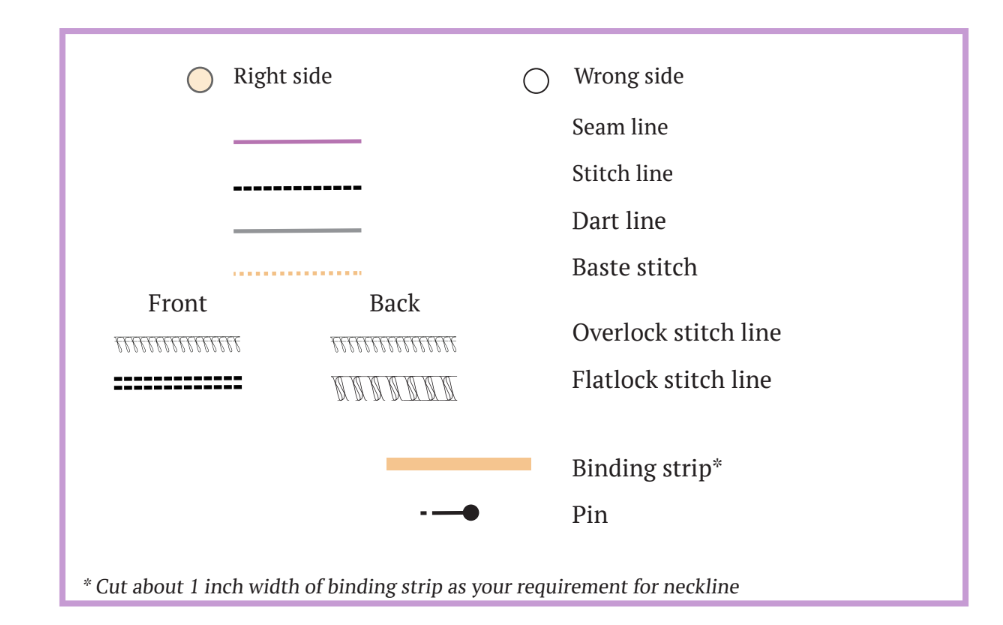
Now, let’s talk details! Notches, darts, and grainlines – these little guys are the superheroes of precise assembly. Grab your favorite marking tool like a chalk and give them a new home on the wrong side of your fabric.
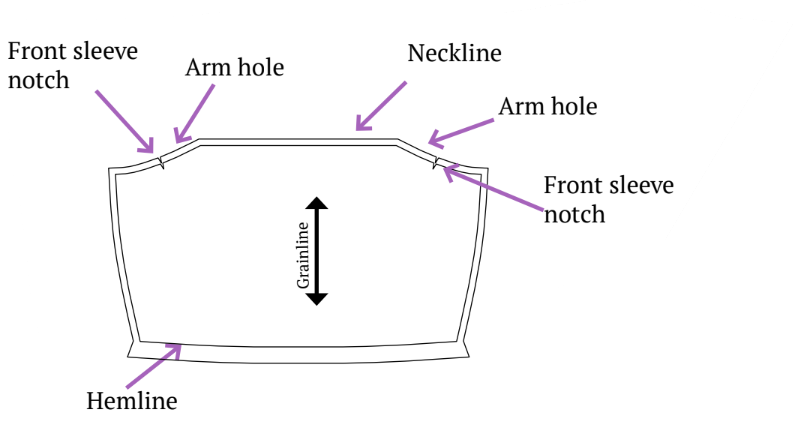
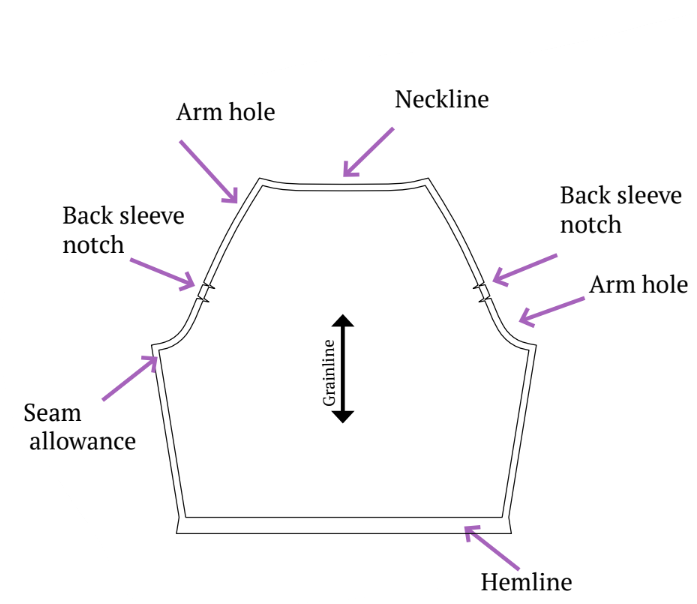
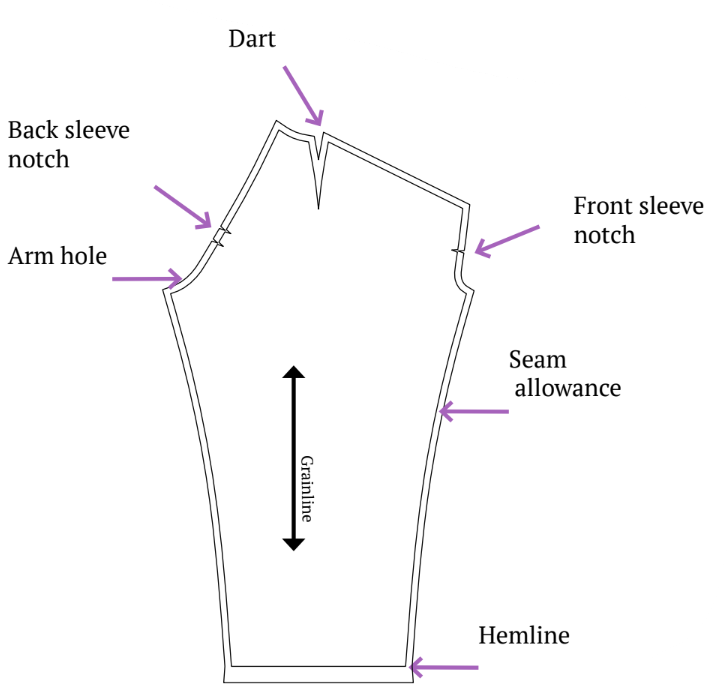
For the broad neck crop top, focus on the following pattern pieces:
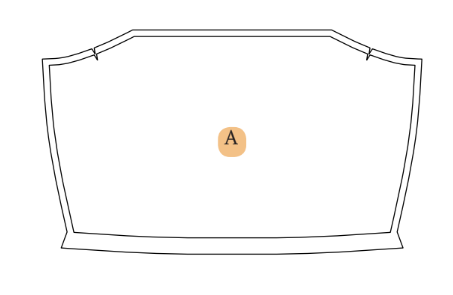
A. Front Bodice
Cut one fabric piece. Ensure you transfer all necessary markings accurately, especially those indicating the placement of darts, notches, and the center front.
B. Back Bodice
Cut one fabric piece. Transfer markings similar to the front bodice, emphasizing the center back, notches, and any darts.

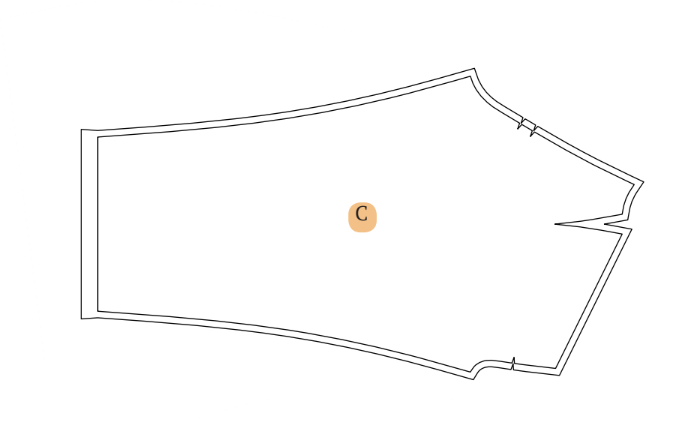
C. Sleeve
Cut two fabric pieces. Mark key points like the top of the sleeve, notches, and the placement of any gathers or pleats.
To minimize fabric wastage, consult the cutting layout provided in the next section before cutting.
If printing at home, utilize the A4 Pattern, and for print at a copy shop, opt for the A0 Pattern for convenience.
Steps To Follow For Sewing a Square Neck Crop Top
Follow these steps to sew a well-fitted and professionally finished broad neck crop top:
Step 1: Cutting Layout
To sew a broad neck crop top, begin by carefully arranging pattern pieces on the fabric according to the cutting layout diagram shown below, ensuring the grainline aligns with the selvage.
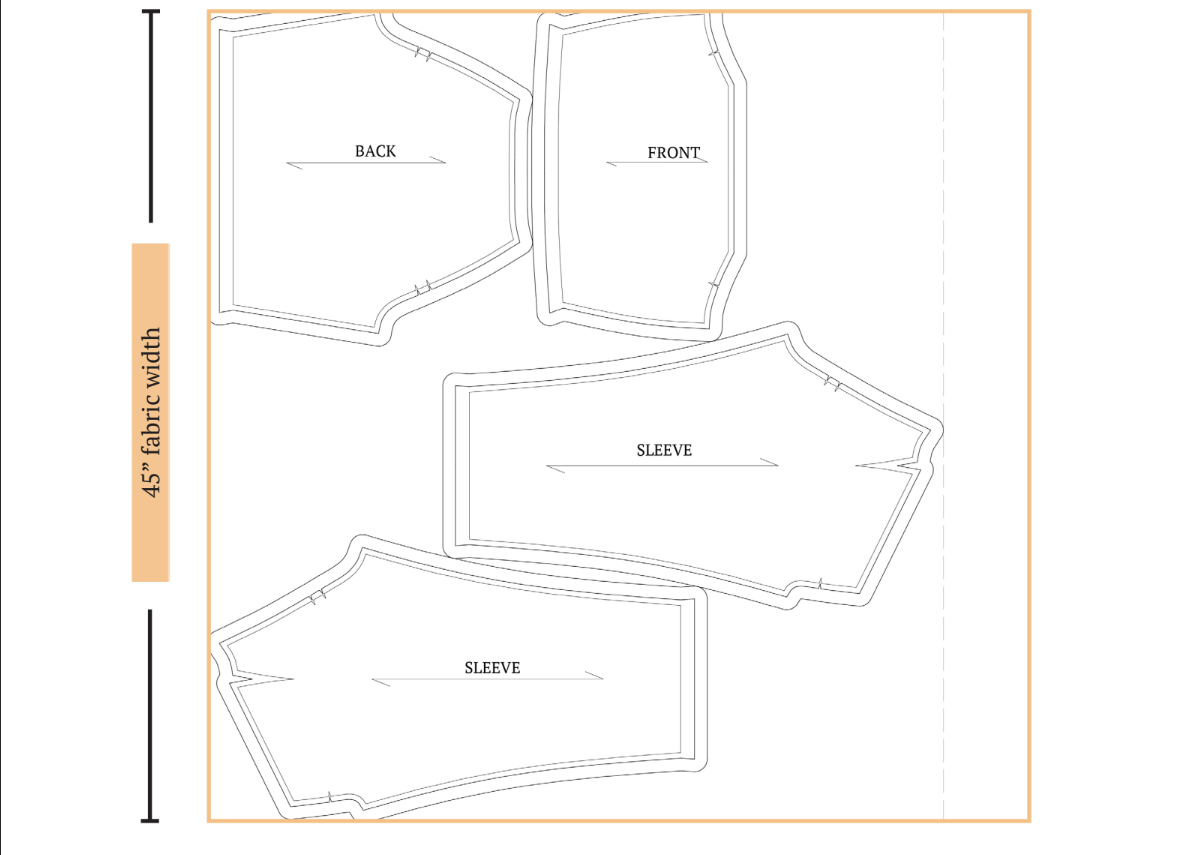
Pin the pieces to secure them before using fabric shears to cut along traced lines, removing any notches and markings for accurate assembly. Transfer additional markings like circles and fold lines to the wrong side of the fabric. Mark the center front of pieces cut on the fold to aid alignment. Consider purchasing extra fabric length for prints or nap.
Step 2: Prepare Dart Openings
Fold the ends of the dart opening, bringing them together with the right sides facing each other, forming a triangle shape.
Sew along the marked line, securing the dart opening.

Step 3: Sew Sleeve Darts
Sew both the darts on the sleeves.
Step 4: Attach Front Sleeve
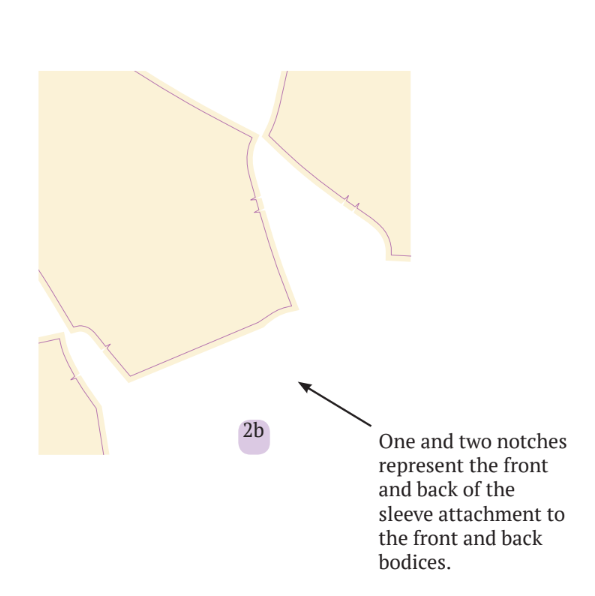
Match the front armhole notches on the sleeve to the corresponding notches on the front body fabric.
Pin the fabrics together and sew along the armhole to attach the front sleeve.
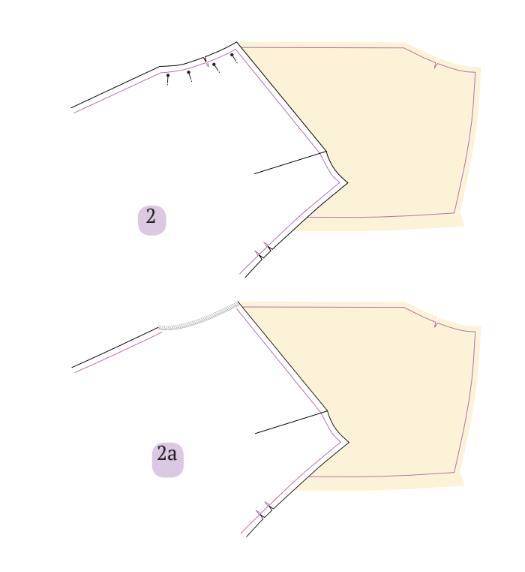
Step 5: Attach Back Sleeves
Similarly, match the back armhole notches and attach the back sleeves to the back body fabric.
Sew along the armhole.
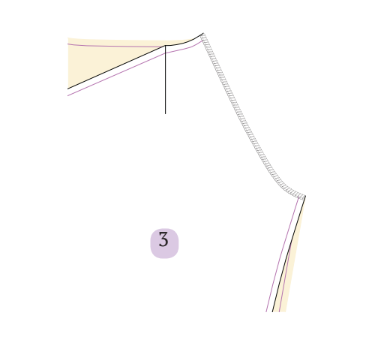
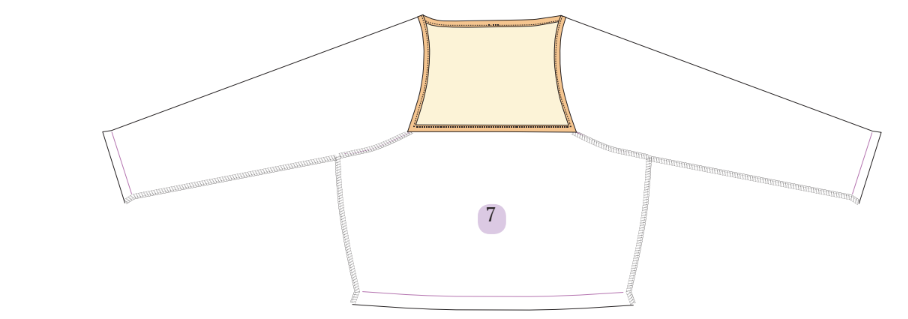
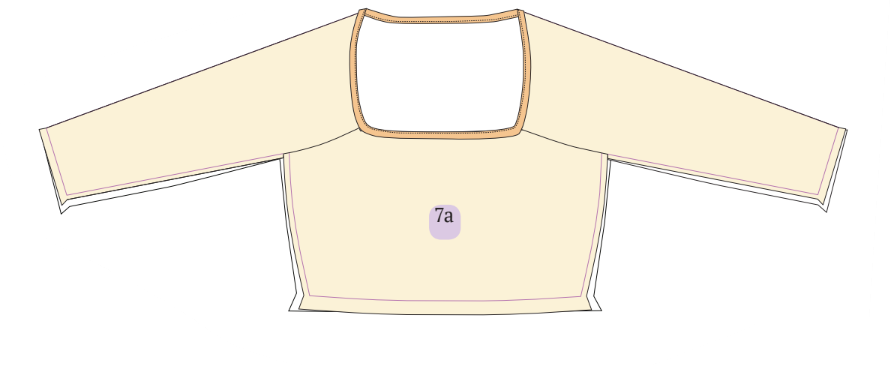
Step 6: Binding the Neckline
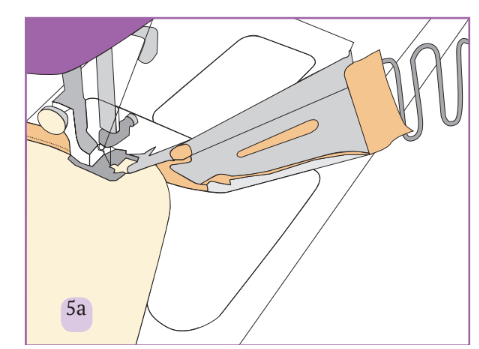
Place the binding strip inside the binder, stitching about 1 inch (See picture 5a).
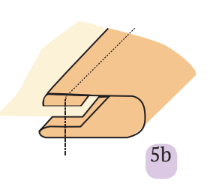
Insert the neck seam allowance inside the bind and start sewing the neckline from one open end to the other (See picture 5b).
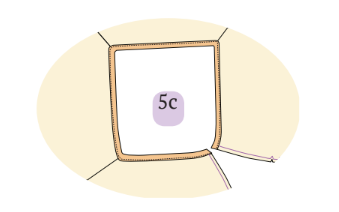
Cut any excess strip after securing the binding in place. The stitching of the bind strip can be seen in picture 5c.
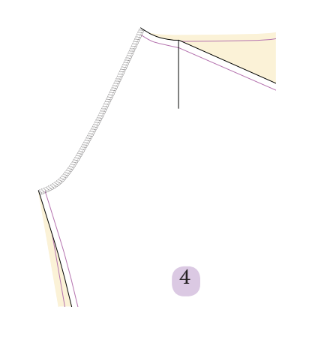
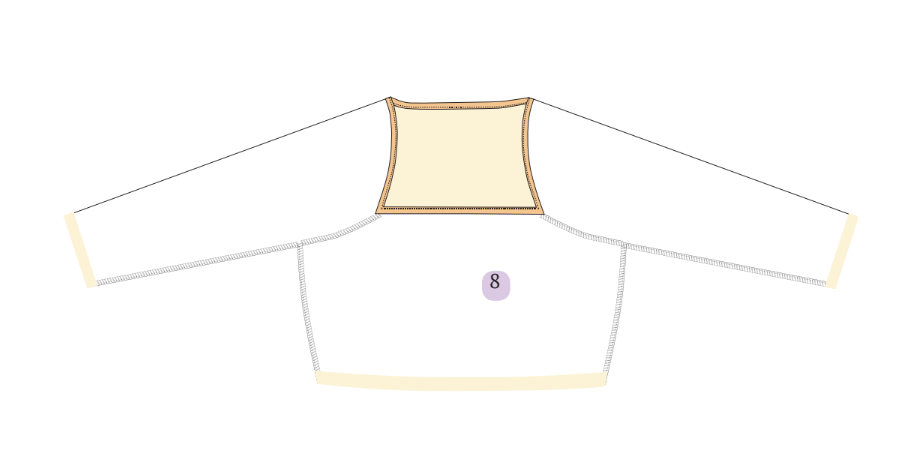
Step 7: Attach Second Sleeve
Repeat the process to attach the other sleeve to the front body, ensuring that this step also closes the binding ends.
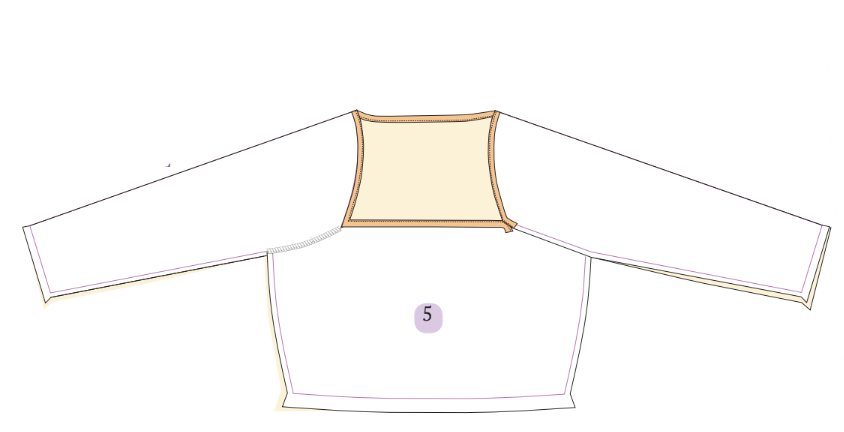
Step 8: Sew Side Seams
Sew the side seams facing right-on-right, starting from the sleeves and progressing towards the hem.
Step 9: Hemming
Fold the hem on the wrong side by 0.7 inches (or your preferred measurement).
Use an iron to flatten the fold and secure it in position with pins.
Sew a straight stitch along the top edge of the fold, starting from one side seam and continuing around the entire hem.
Summary: How to sew a square neck crop top
Great job on making your first square neck crop top! Sewing a crop top is a cool DIY project, perfect for beginners. Start by picking a pattern that fits your style. I’ve used the Winslet’s BLAZE Square Neck Crop Top Pattern and recommend it but you can use any square neck top pattern.
Grab the sewing supplies you need and measure yourself accurately for the right fit. Follow the step-by-step guide in this post and I’m certain you can get creative and make the design your own. Lastly, don’t be scared to play with different colors for a unique crop top.
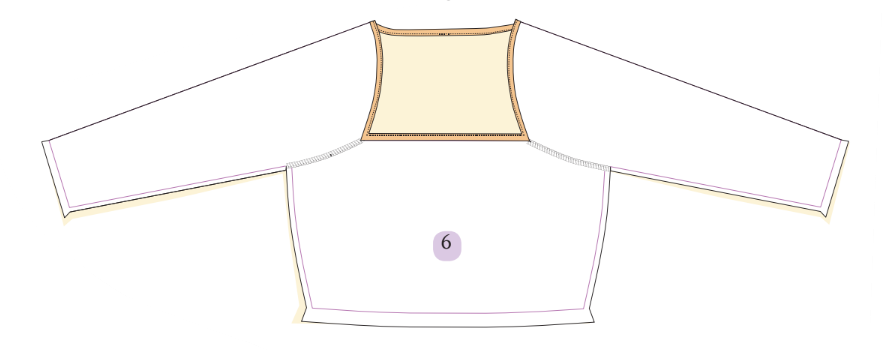
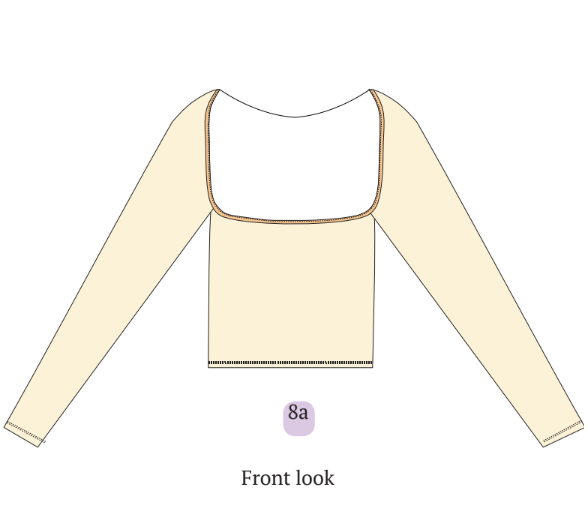
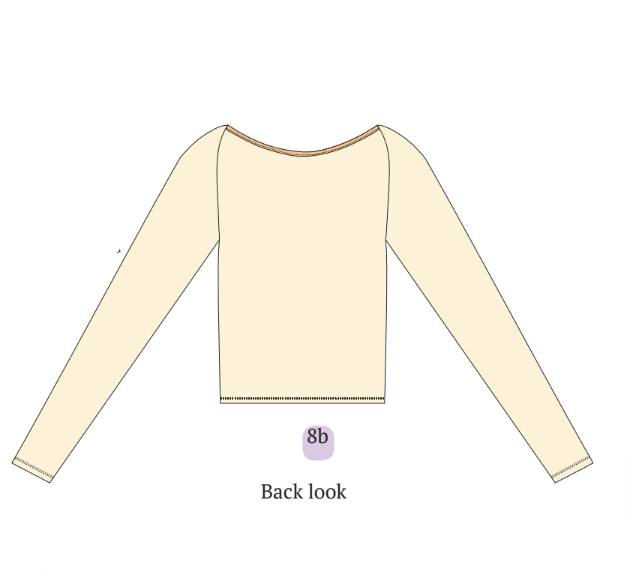
Check out some final images of this adorable top created with the Winslet’s BLAZE Square Neck Crop Top Pattern:


I hope you had fun making your first square neck crop top – give it a go and enjoy wearing something you crafted! Share your photos with us, and let us know how it went.
Join the Winslet sewing community by sharing your masterpiece with the hashtag #madewithwinslets!


