Sewing has evolved significantly over the years, with digital innovations making the craft more efficient and sustainable. One such innovation that has taken the sewing community by storm is projector sewing patterns. If you’ve ever been frustrated with printing, taping, and cutting paper patterns, this method offers a game-changing solution.
In this guide, we’ll explore what projector sewing patterns are, how they work, the benefits of using them, and tips for getting started.
What Are Projector Sewing Patterns?
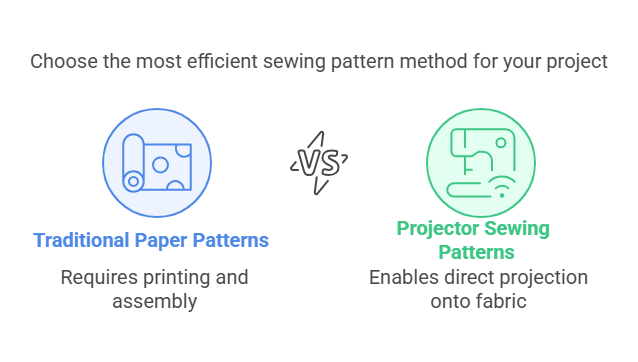
A projector sewing pattern is a digital file designed to be projected directly onto fabric, eliminating the need for printed paper patterns. Instead of printing and assembling pages, you use a ceiling-mounted or table-mounted projector to display the pattern pieces at the correct scale on your cutting surface.
These patterns are typically formatted for projection, with bold lines, minimal layers, and clear labeling to make cutting as accurate and efficient as possible.
Winslet’s projector files include:
- Bold 4pt weight lines for crystal-clear visibility
- High-contrast neon color options
- Unfolded (mirrored) pattern pieces for single-layer cutting
- Large margins so toolbars never block your view
- Layered sizing for clean layouts
- This means faster cutting, higher accuracy, and a much smoother sewing process.
Why Are Sewists Switching to Projector Sewing Patterns?
There are several compelling reasons why more sewists are embracing projector patterns:
1. Save Time
- No need to print, cut, and tape multiple sheets of paper.
- Directly project the pattern and start cutting immediately.
2. Reduce Waste
- Say goodbye to wasted printer paper and ink.
- More environmentally friendly compared to traditional printed patterns.
3. Accuracy and Precision
- Digital projection ensures clean and precise cutting without paper distortion.
- Many projector-friendly patterns include grid lines for easy alignment.
4. Cost-Effective in the Long Run
- While the initial investment in a projector may seem high, it pays off over time by eliminating printing costs.
- Saves storage space—no more stacks of printed patterns.
5. Customization and Adjustments
- Easily scale and modify patterns using projection software.
- Quickly adjust seam allowances, grading, and pattern alterations without reprinting.
How Do Projector Sewing Patterns Work?
If you’re new to projector sewing, here’s a step-by-step guide to help you get started.
Step 1: Choose a Suitable Projector
You’ll need a short-throw or ultra-short-throw projector mounted to your ceiling or a tabletop projector positioned correctly.
Common projector options:
- Ultra Short Throw – Mounted close to the cutting surface, reducing shadows.
- Short Throw – Mounted on the ceiling or wall, requires more space.
- Portable Projectors – Can be placed on a shelf or tripod for temporary setup.
Step 2: Calibrate Your Projector
- Open your projector sewing pattern file (usually in PDF format).
- Use a calibration grid to ensure the projection is accurate to scale.
- Adjust the projector settings to maintain a sharp, distortion-free image.
Step 3: Prepare Your Cutting Surface
- Use a cutting mat or large flat surface for projection.
- Make sure your fabric is smooth and wrinkle-free.
- Adjust brightness settings for optimal pattern visibility.
Step 4: Adjust and Layer Your Pattern
- Many projector-friendly patterns come with layered PDF options so you can select only the size you need.
- Zoom or scale the pattern if necessary to match your cutting dimensions.
Step 5: Cut Your Fabric Directly
- Use pattern weights or clips to secure the fabric in place.
- Cut along the projected lines just as you would with a paper pattern.
- Mark notches or details with chalk or fabric markers.
Do I Need an Expensive Projector for Sewing?
Not at all. Many sewists successfully use affordable mini or short-throw projectors mounted to ceilings, shelves, or tripod stands.
While ultra-short-throw projectors provide the best experience with minimal shadows, budget-friendly models work well too.
To help beginners, Winslet’s Patterns includes a Hardware Cheat Sheet listing the top budget-friendly projectors proven to work great for sewing patterns.
What to Look for in a Good Projector Sewing Pattern?
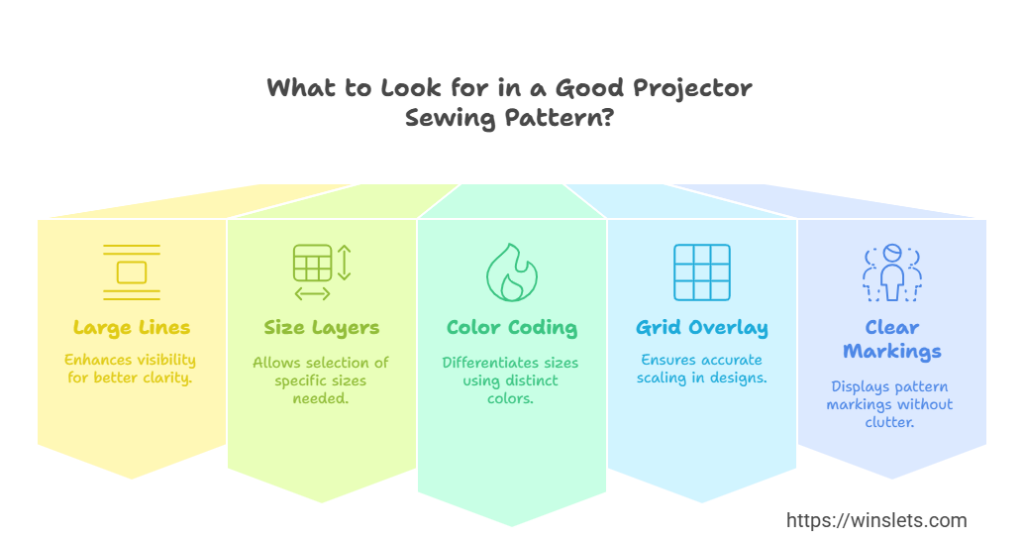
Not all patterns are projector-friendly. Here are key features to look for:
 Large, bold lines for better visibility. Layers for size selection (so you can view only the sizes you need). Color-coded lines to differentiate sizes. Grid overlay to ensure correct scaling. Pattern markings clearly visible without extra clutter.
At Winslet’s Patterns, we include projector files with bold lines, multiple size layers, and clear labeling for an easy cutting experience.
Top Tips for Success with Projector Sewing Patterns
 Use a ruler to double-check the projection scale before cutting. Secure your fabric with pattern weights to prevent shifting. Adjust brightness & contrast settings for better visibility. Use a darkroom or dim lighting to improve projection clarity. Label your projector files for easy access in the future.
Can I Use a Regular PDF Pattern for Projector Sewing?
Technically yes — but it’s frustrating.
Standard PDF patterns are designed for printing, which means:
- Thin lines that are hard to see when projected
- Small text labels
- Cluttered layouts
Winslet’s projector files are built differently with:
- Extra-thick high-contrast lines
- Simplified projection layouts
- Large readable markings
The result is faster cutting and far less eye strain.
How Do I Make Sure the Projected Pattern Size Is Correct?
This process is called calibration.
You adjust the zoom in your PDF viewer until a projected square measures exactly 1 inch (or 4 cm) using a physical ruler.
Unlike most brands that include a tiny corner square, Winslet’s provides a massive calibration grid layer that covers the entire cutting surface, letting you verify accuracy everywhere — not just one spot.
What Are Unfolded Pieces in a Projector Sewing File?
Traditional paper patterns often show half a pattern piece intended to be cut on the fold.
Winslet’s projector files instead include full mirrored (unfolded) pieces, allowing you to cut fabric in a single layer.
Benefits include:
• More precise cutting
• Better fabric usage
• No folding distortions
Every Winslet’s projector file is fully mirrored for accuracy.
Why Are the Lines Thicker in Projector Sewing Patterns?
Projectors can slightly blur or pixelate thin lines, especially on textured fabrics like fleece or wool.
Winslet’s uses extra-thick 4pt vector lines so edges stay crisp and visible no matter the fabric.
This ensures:
• Clear cutting paths
• Less guessing
• Higher precision
What Background Color Works Best for Projector Sewing?
It depends on your fabric color:
• Light fabrics → dark lines on white background
• Dark or busy fabrics → light or neon lines on dark background
Winslet’s Patterns includes Invertible Layers (Dark Mode) so you can instantly flip between color schemes with one click.
Do I Need a Cutting Mat for Projector Sewing?
Yes — a self-healing cutting mat is strongly recommended.
It protects your surface, allows safe rotary cutting, and helps keep everything aligned.
Winslet’s also includes a digital grid layer that matches standard 24” x 36” cutting mats for easy double-checking of straightness and scale.
How Do I Cut Fabric Without Blocking the Projector Light?
Most sewists quickly master what’s called the “shadow dance.”
Tips include:
• Standing slightly to the side
• Using a rotary cutter instead of scissors
• Keeping hands low to the surface
Winslet’s layouts also include extra spacing between pieces (cutting corridors) so you can move comfortably without shadows covering important lines.
Can I Lengthen or Adjust a Pattern Using a Projector?
Absolutely.
You can either:
• Digitally edit the file
• Use the popular “slide method”
Winslet’s takes this further by marking Slide Points directly on the projected pattern, showing exactly where to pause and slide fabric — no measuring or math required.
What Is the Margin or Buffer in a Projector Sewing File?
This is the empty border around the pattern layout.
It prevents your PDF reader’s toolbars and menus from covering parts of the projected design as you scroll.
Winslet’s projector files include a generous 20-inch buffer around the entire layout so nothing ever gets blocked.
How Do Projector Sewing Patterns Work? (Step-by-Step)
Step 1: Choose a Projector
Short-throw or ultra-short-throw models are best, but many budget projectors work well too.
Step 2: Calibrate
Use Winslet’s full-table calibration grid to ensure perfect scale.
Step 3: Prepare Your Surface
Lay fabric flat on a cutting mat and smooth out wrinkles.
Step 4: Turn On Your Size Layer
Select only your size for a clean layout.
Step 5: Cut Directly
Secure fabric with weights and cut along the bold projected lines.
What Makes Winslet’s Projector Sewing Patterns Different?
Every Winslet’s digital pattern includes:
-
Dedicated projector-optimized file
-
Extra-thick high-contrast lines
-
Invertible dark/light modes
-
Massive calibration grid
-
Fully mirrored pieces
-
Cutting corridors for shadow-free cutting
-
Slide point markers for easy adjustments
-
Large margins to avoid toolbar interference
-
Budget projector recommendations
Conclusion: Is Projector Sewing Right for You?
If you’re ready to save time, reduce waste, and enjoy a smoother cutting process, projector sewing patterns are a fantastic upgrade.
With Winslet’s Patterns’ fully optimized projector files, even beginners can enjoy accurate, frustration-free paperless sewing.
Whether you’re working on dresses, jumpsuits, tops, or outerwear, Winslet’s makes projector sewing simple, precise, and enjoyable.
FAQs About Projector Sewing Patterns
Q: Do I need a special kind of fabric for projector patterns?
No, projector sewing patterns work with all types of fabric, but light-colored fabrics work best for clear visibility.
Q: What is the best place to mount a projector for sewing?
A ceiling-mounted projector offers the best long-term setup. If you’re renting or need flexibility, a shelf-mounted or tripod setup can also work.
Q: Can I use a regular PDF pattern for projection?
Regular PDF patterns might work, but projector-optimized patterns are better because they have bold lines, layers, and a proper scale.
Q: How do I know if a pattern is projector-friendly?
Look for a “projector file” or “projection-optimized” label when purchasing patterns. Winslet’s Patterns includes projector-ready formats with all designs!
Q: How do I know if a pattern is projector-friendly?
Yes, but it depends on the type of projector and your setup. A regular home or office projector can work, but it may not be ideal due to factors like throw distance, focus, and keystone correction. Short-throw or ultra-short-throw projectors are better suited for sewing patterns because they require less space and provide a clear, distortion-free image on your cutting surface. If using a regular projector, ensure it has: A way to mount or position it securely at the right height and angle. Sufficient brightness and focus for clear visibility. Good keystone and zoom adjustment to scale the pattern correctly.
If you already own a standard projector, test it with a calibration grid to check if it can maintain an accurate scale before cutting fabric.
Conclusion: Is Projector Sewing Right for You?
If you’re looking for a way to streamline your sewing process, reduce waste, and improve efficiency, projector sewing patterns are a fantastic investment. While there’s a learning curve to setting up your projector, the time saved in the long run makes it well worth the effort.
At Winslet’s Patterns, we’re committed to making sewing easier and more accessible. That’s why all our patterns come with projector-friendly formats so you can enjoy seamless, paperless sewing.
Ready to Try Projector Sewing?
Explore our projector-optimized sewing patterns at Winslet’s Patterns and start sewing smarter today!


