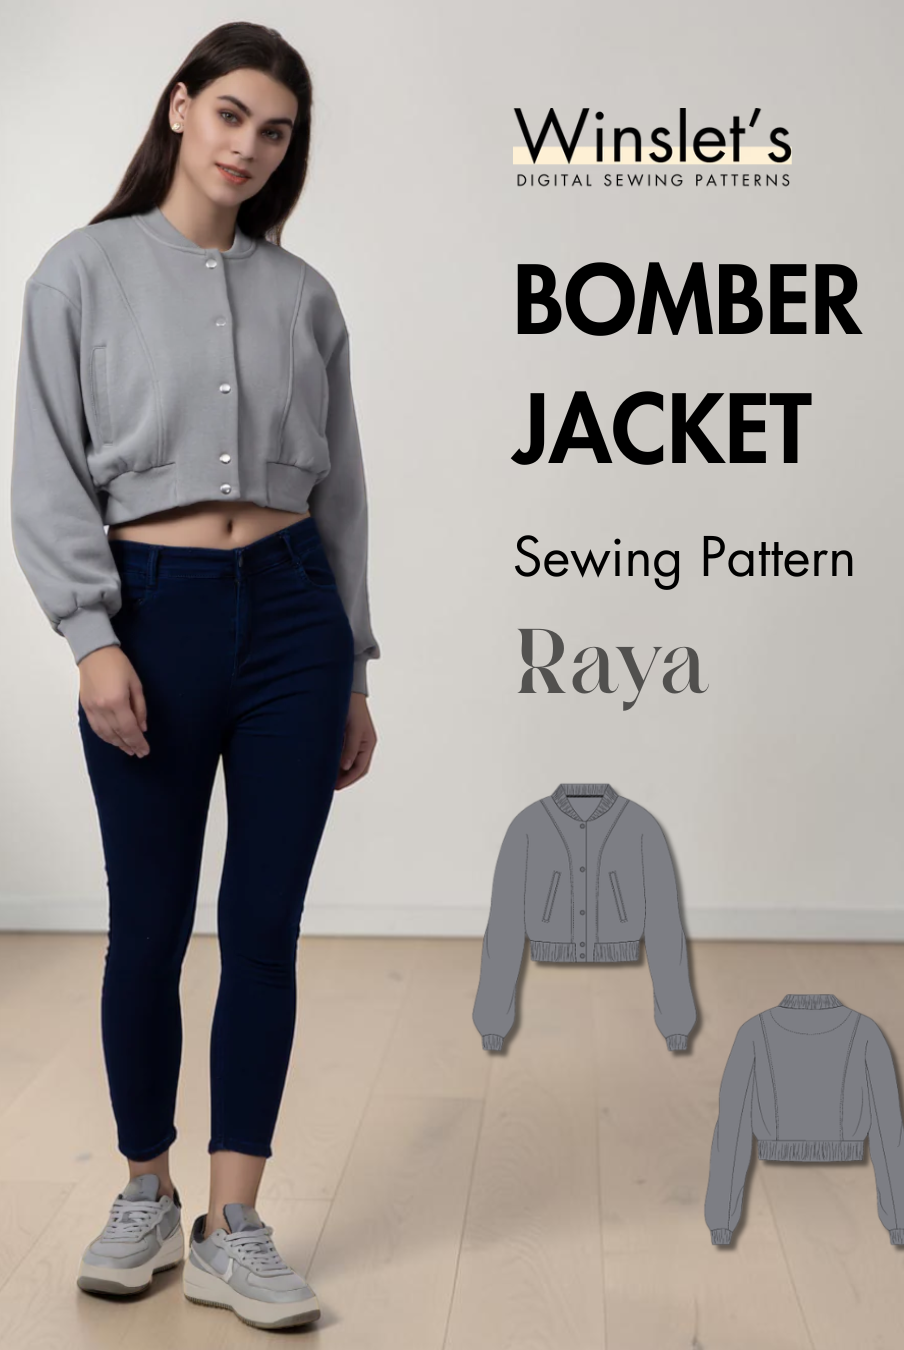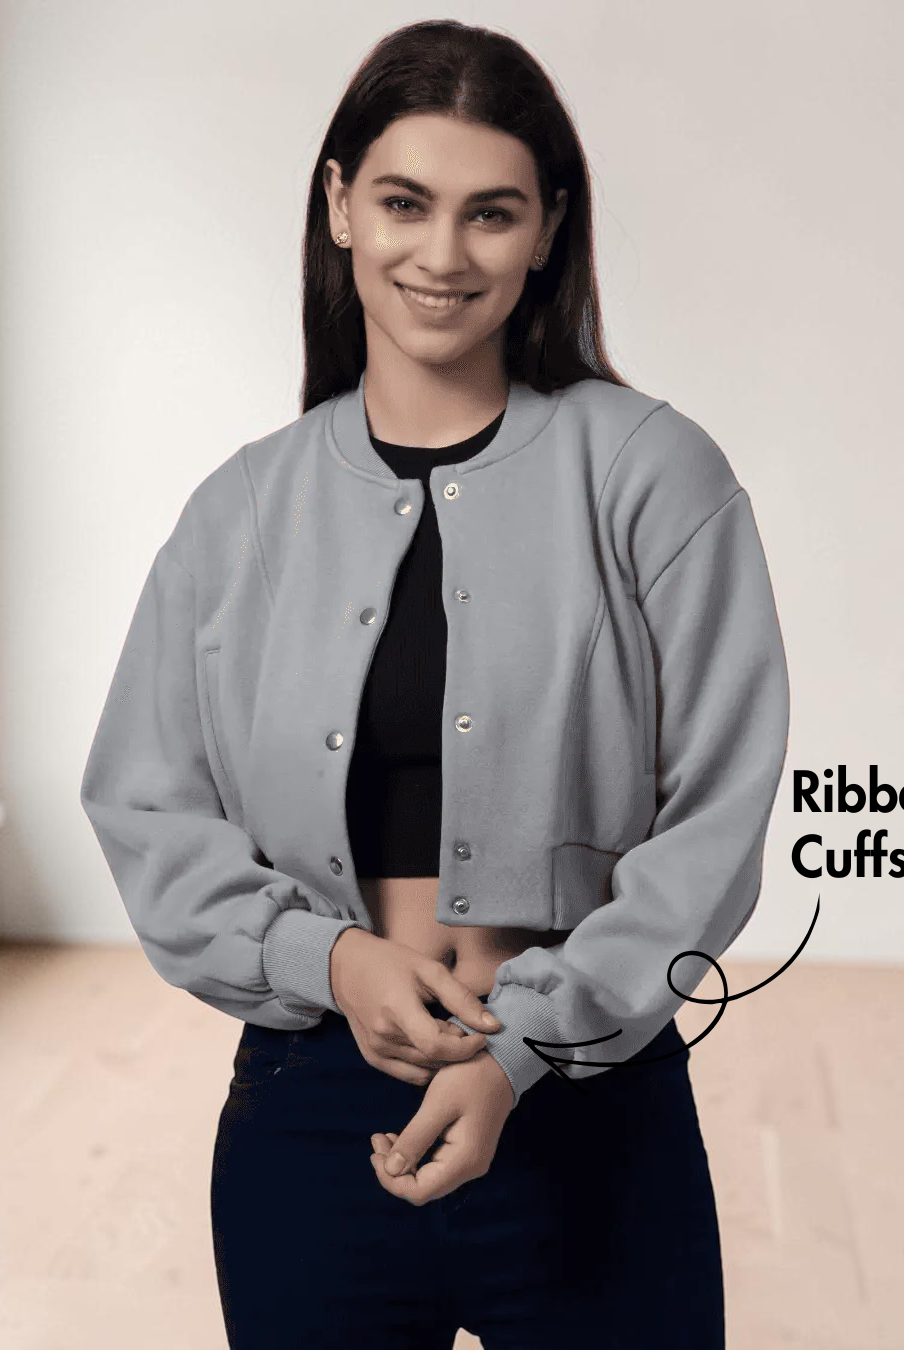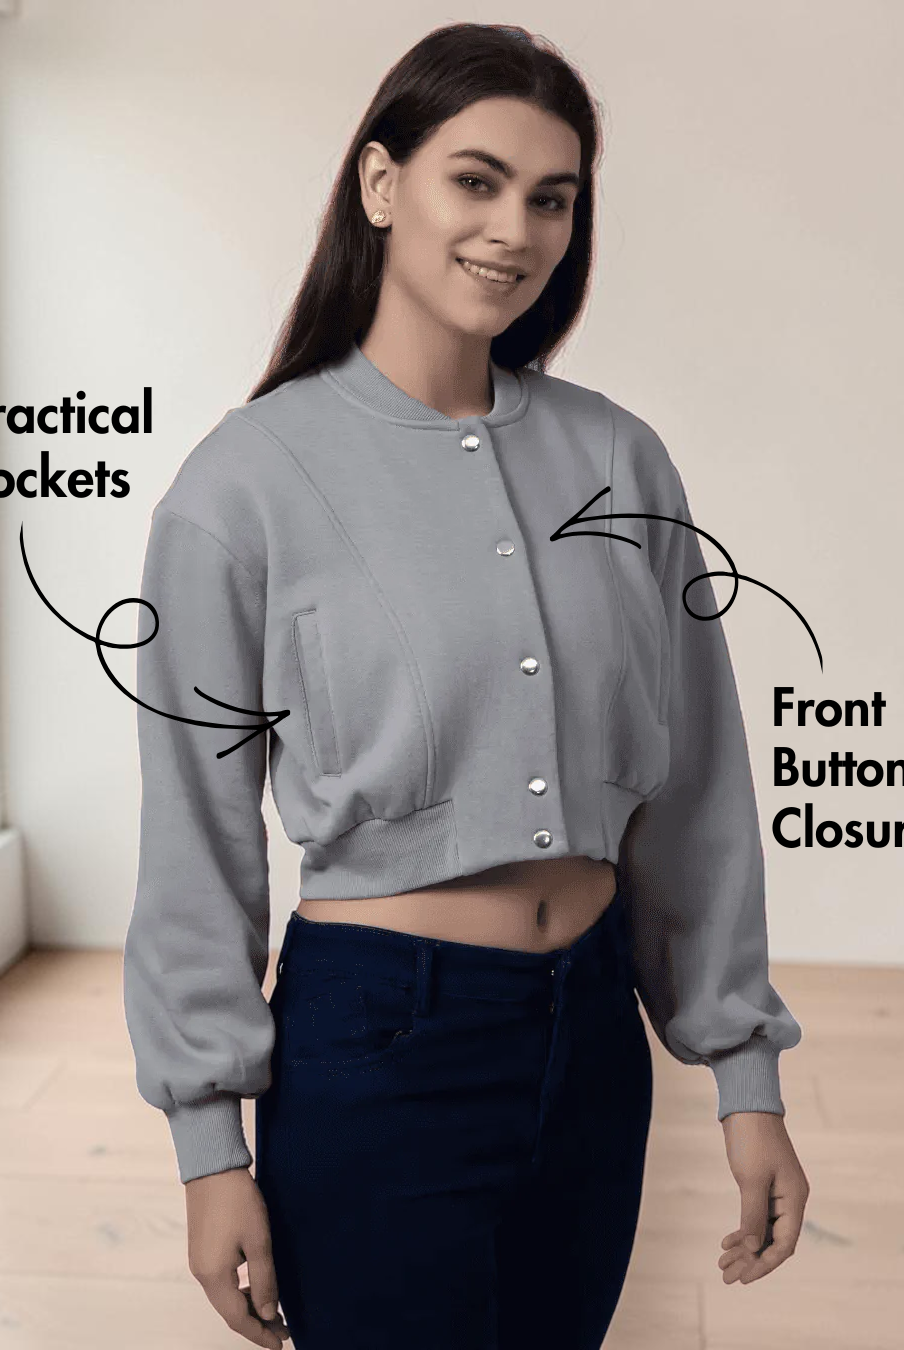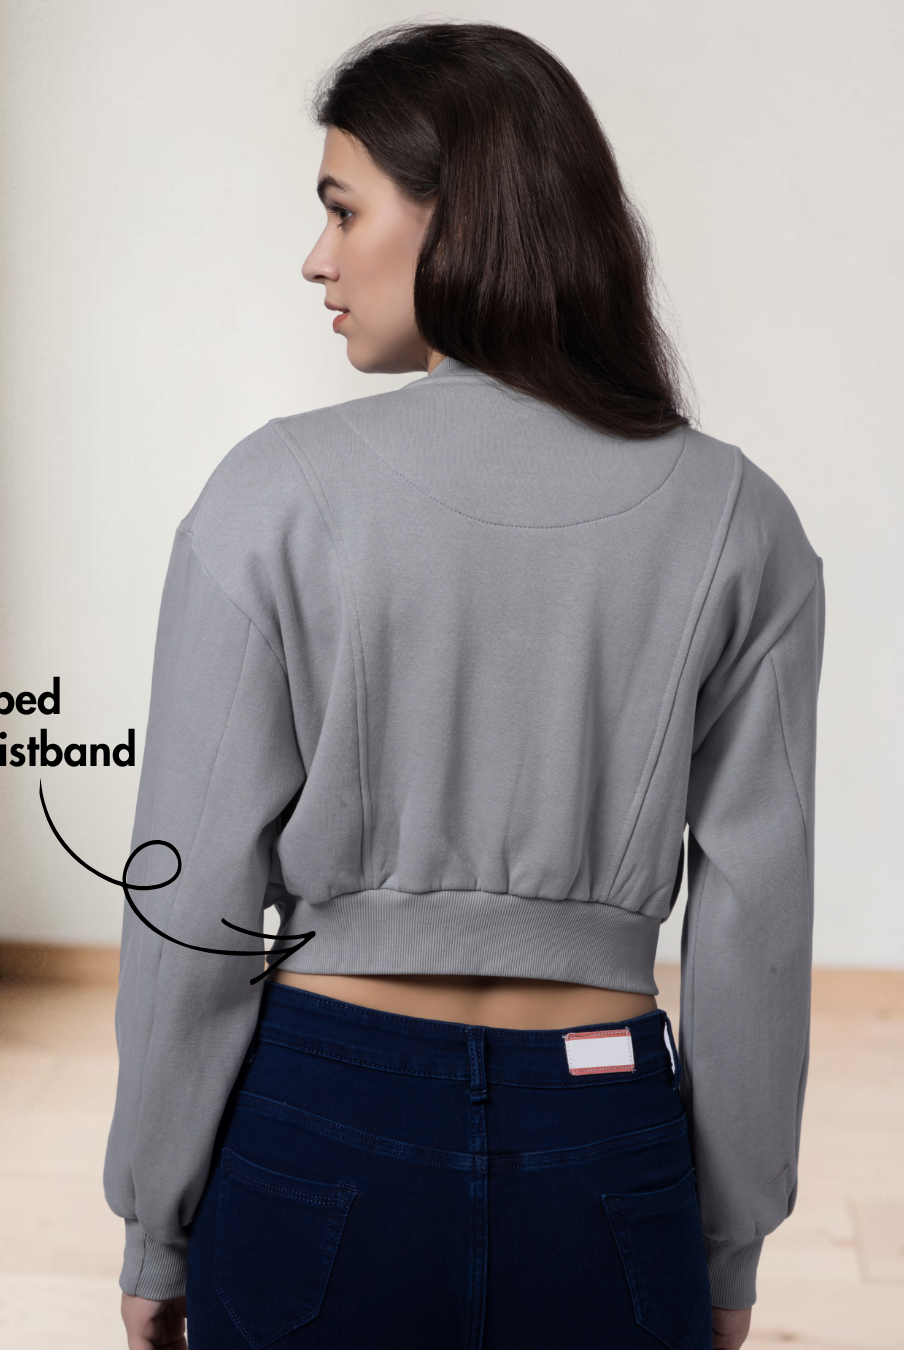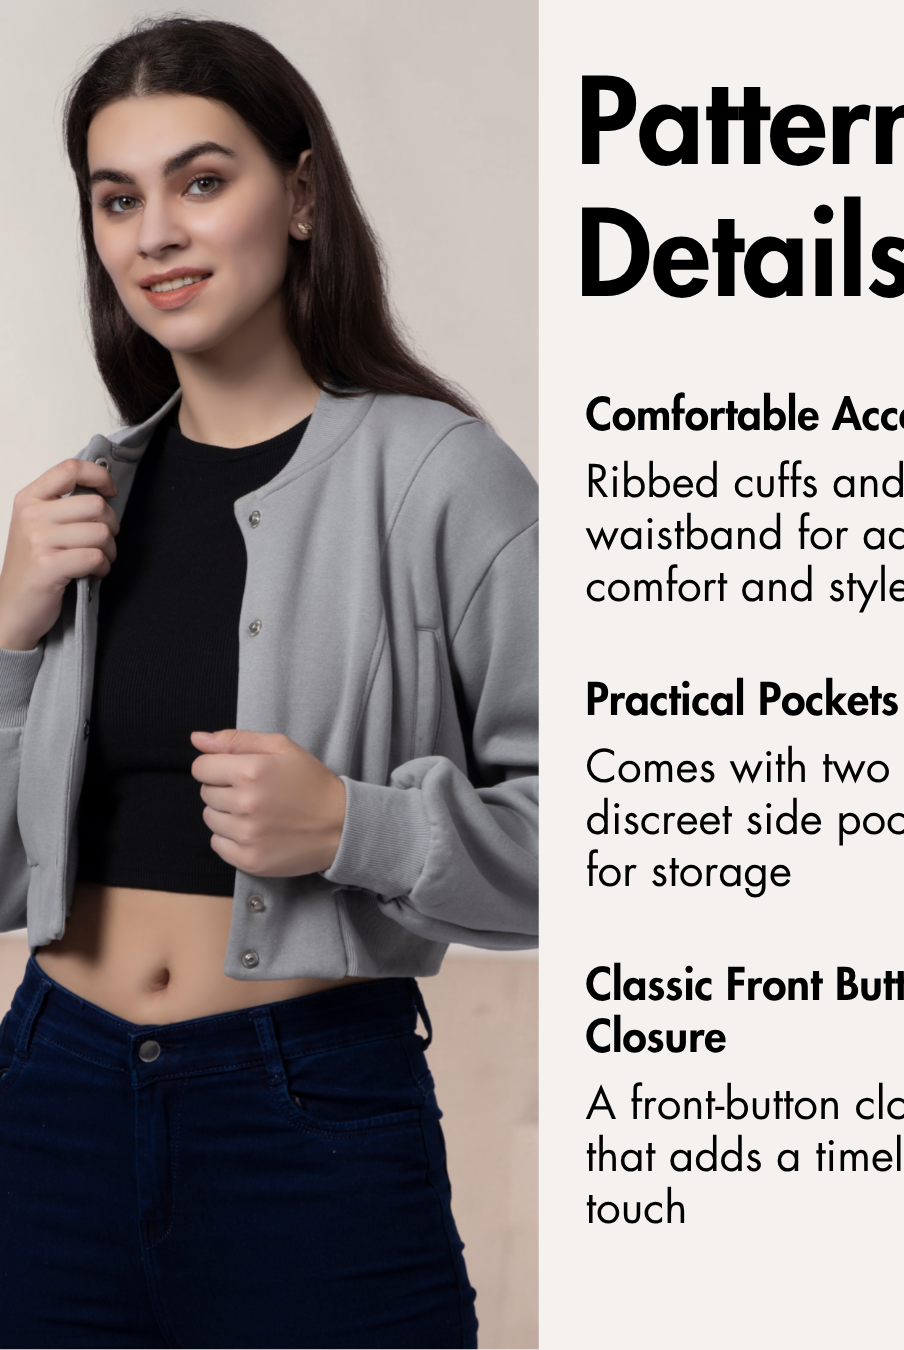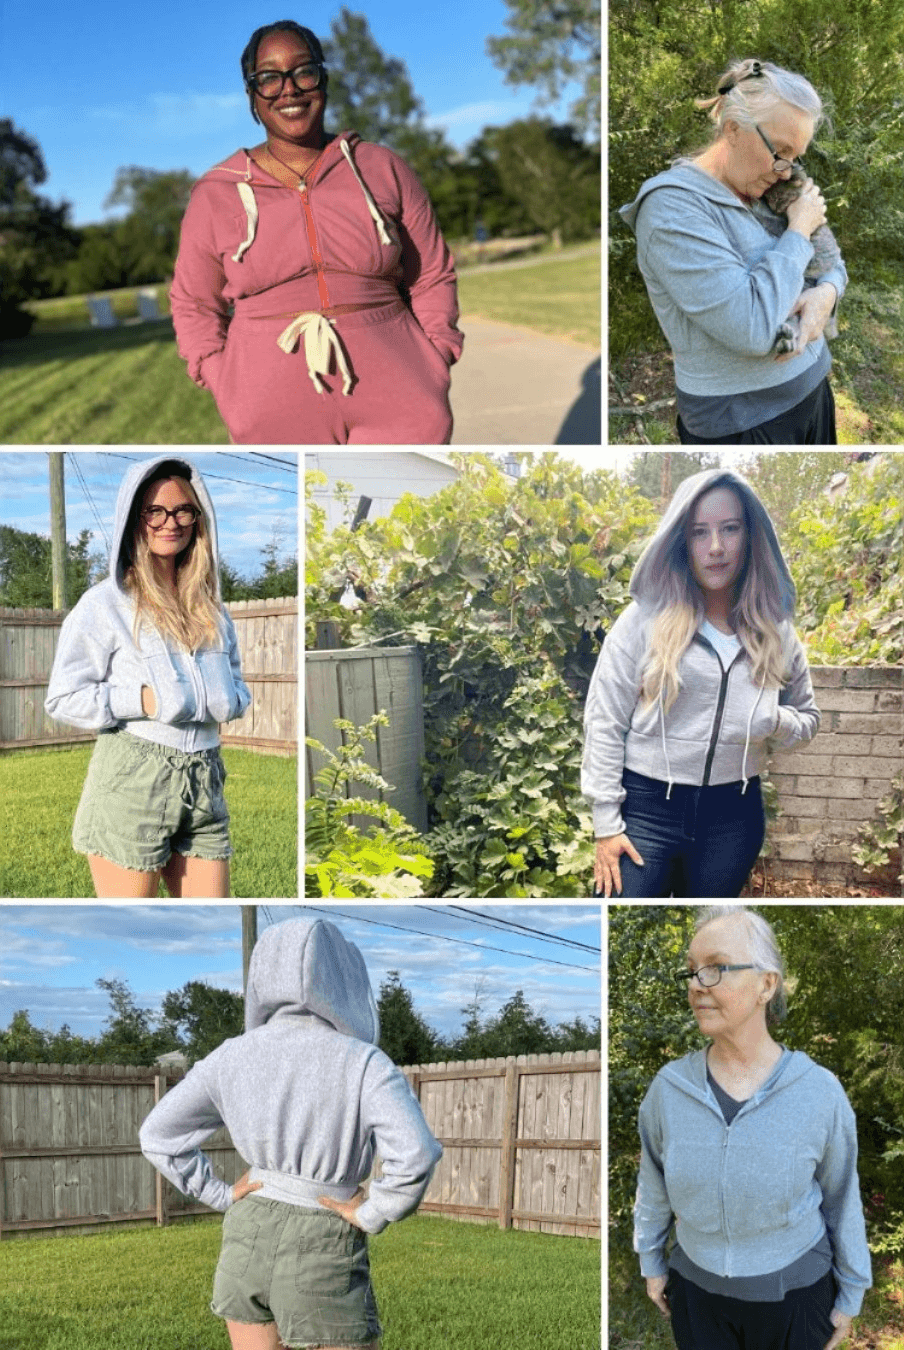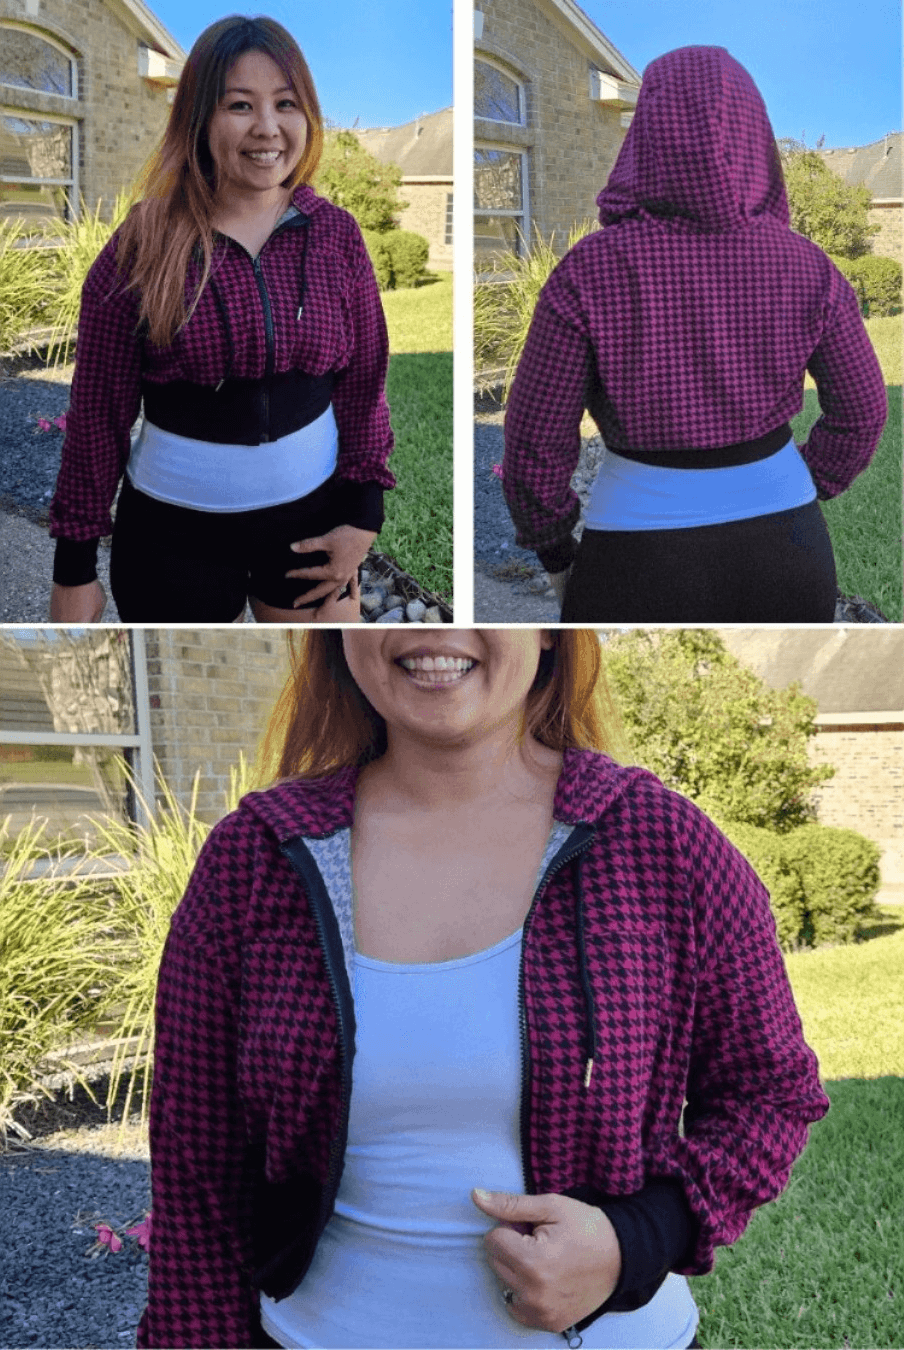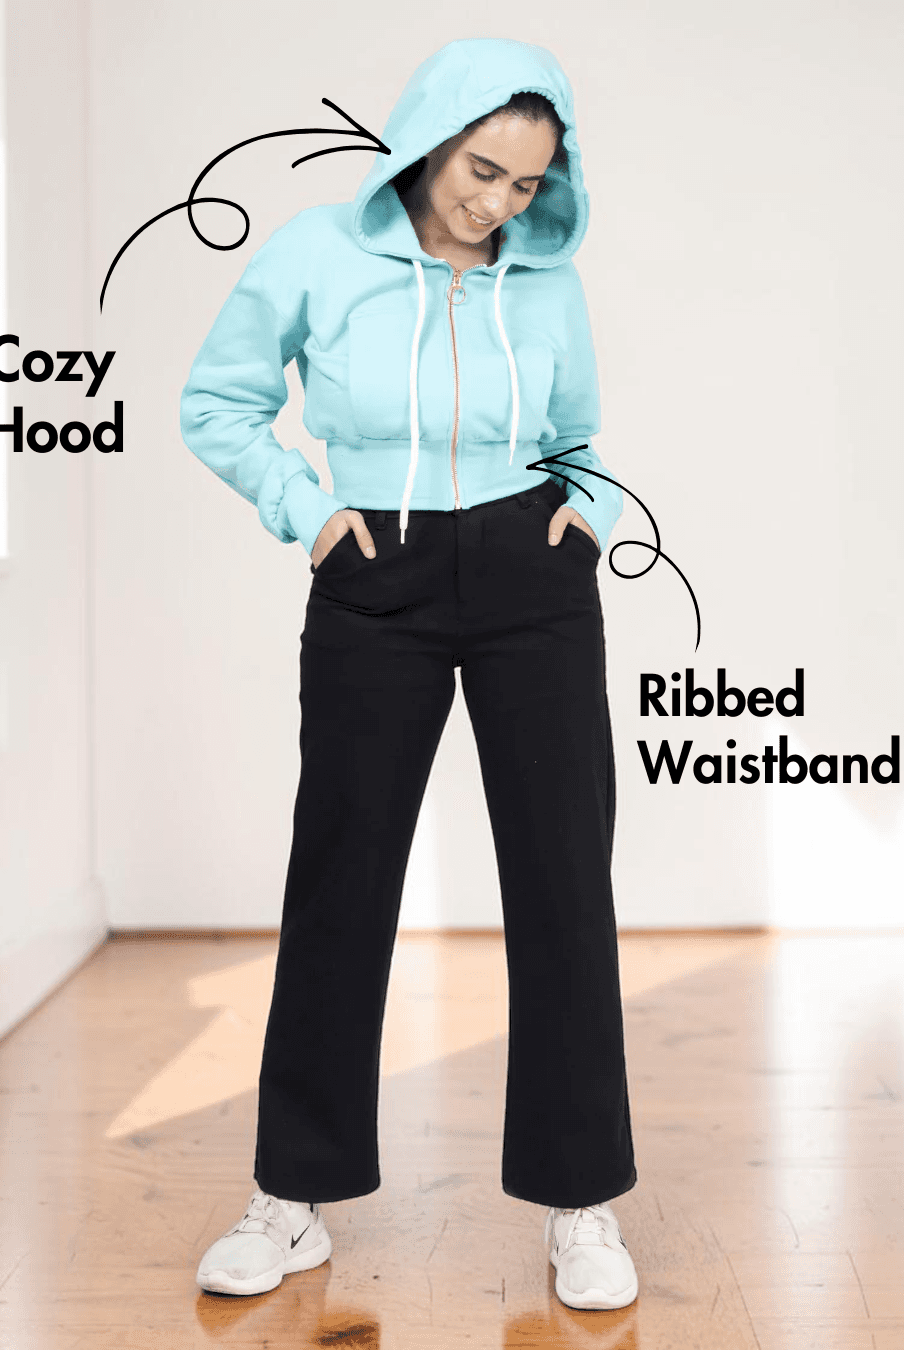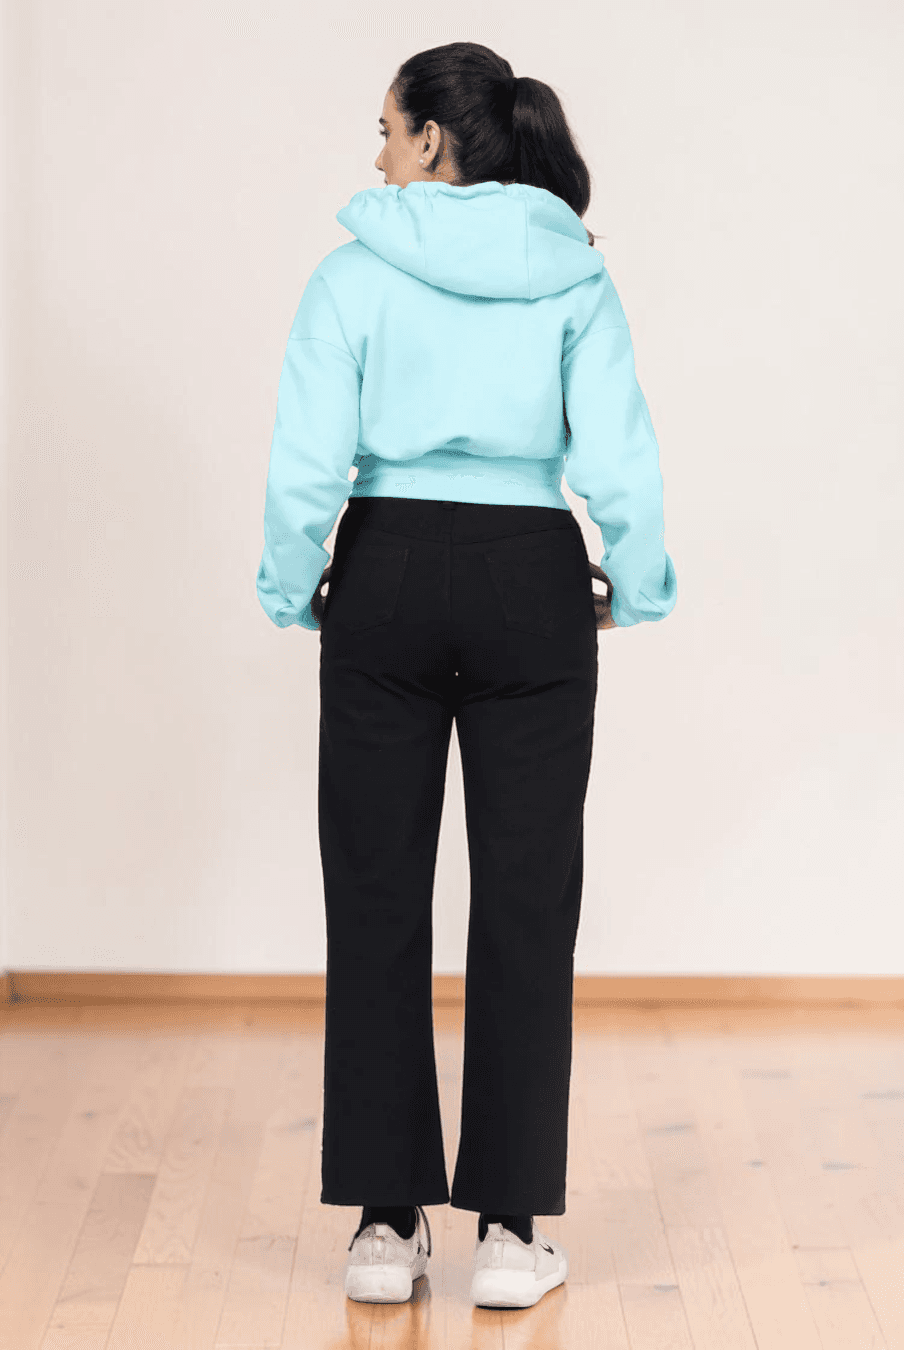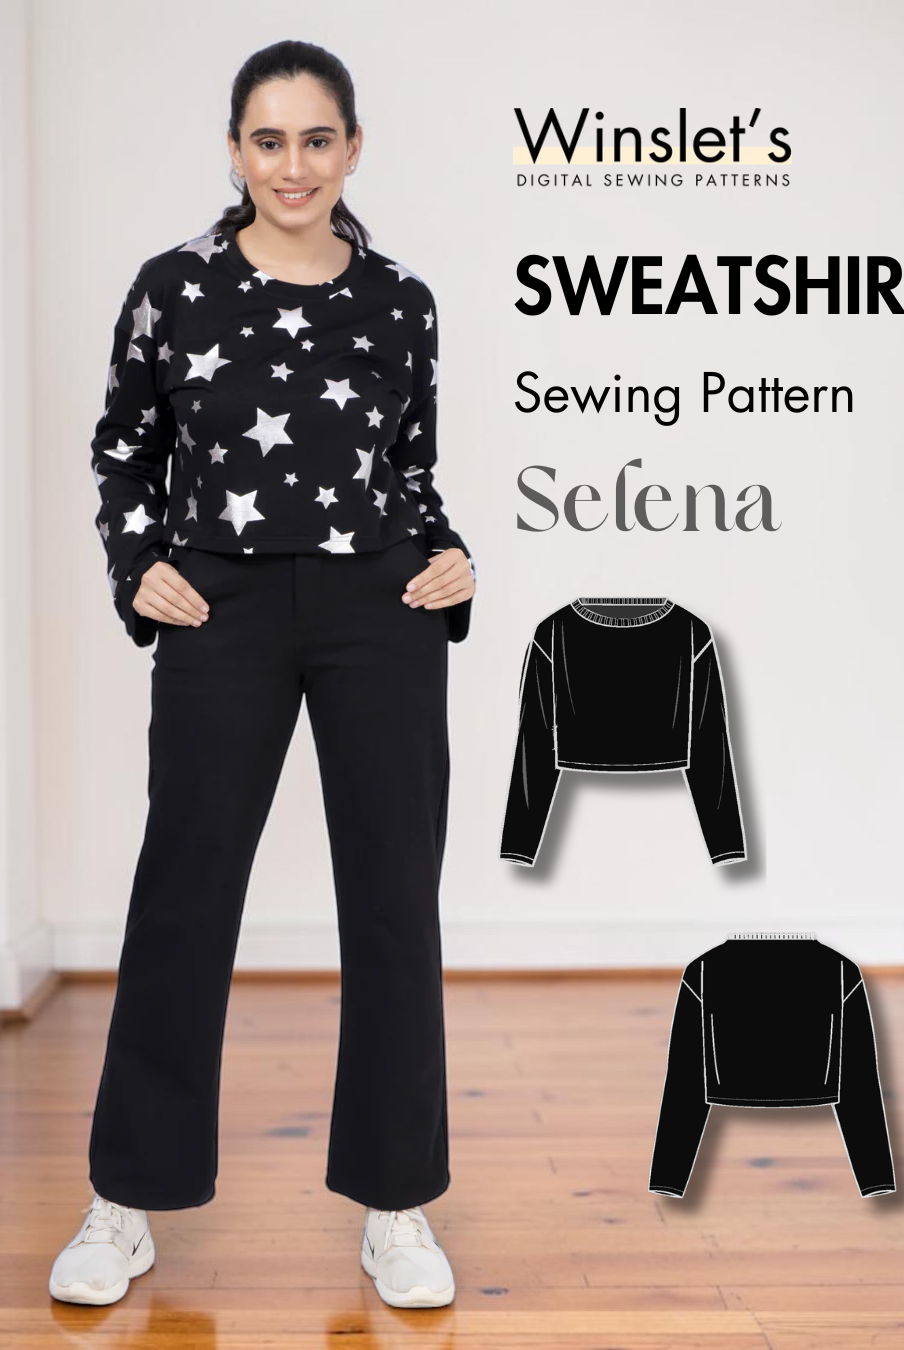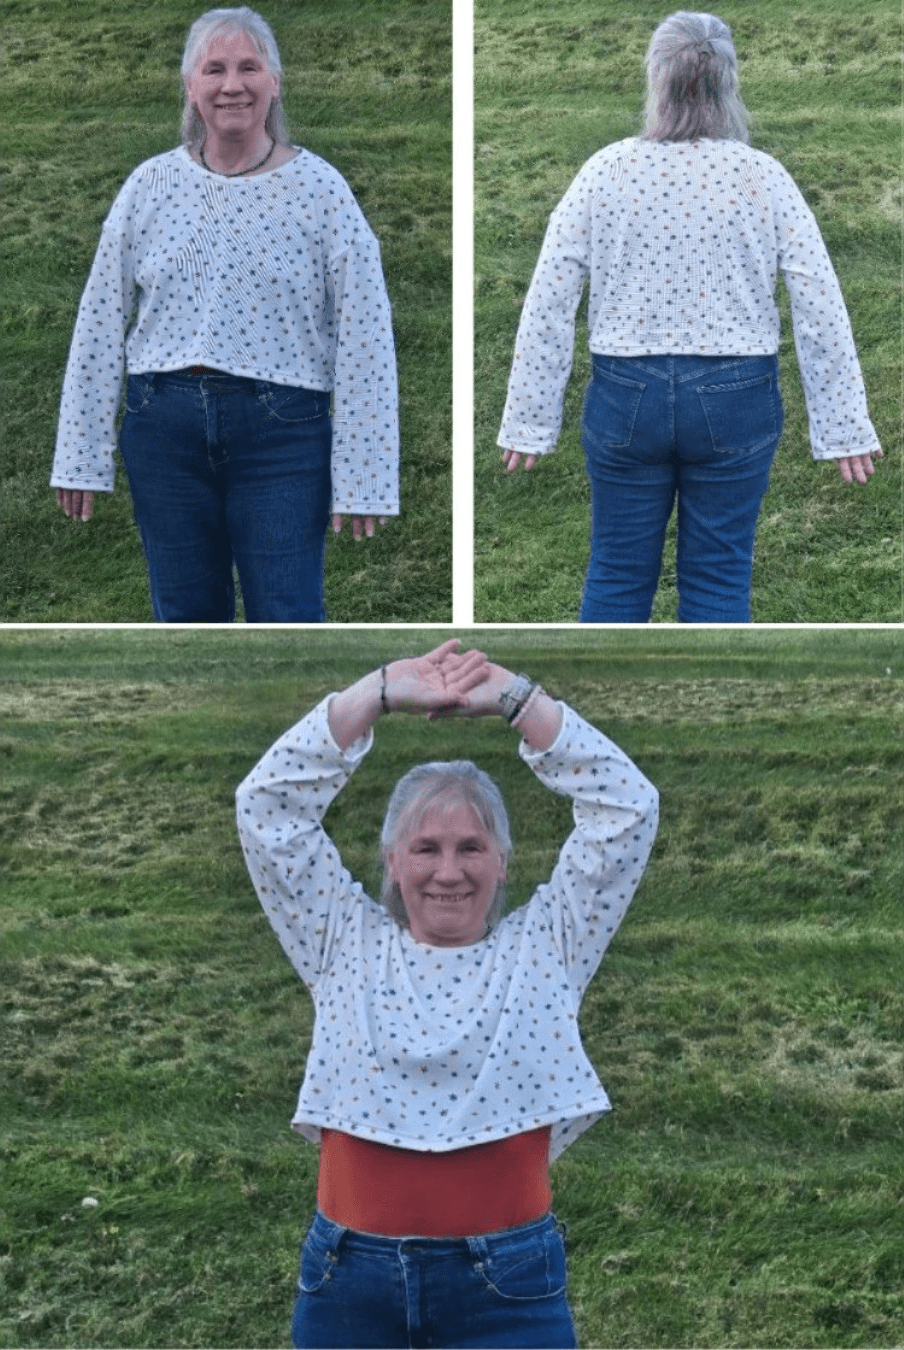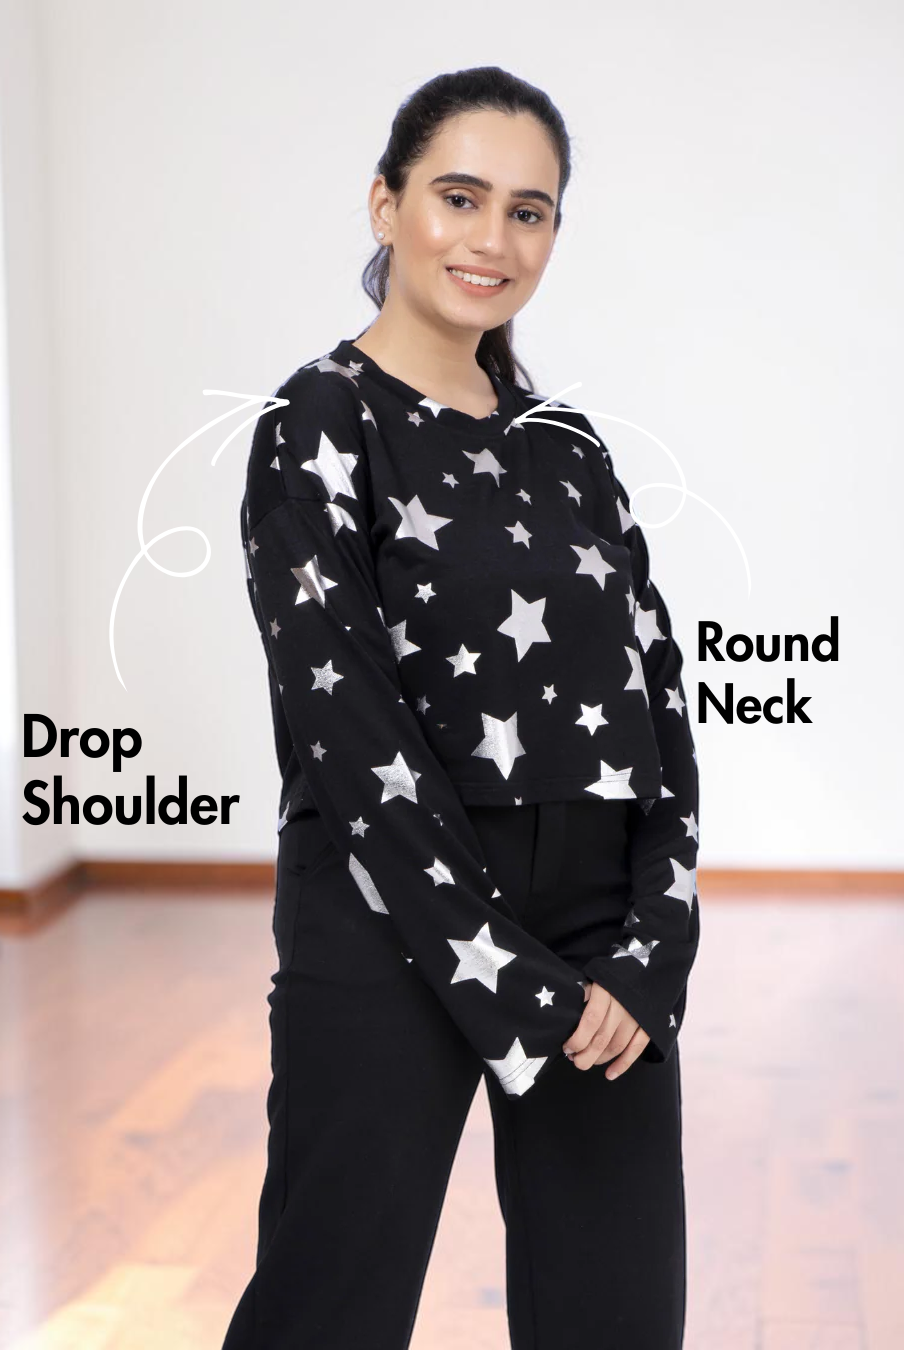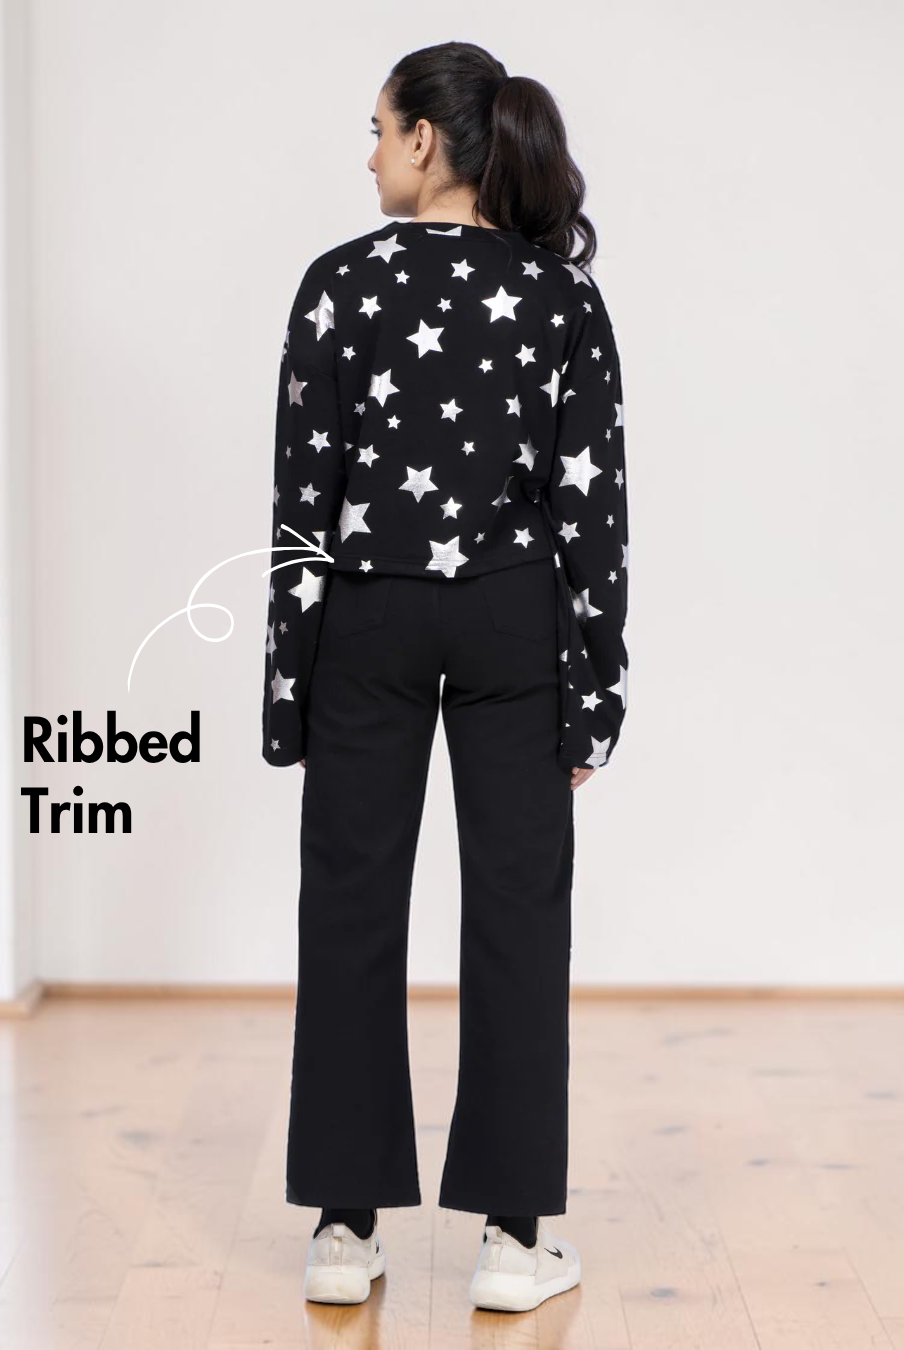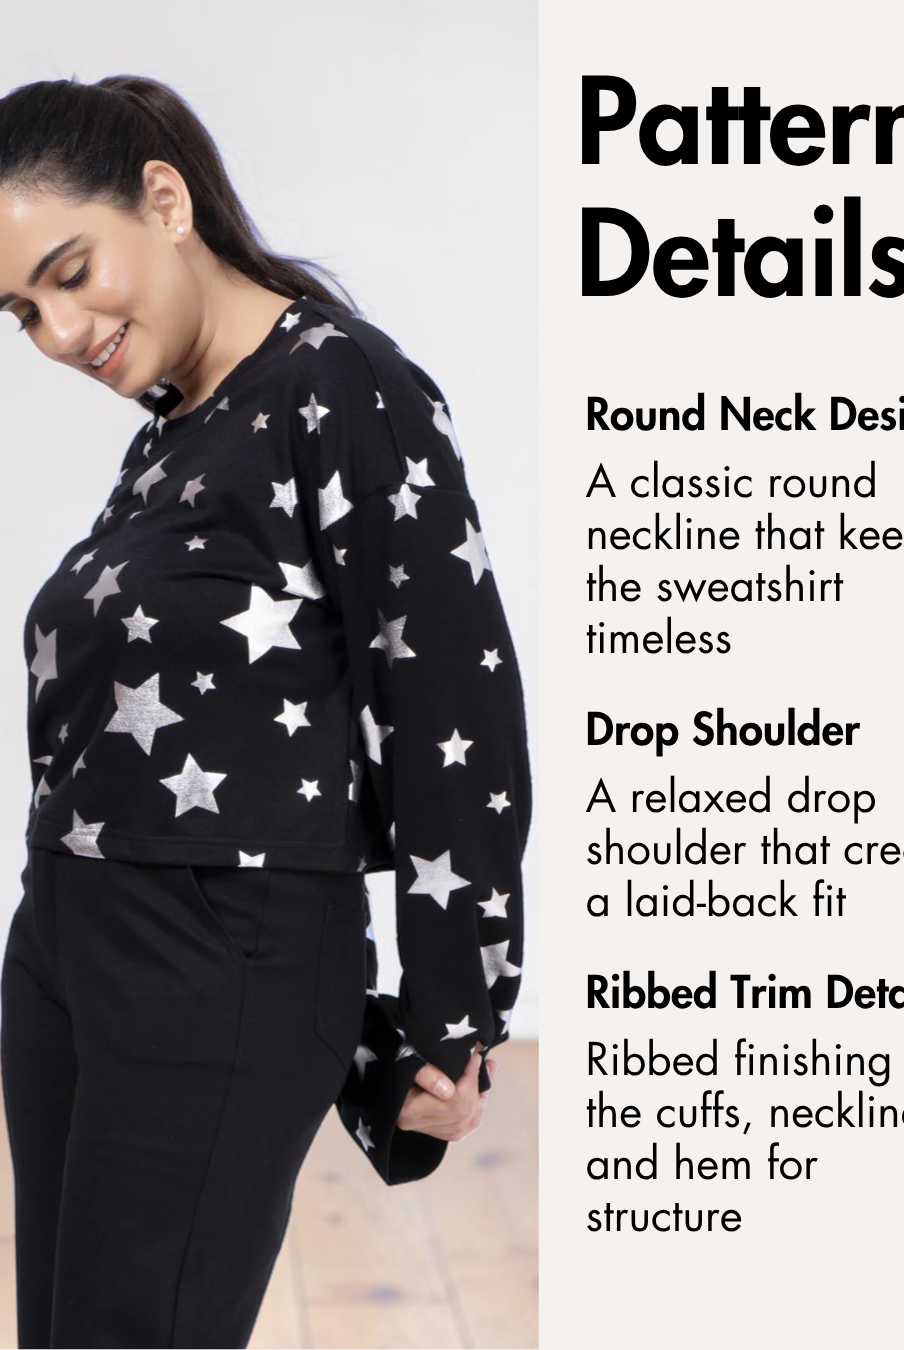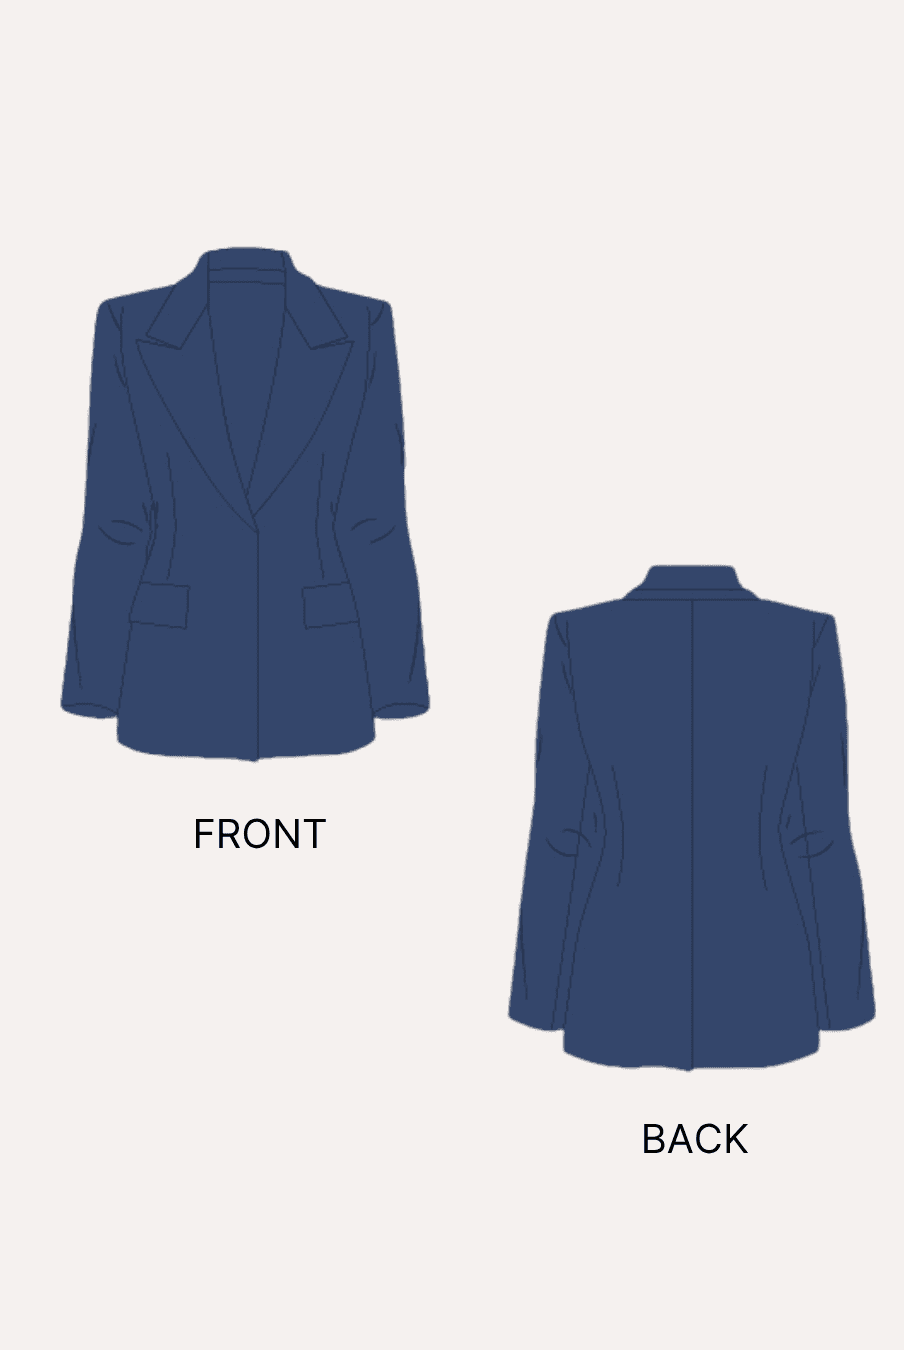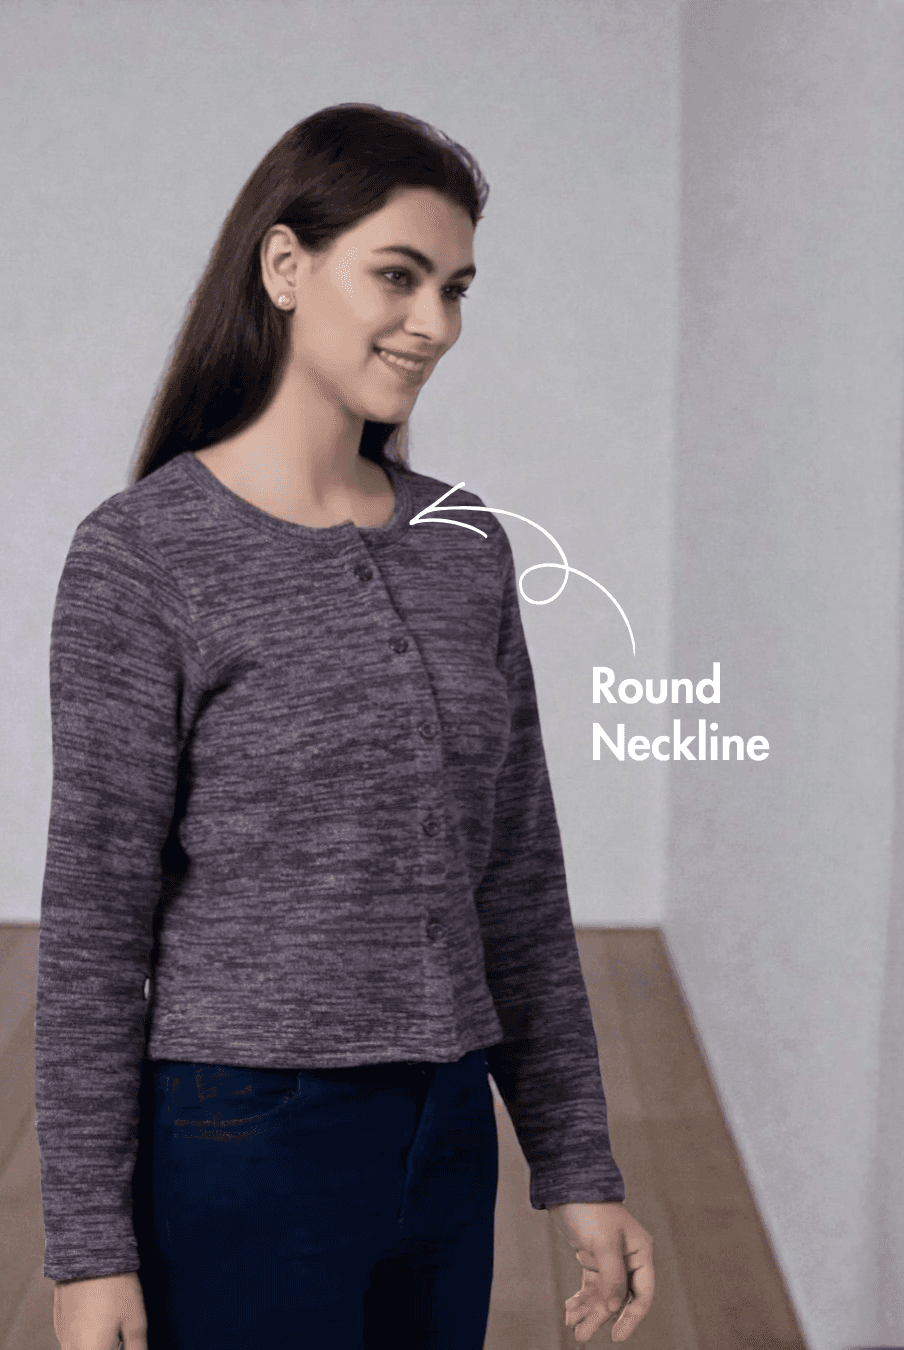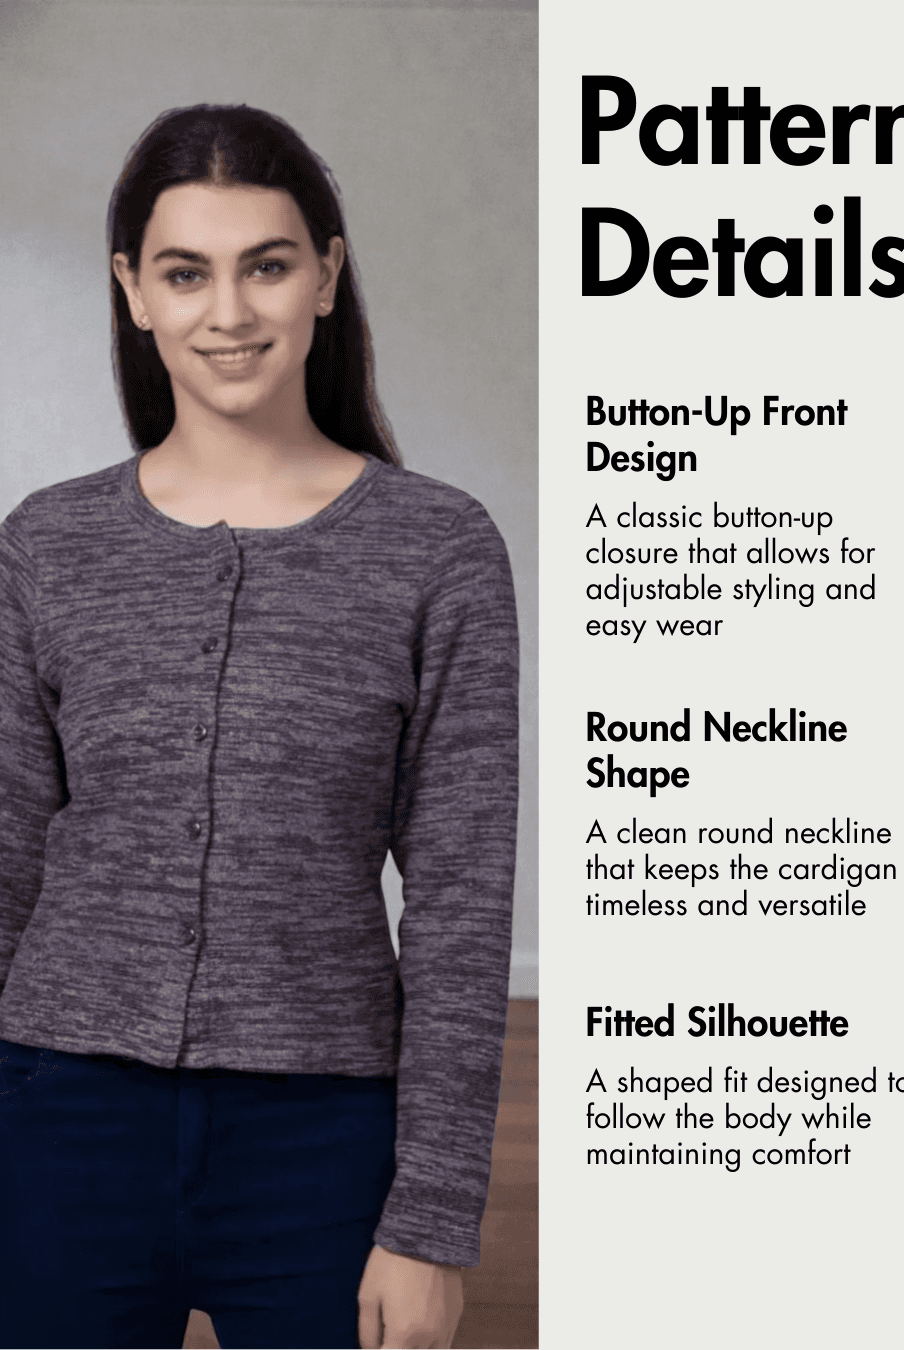
Cropped shirts combine traditional shirtmaking details with a shorter silhouette that works well with high-waisted separates. They are rewarding projects for sewists who want to practise placket construction, collar assembly, sleeve insertion, buttonholes, and neat hem finishes.
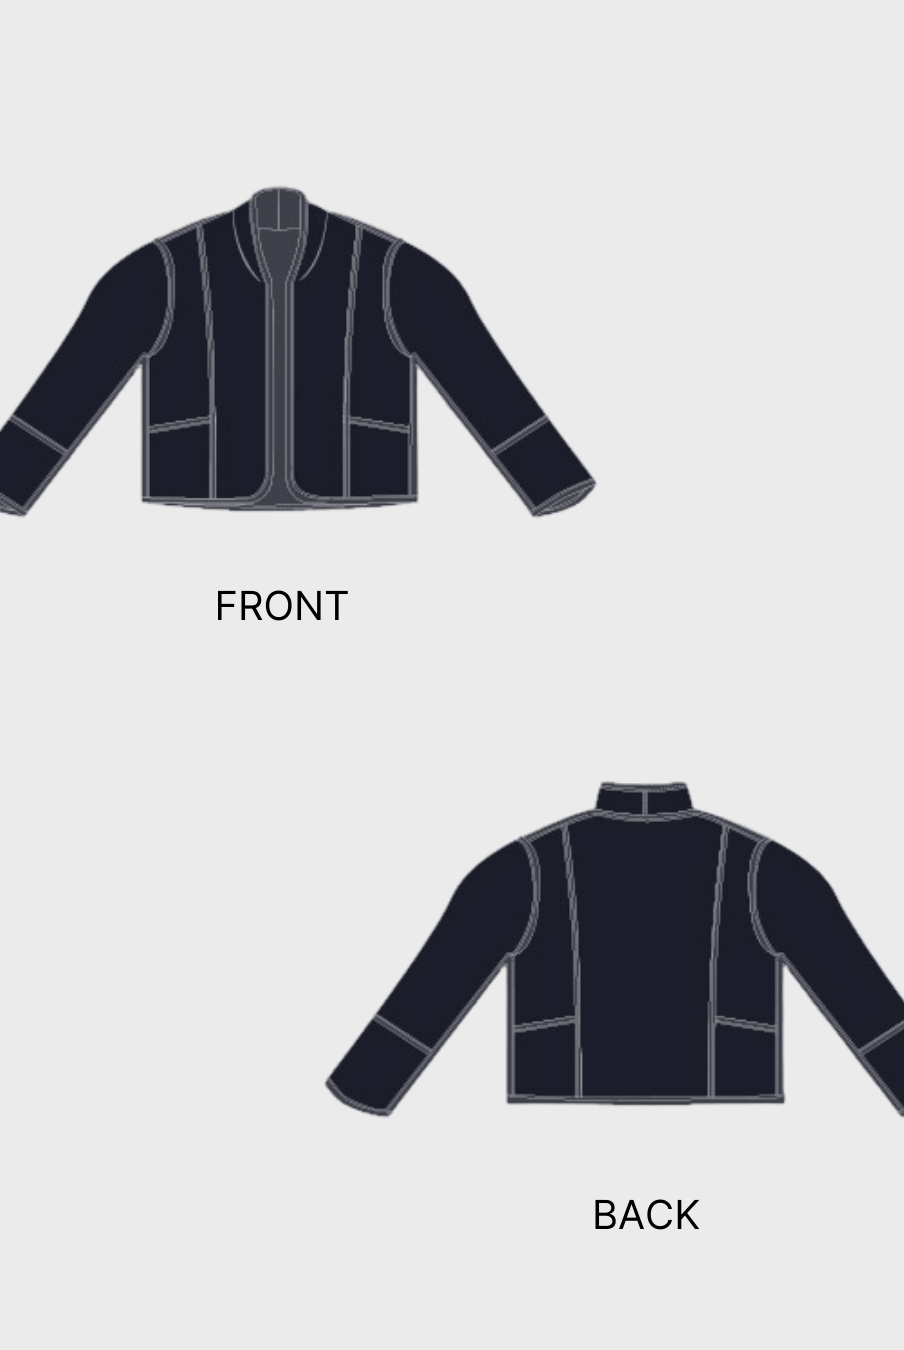
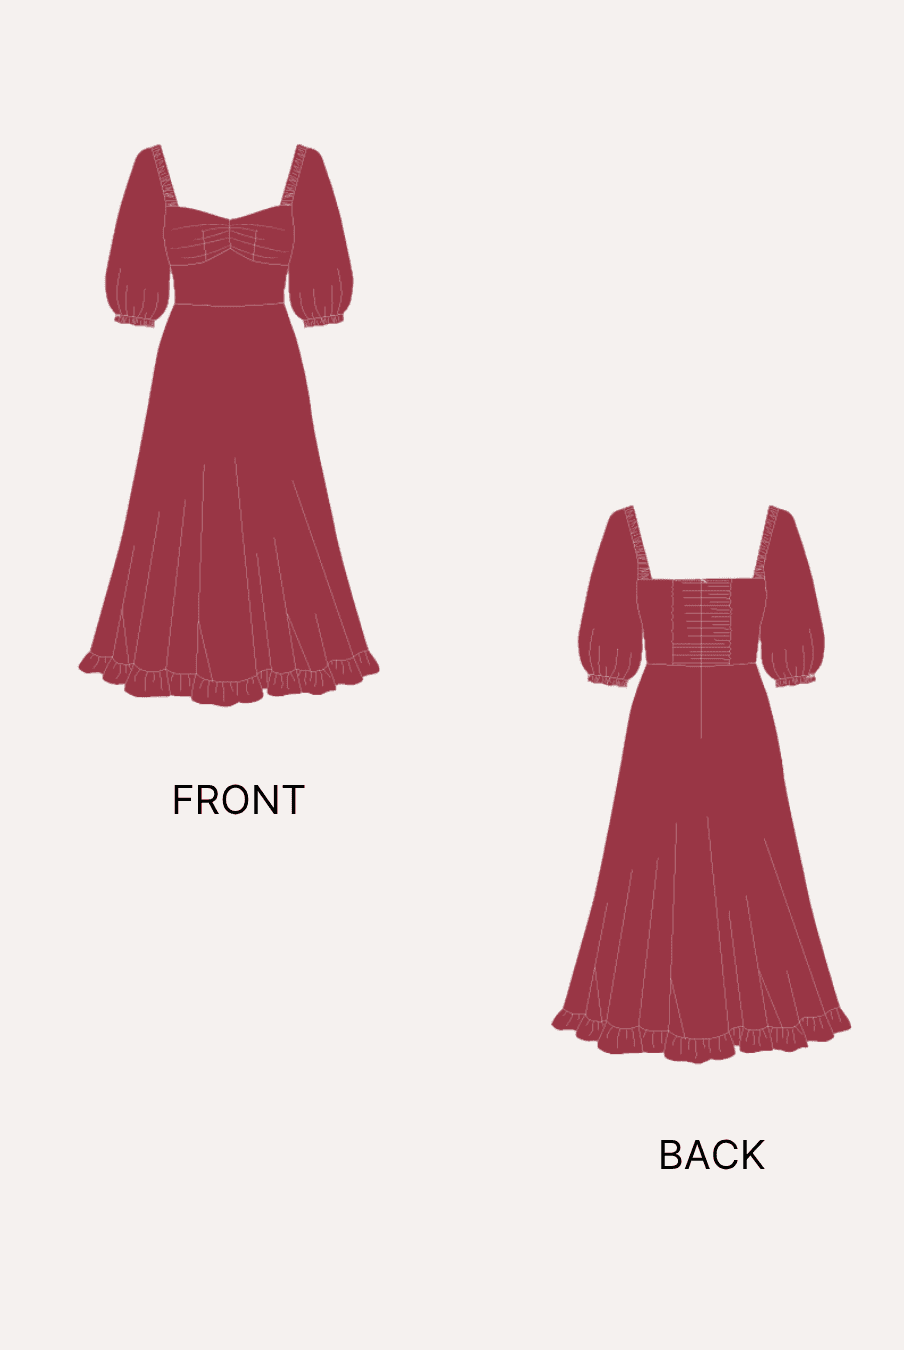
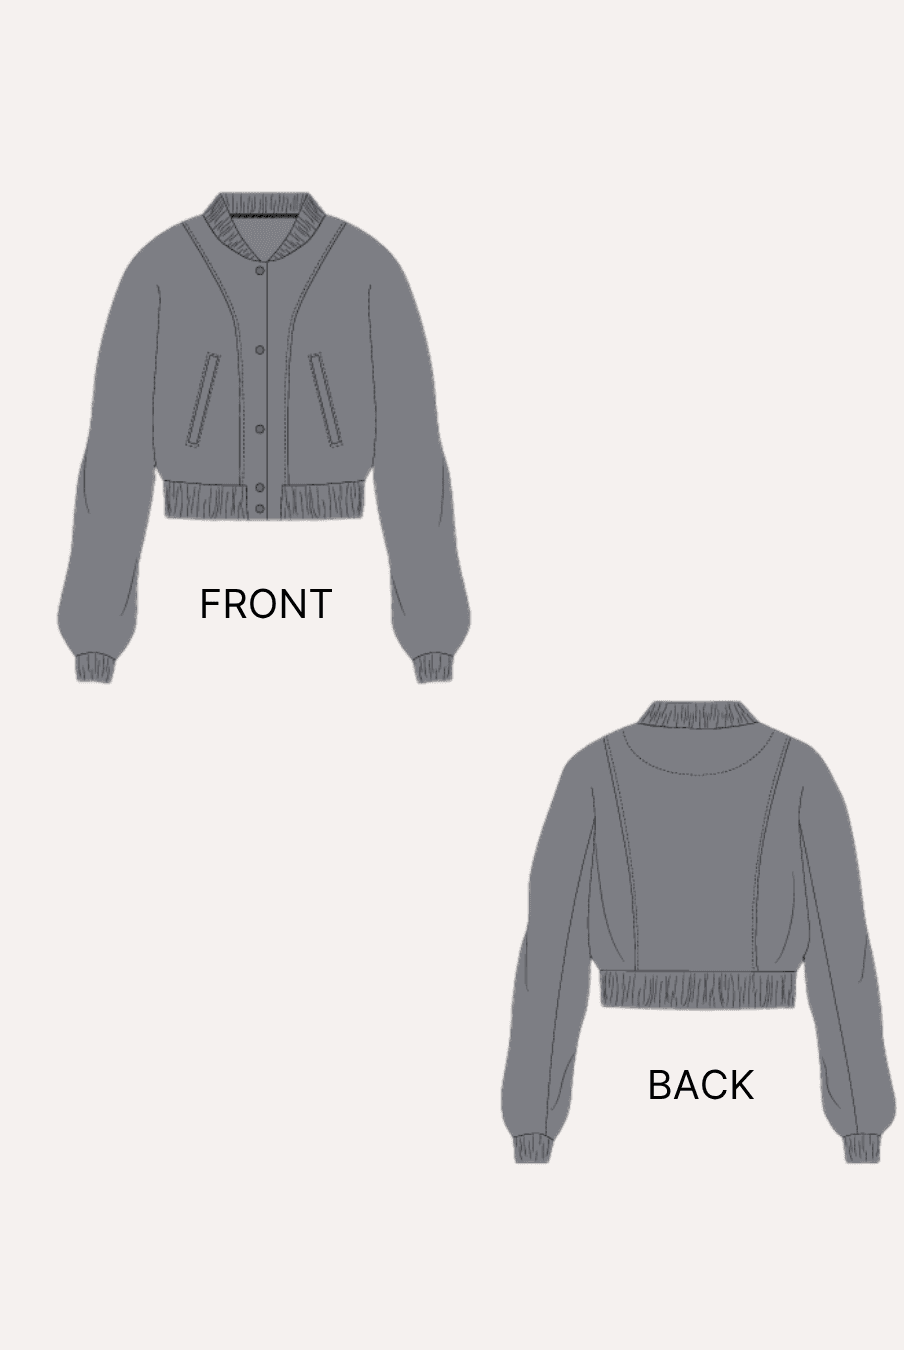
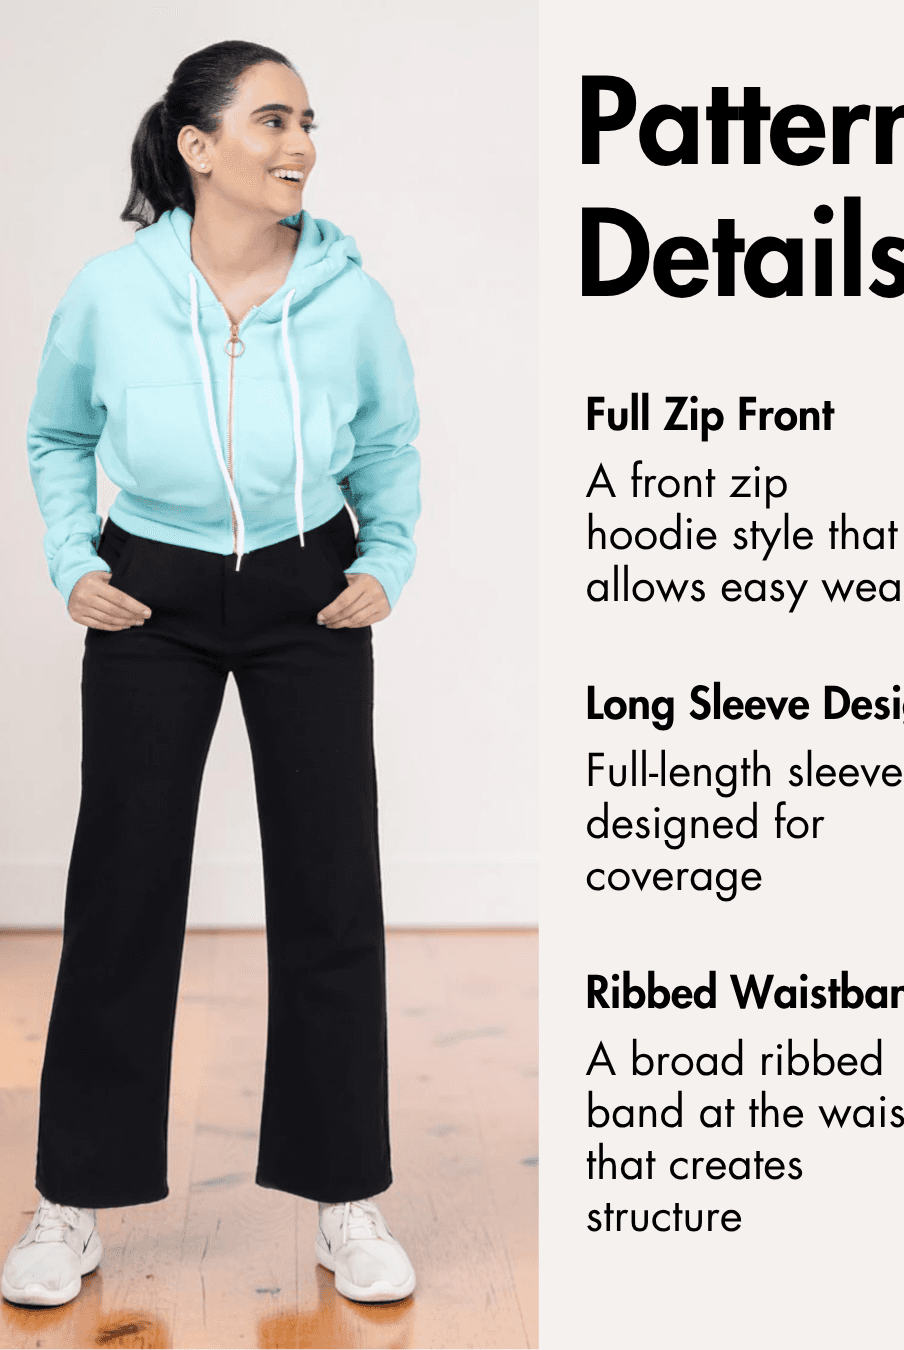
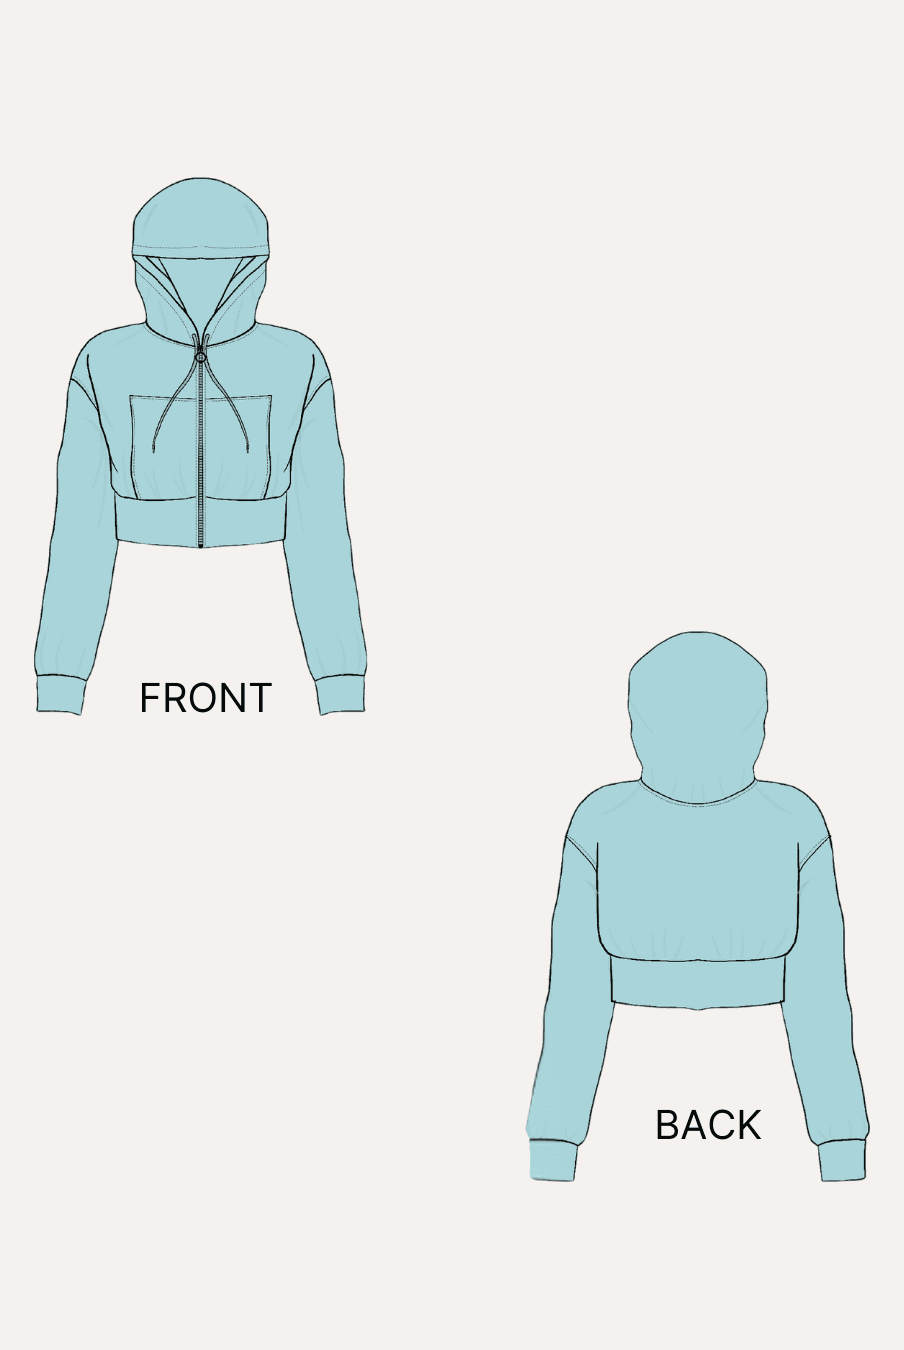
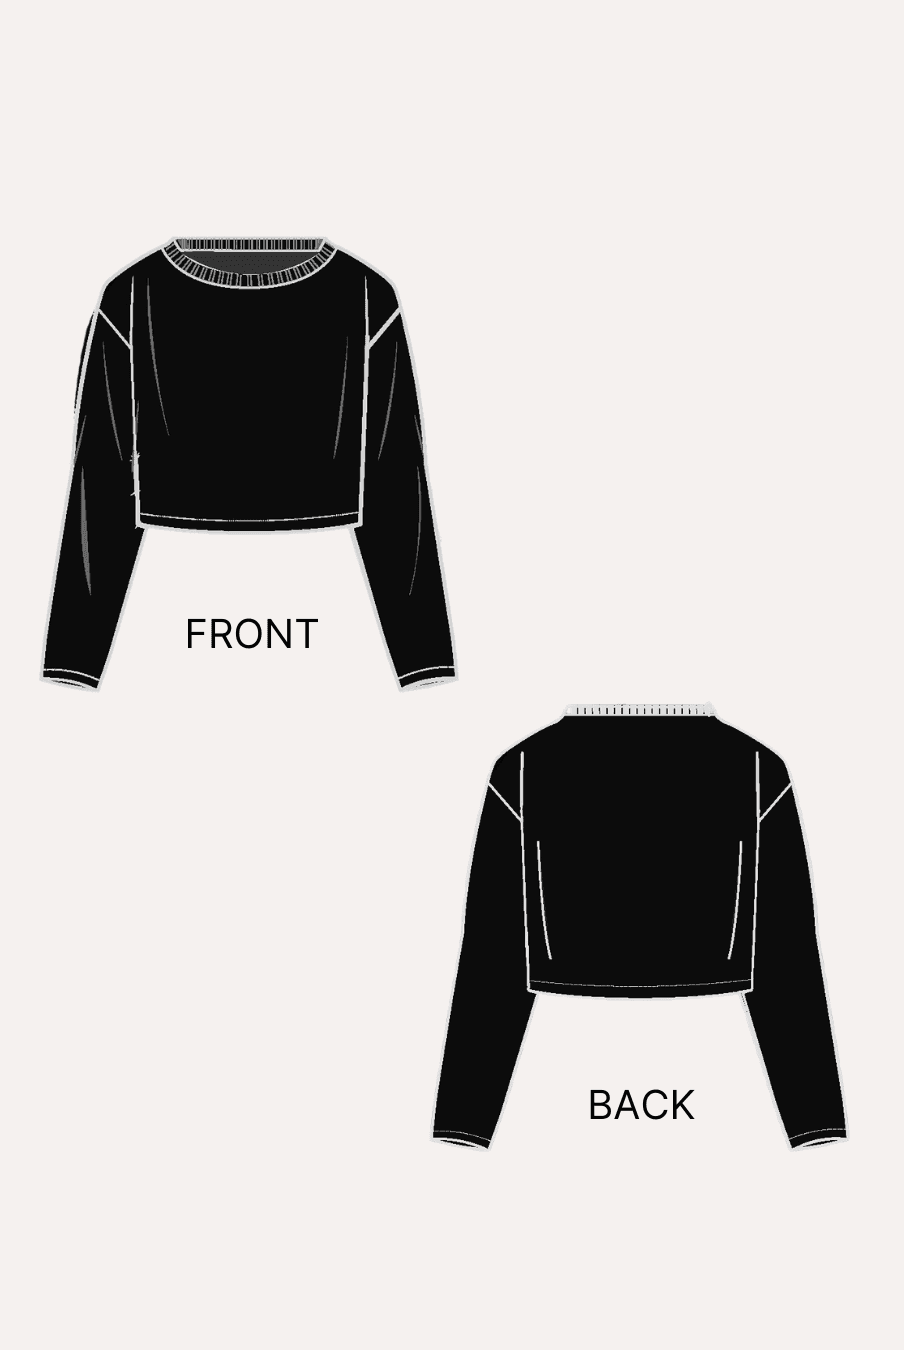
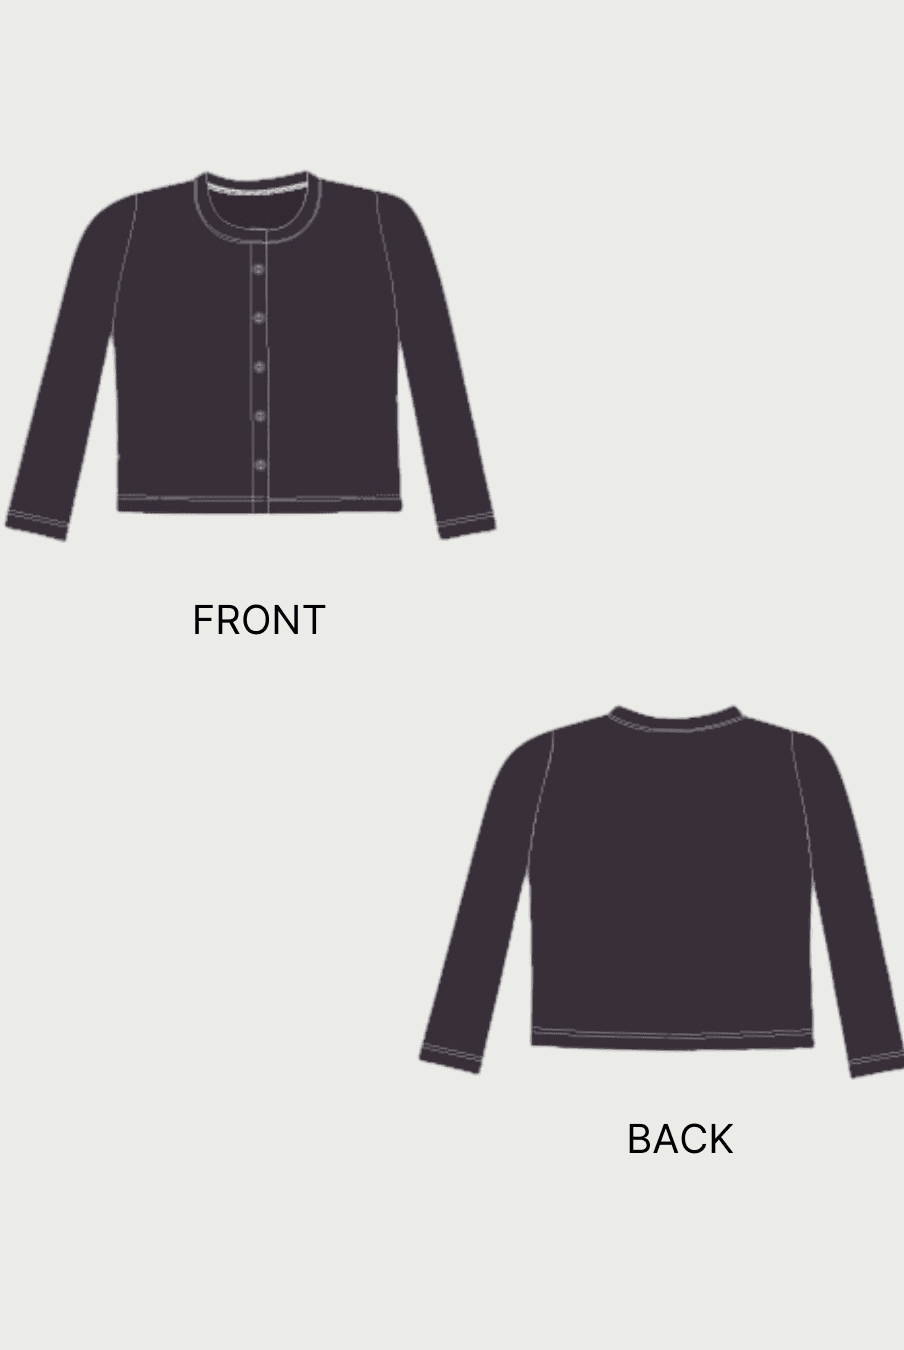
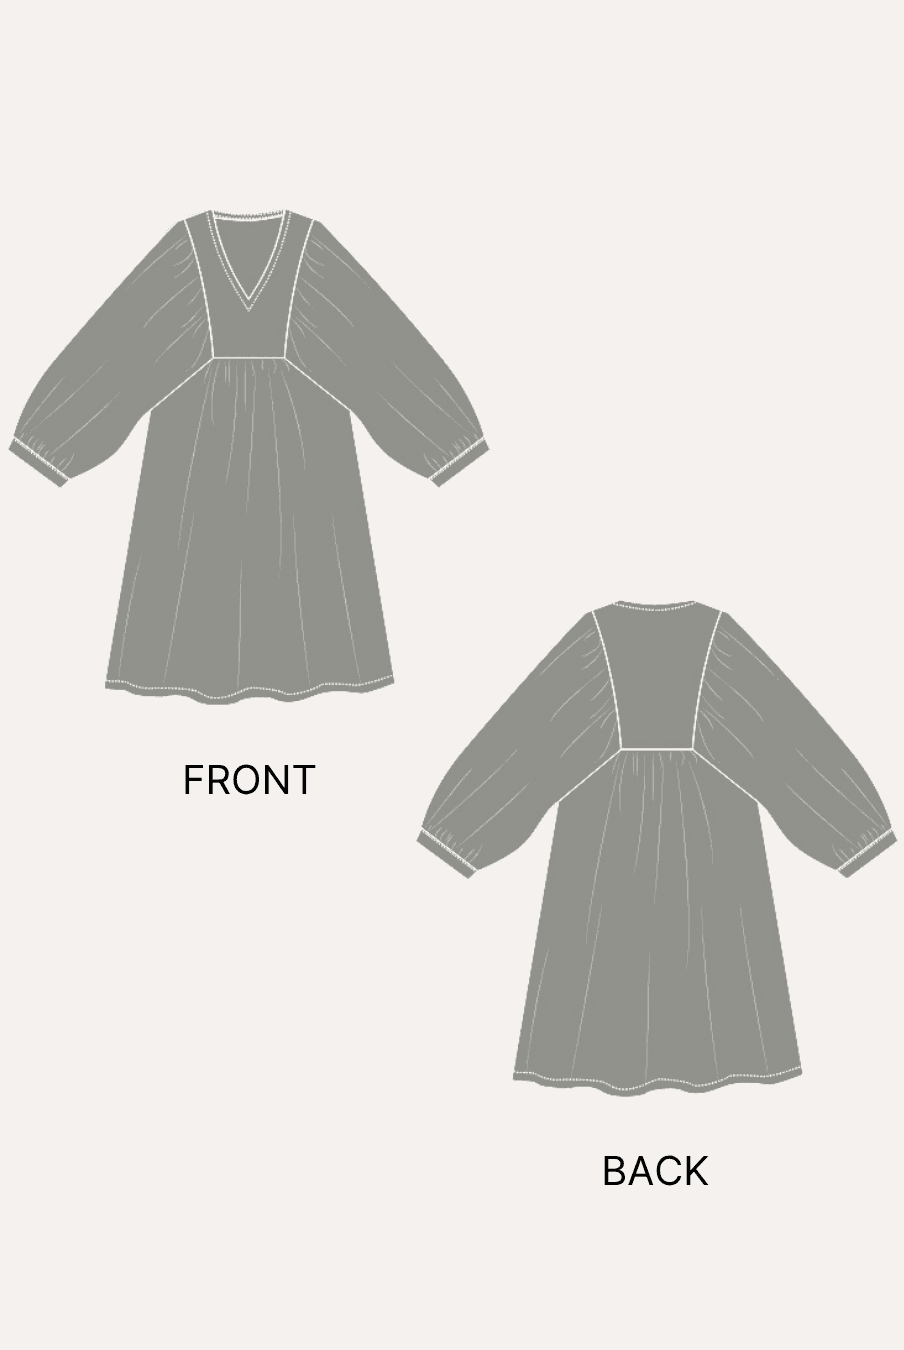
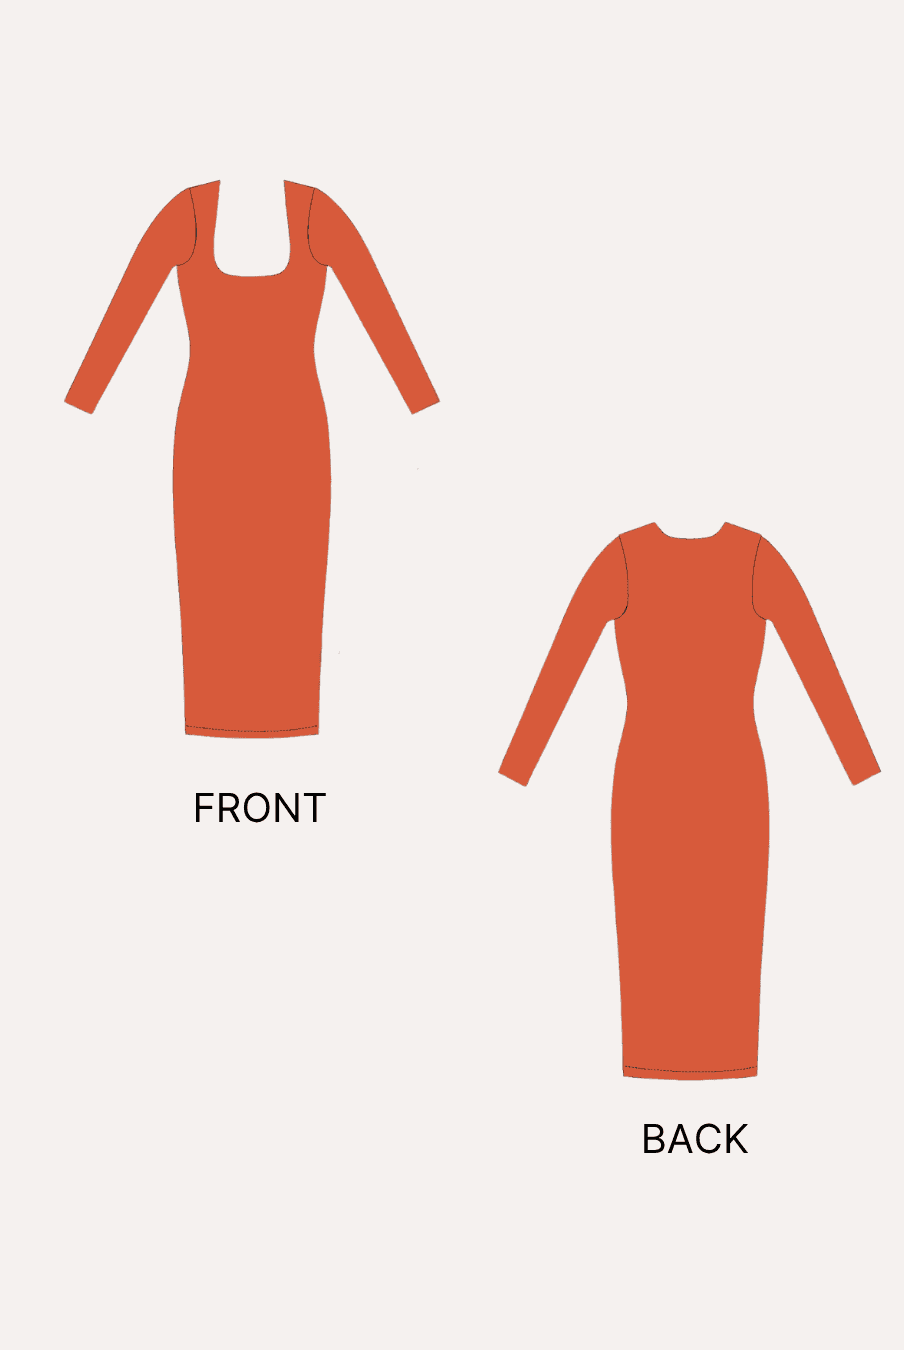
The Winslet's Myrtle Straight Hem Crop Shirt Sewing Pattern features a cropped waist, full-length sleeves, a straight hemline, and a classic point collar. Its relaxed fit skims the body while retaining the polished appearance of a button-down shirt.

Why Sew a Cropped Shirt?
- Create a button-down shirt with a modern cropped length.
- Practise making reinforced front plackets for buttons and buttonholes.
- Learn how to construct a classic point collar with a collar band.
- Sew full-length sleeves into shaped armholes.
- Practise finishing straight shirt and sleeve hems neatly.
- Create a relaxed shirt that pairs well with high-waisted trousers and skirts.
- Sew a versatile garment suitable for casual, smart-casual, and evening outfits.
Why Choose the Winslet's Myrtle Straight Hem Crop Shirt Sewing Pattern?

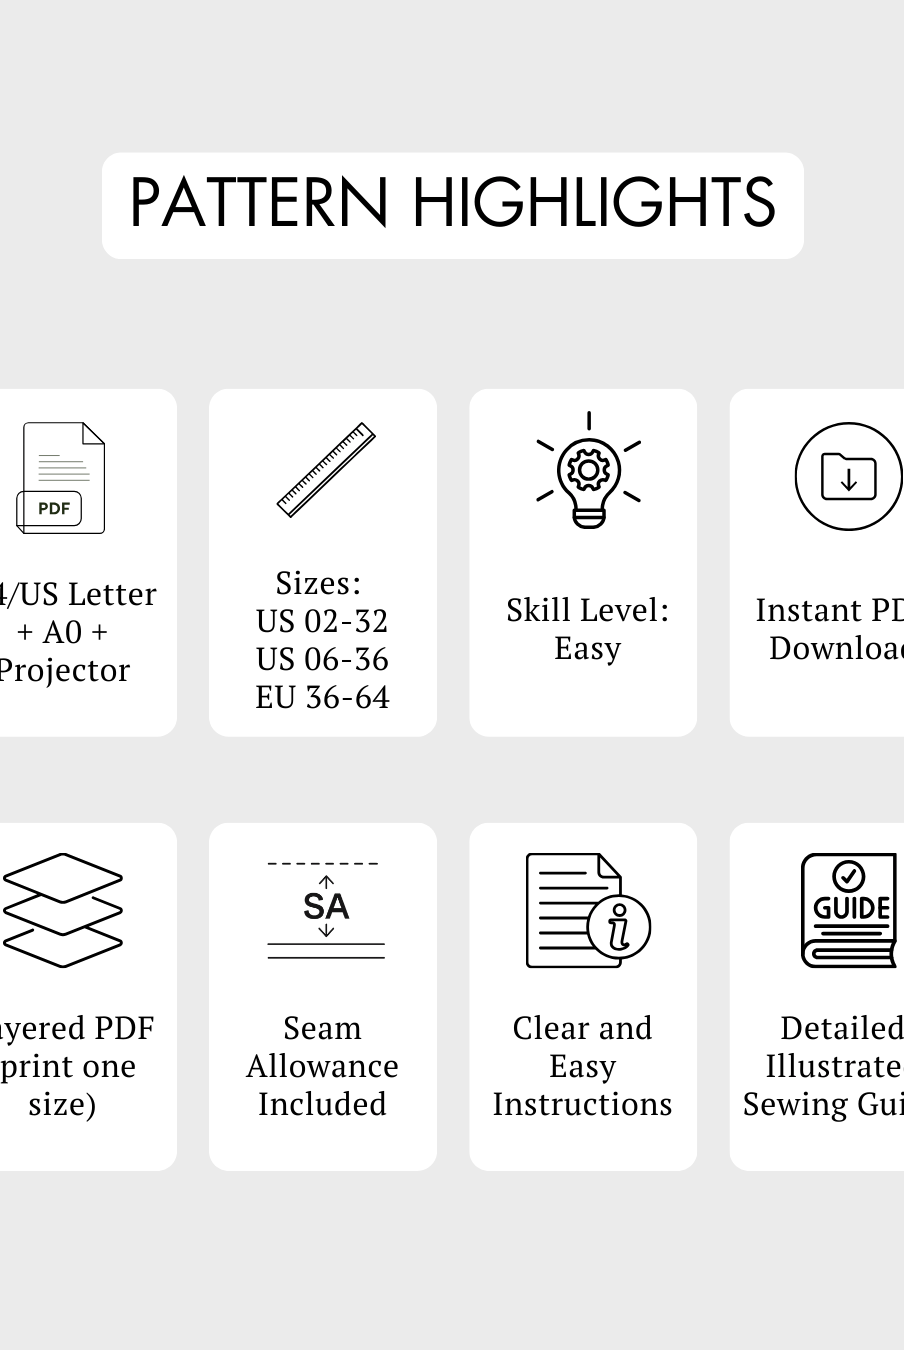
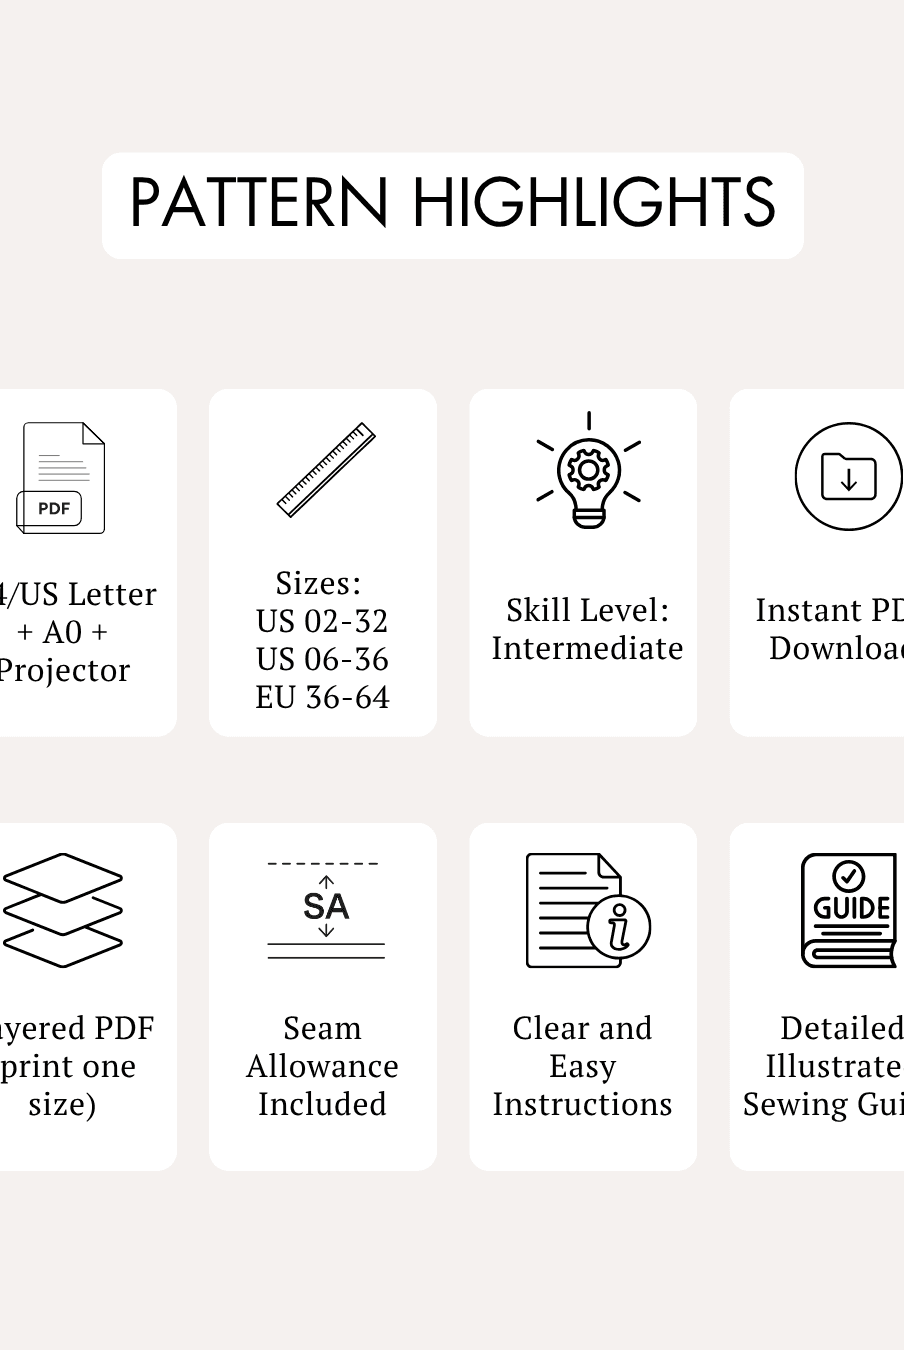
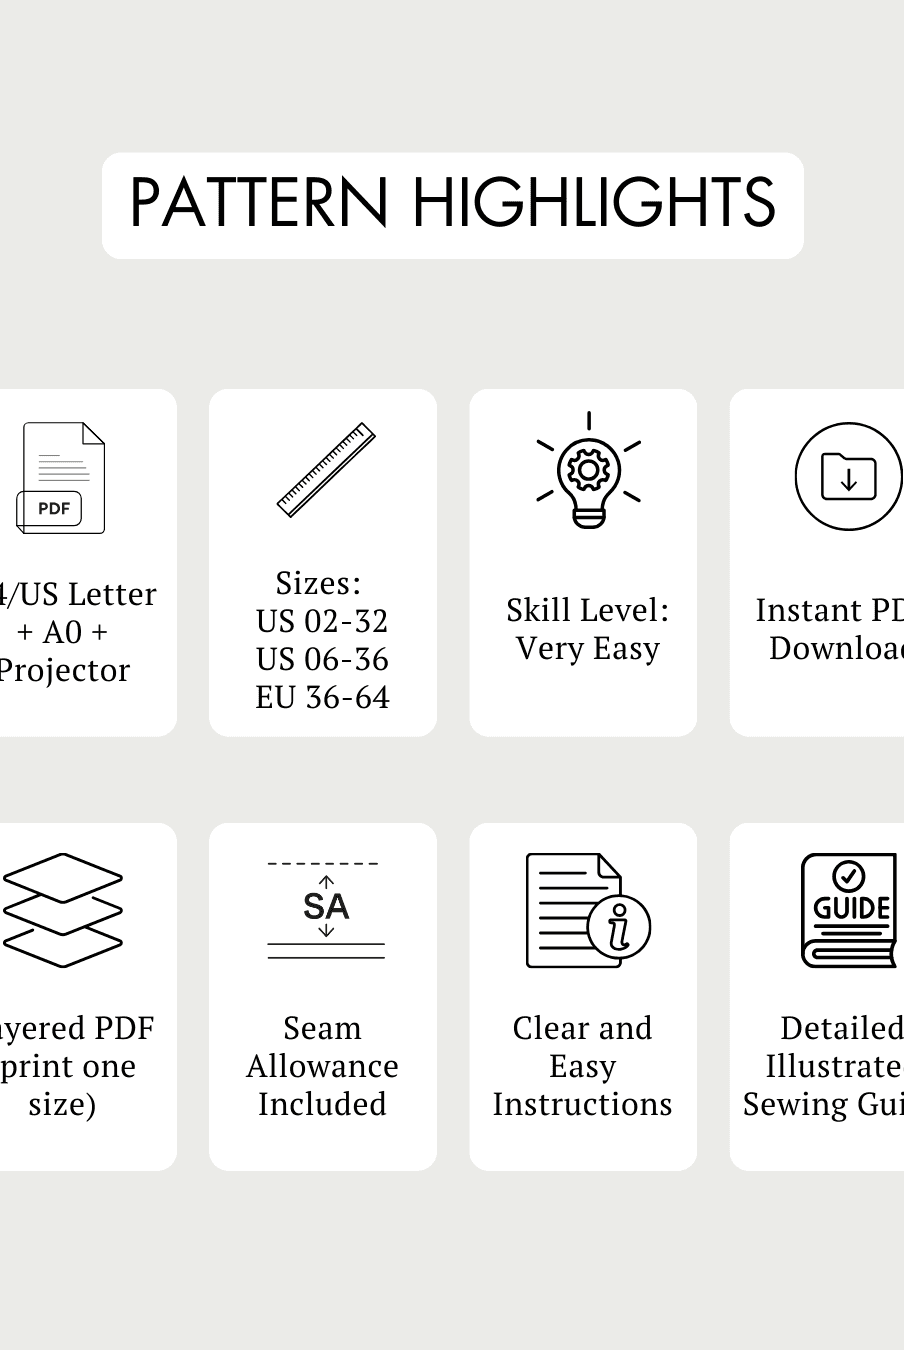
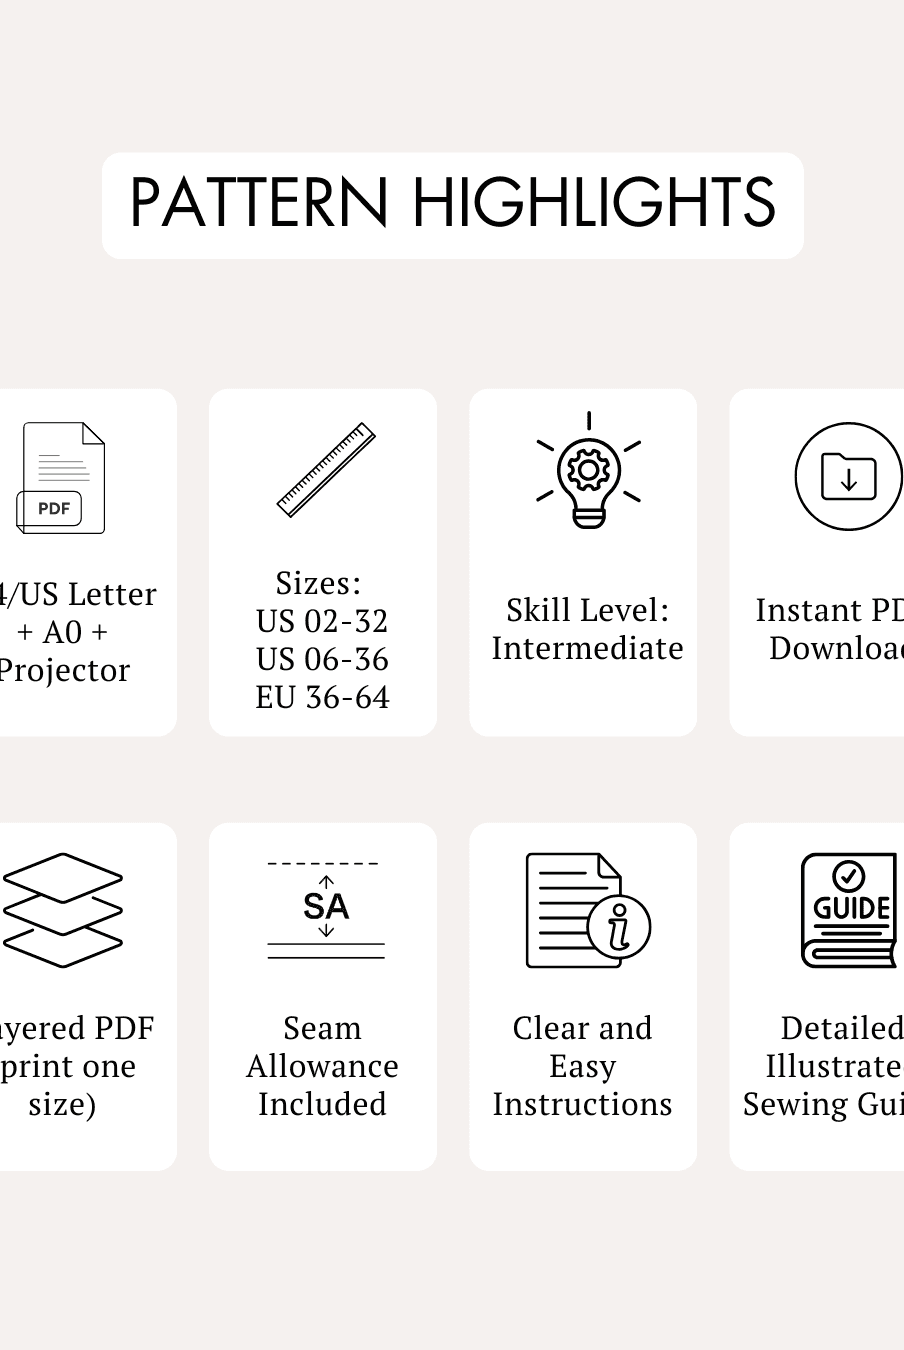
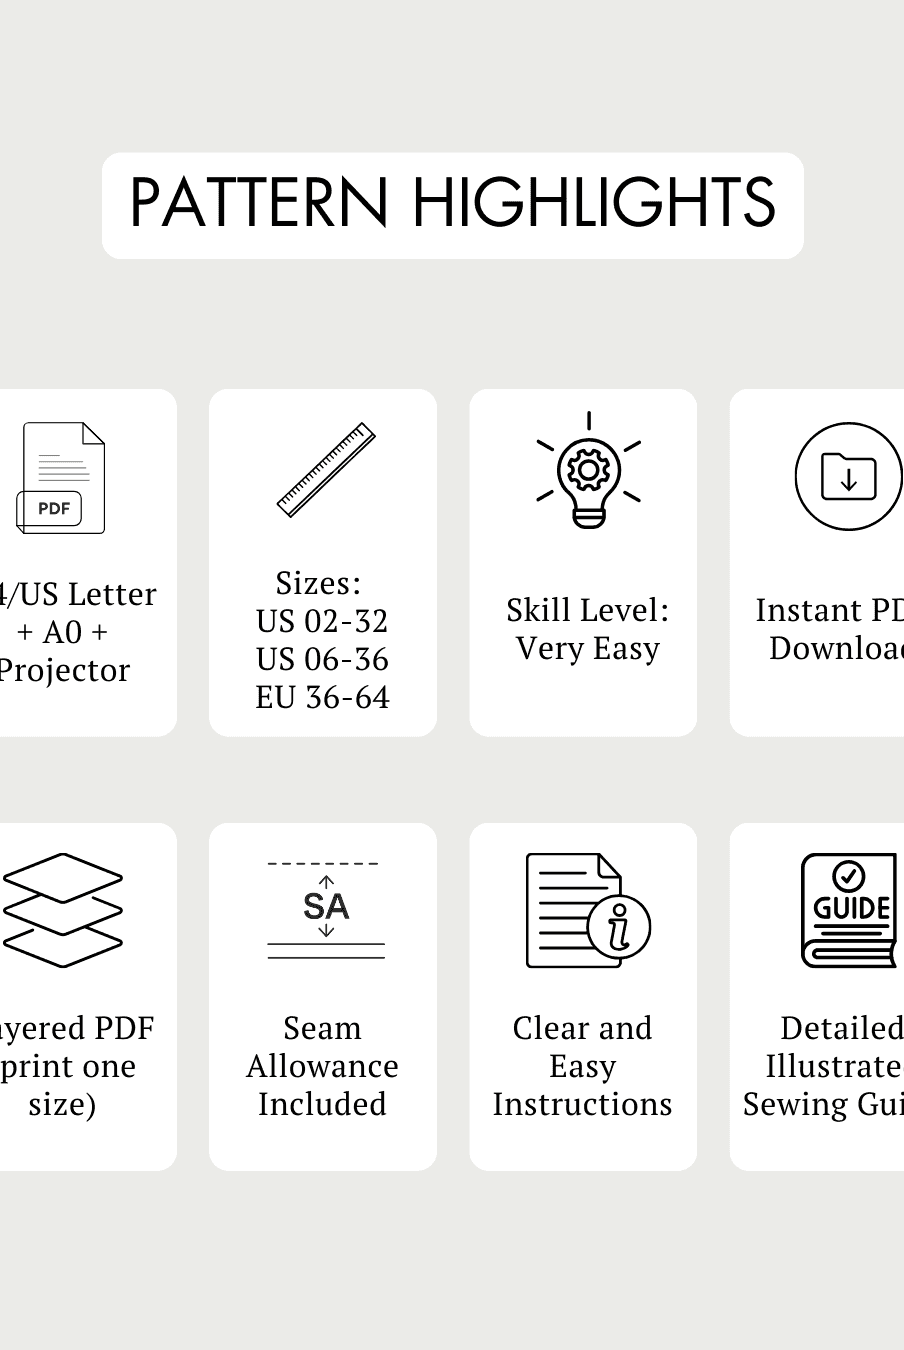
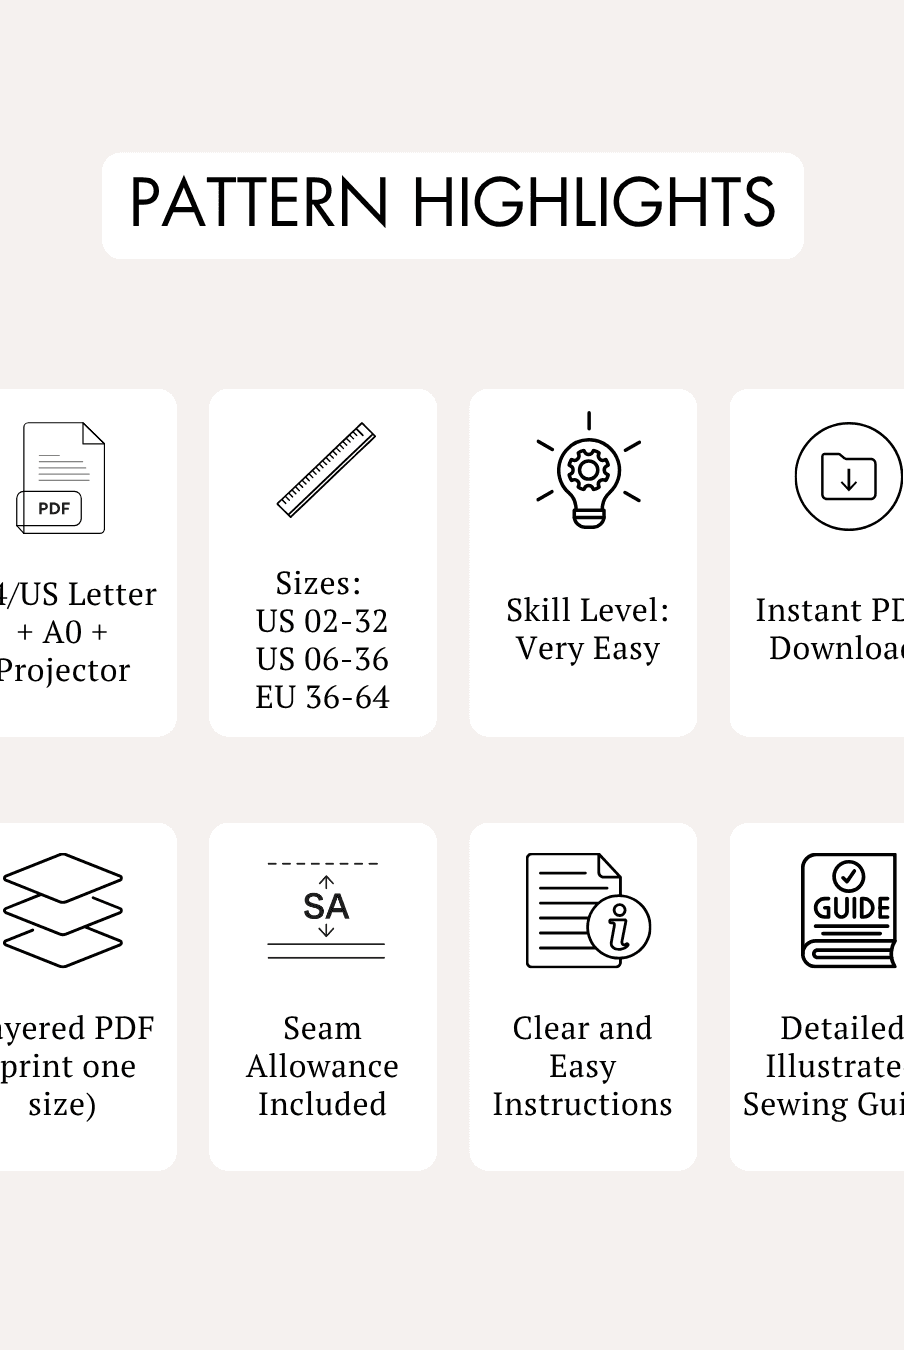
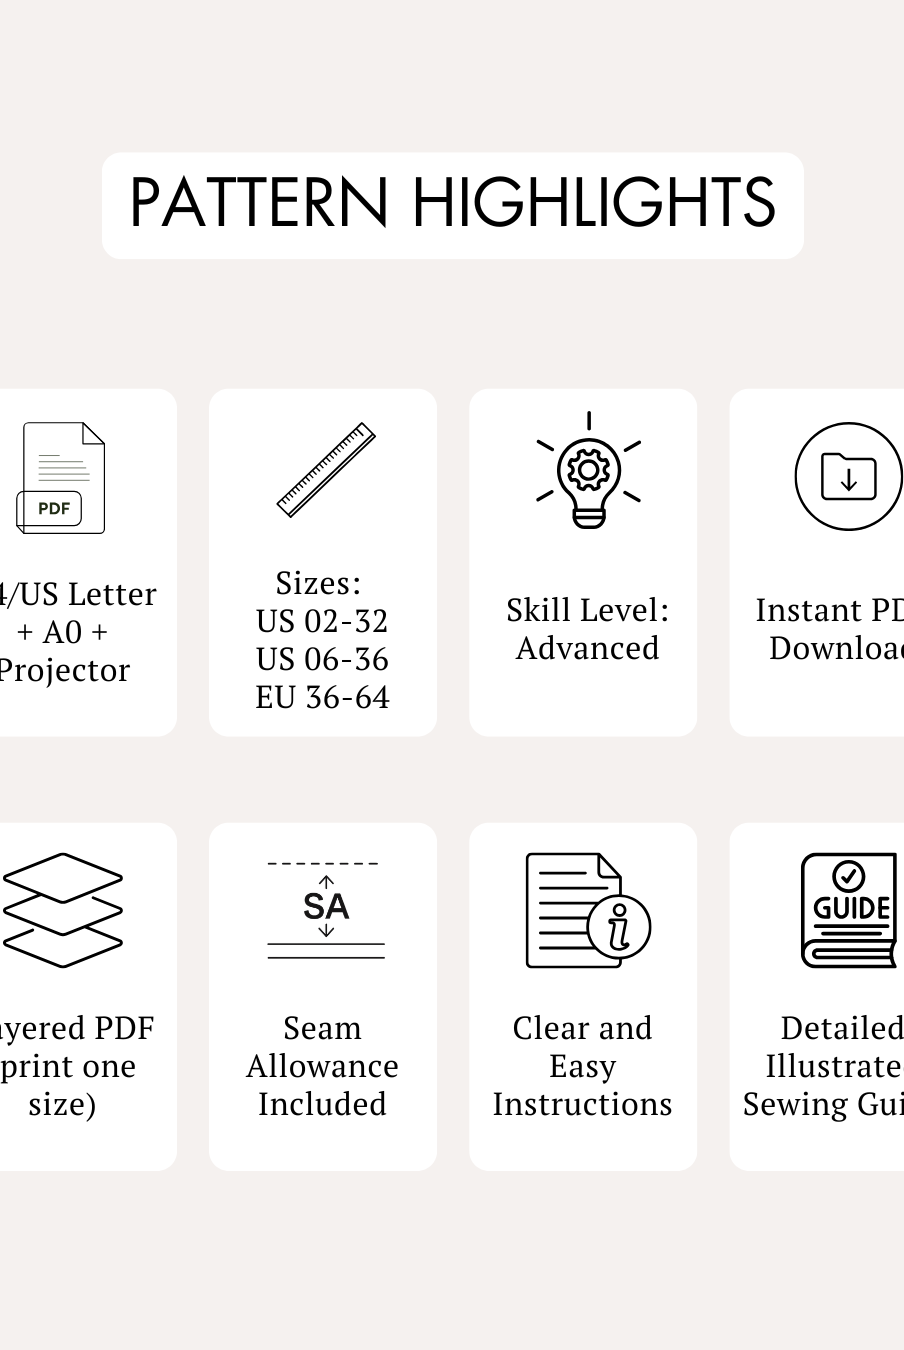
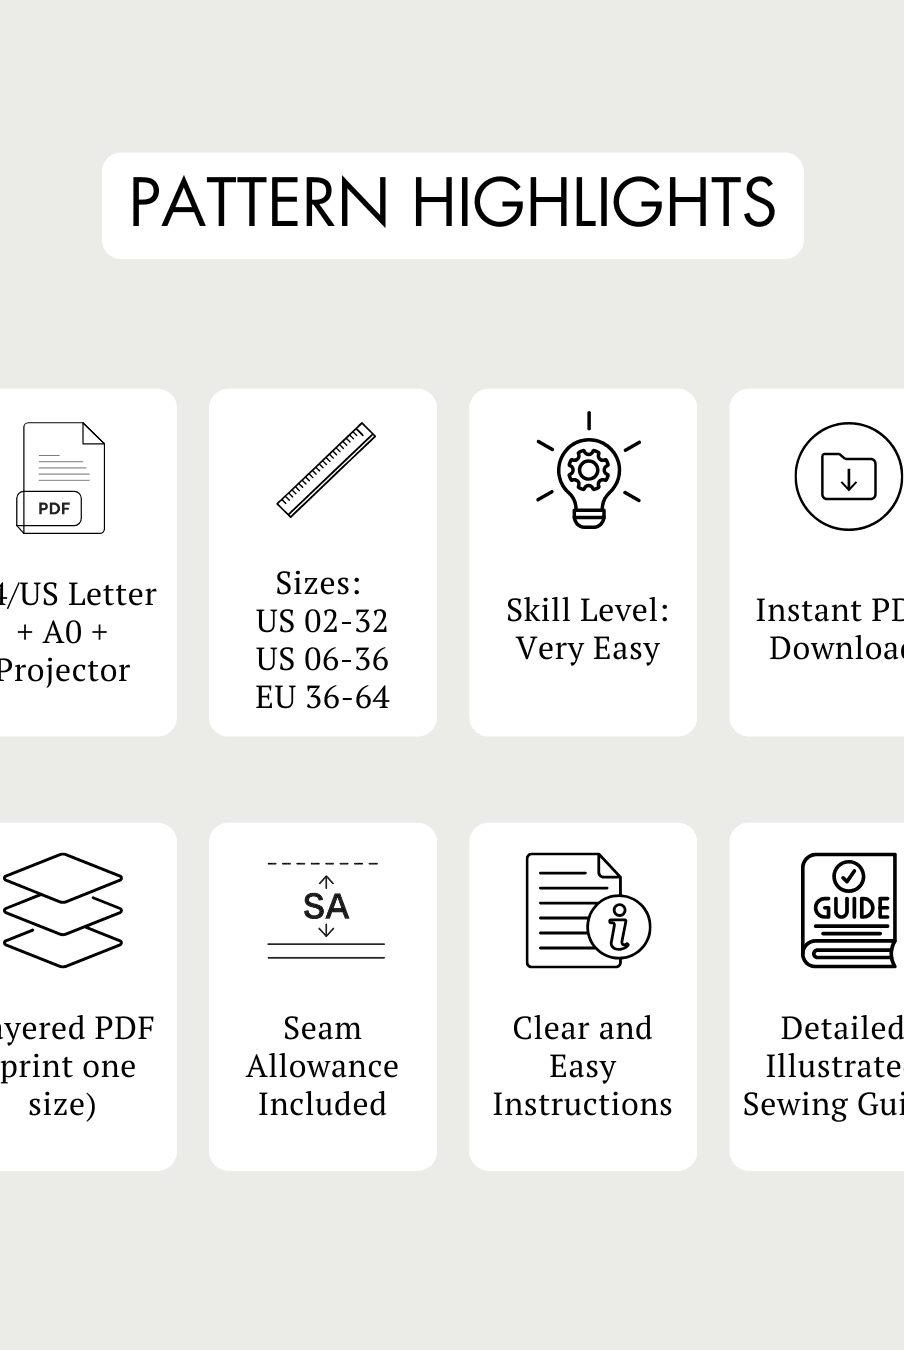
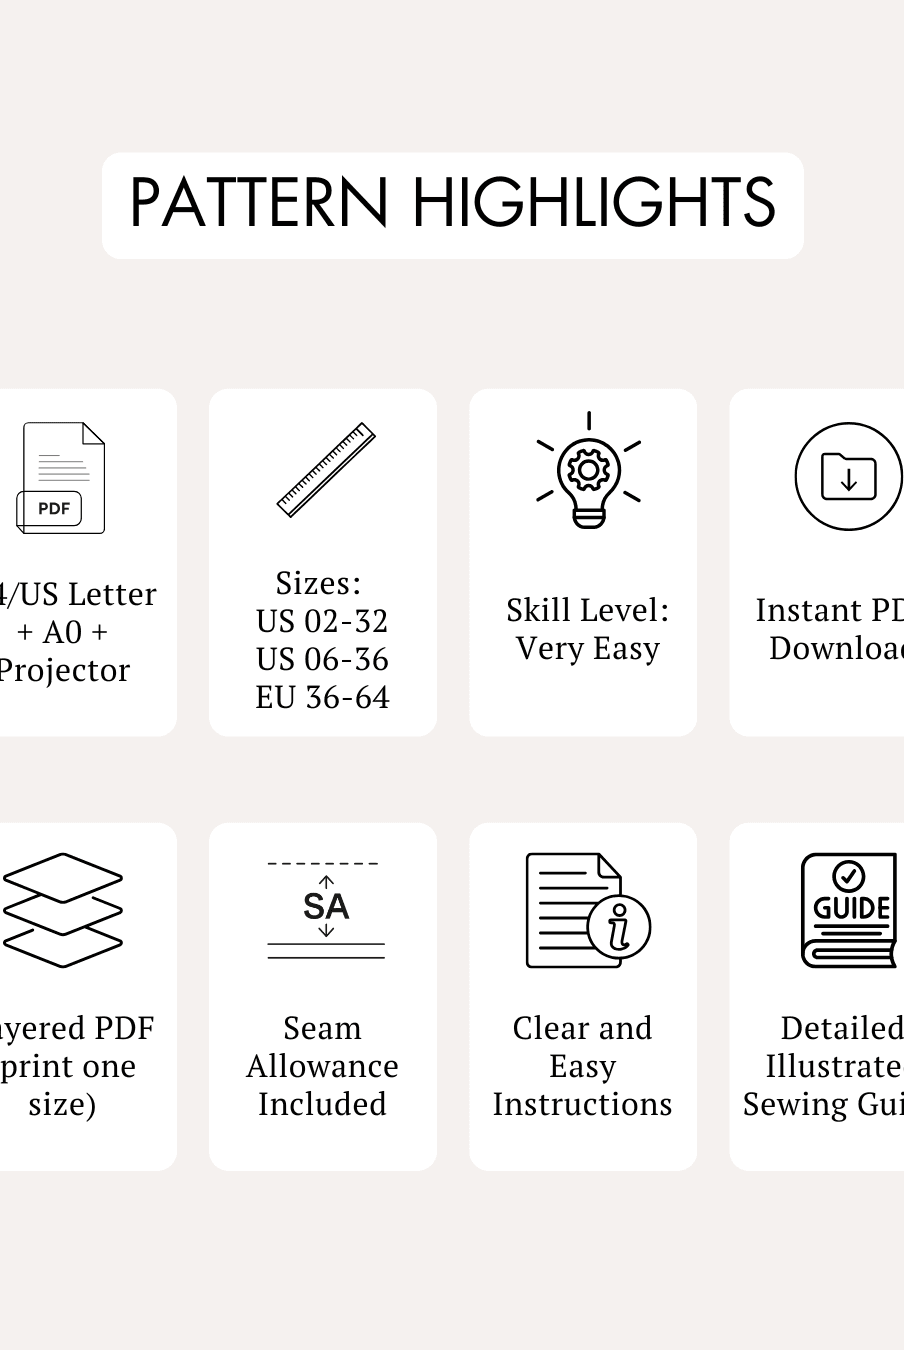
- Skill Level: Intermediate
- Major Design Features: Cropped waist, straight hemline, full-length sleeves, classic point collar, button-front closure, and a relaxed fit that skims the body.
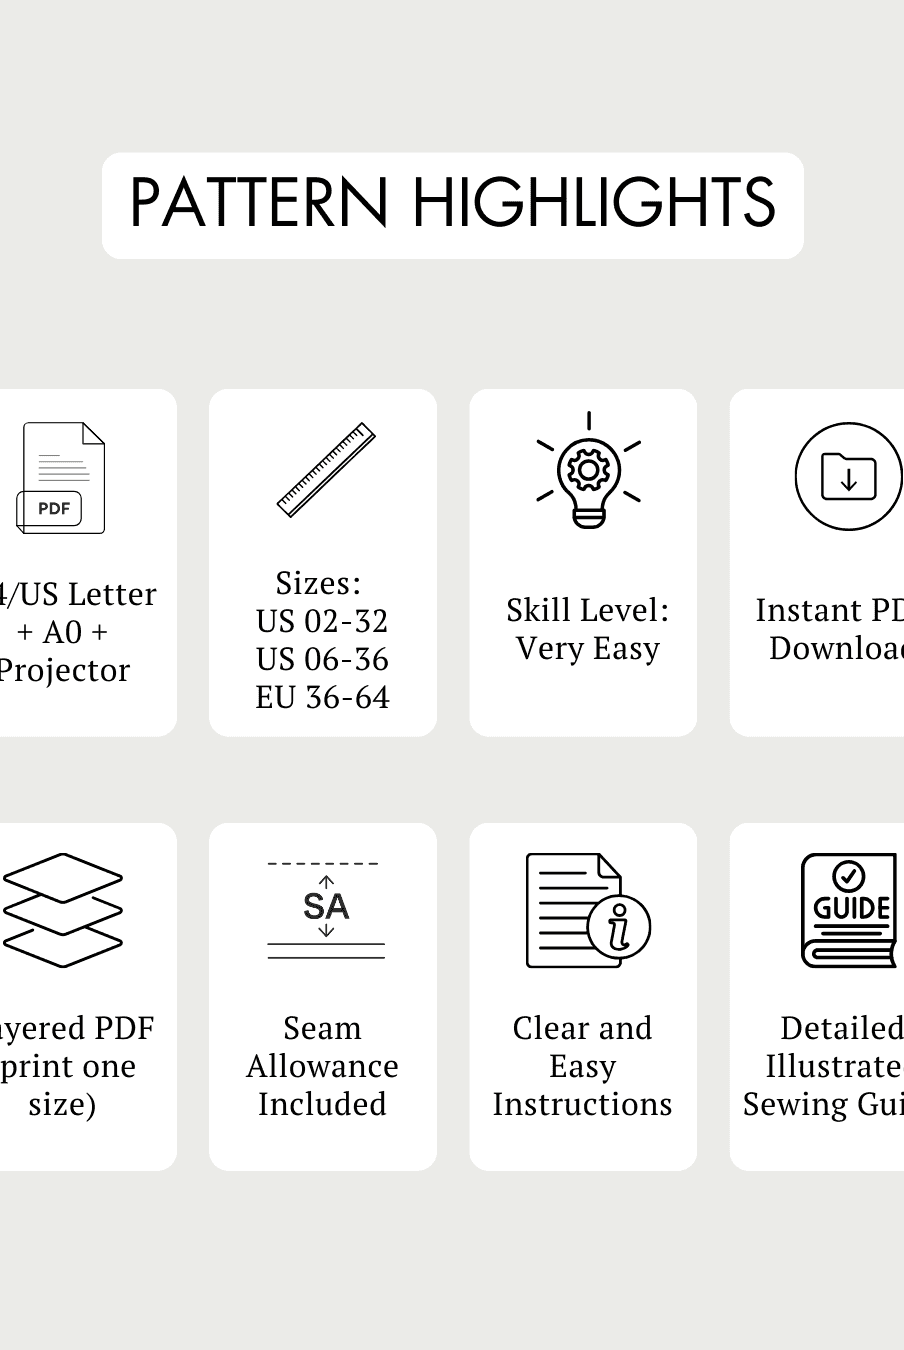
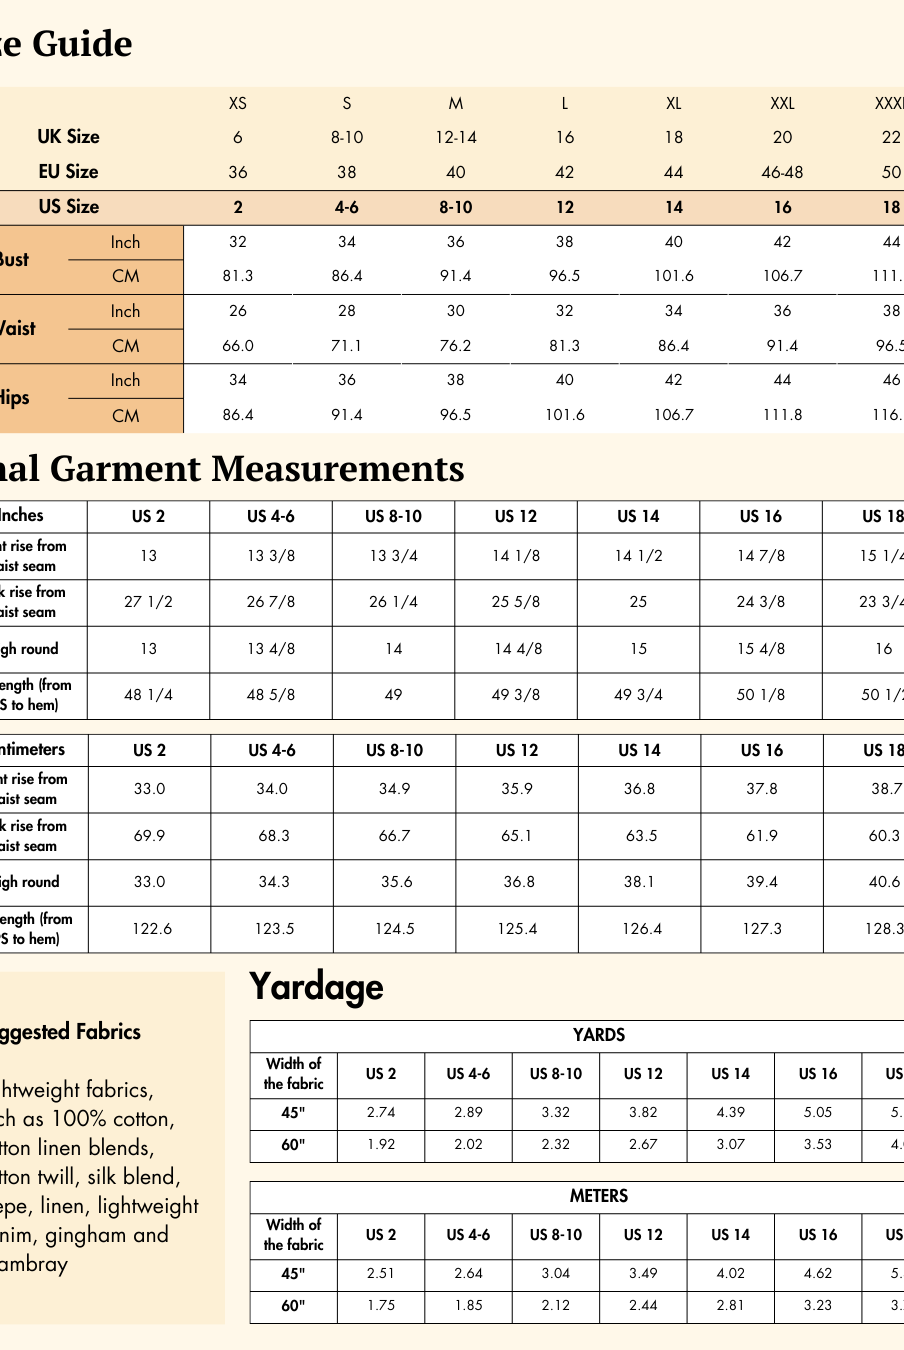
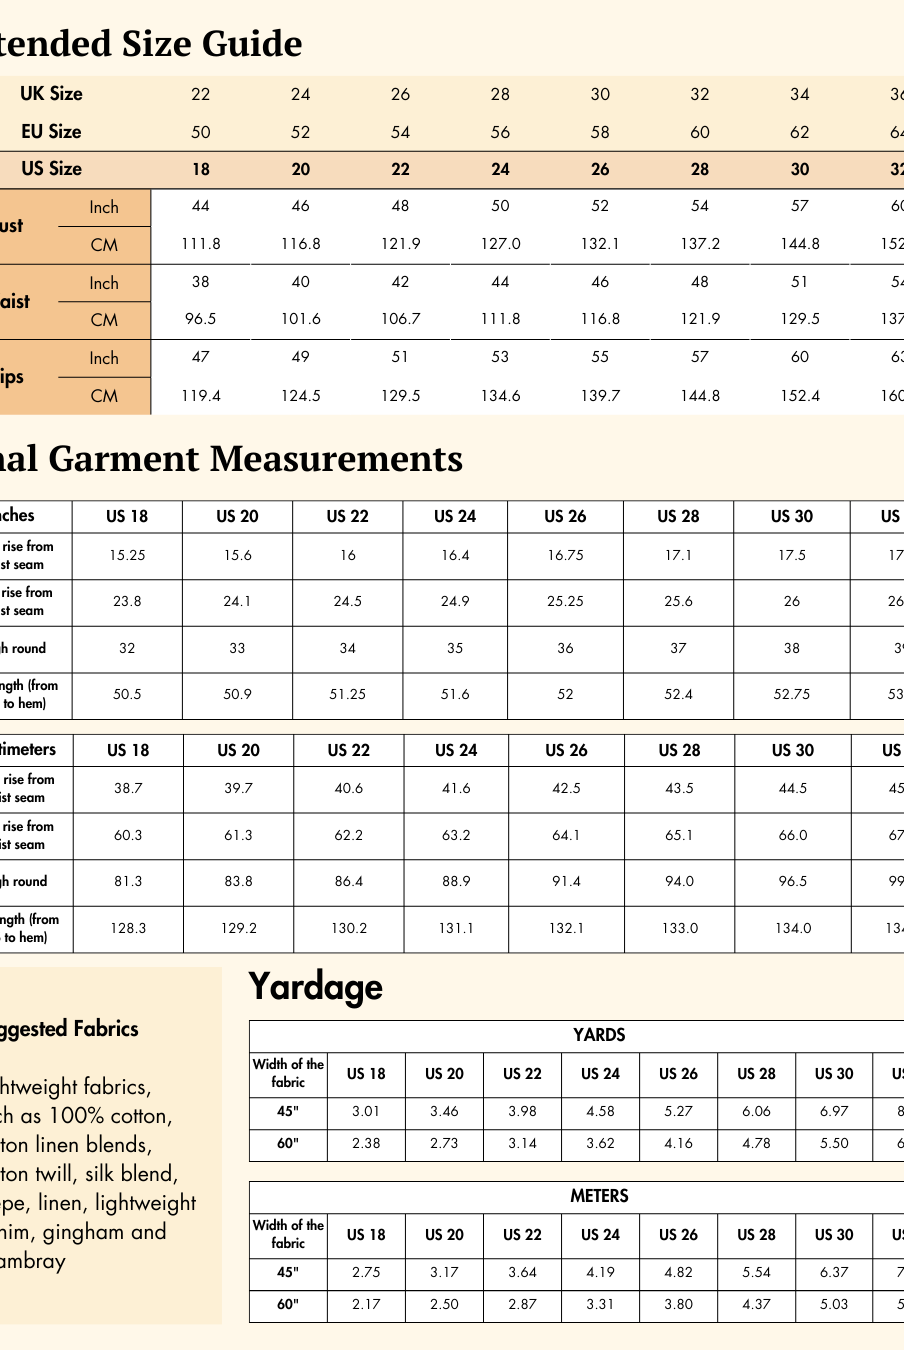
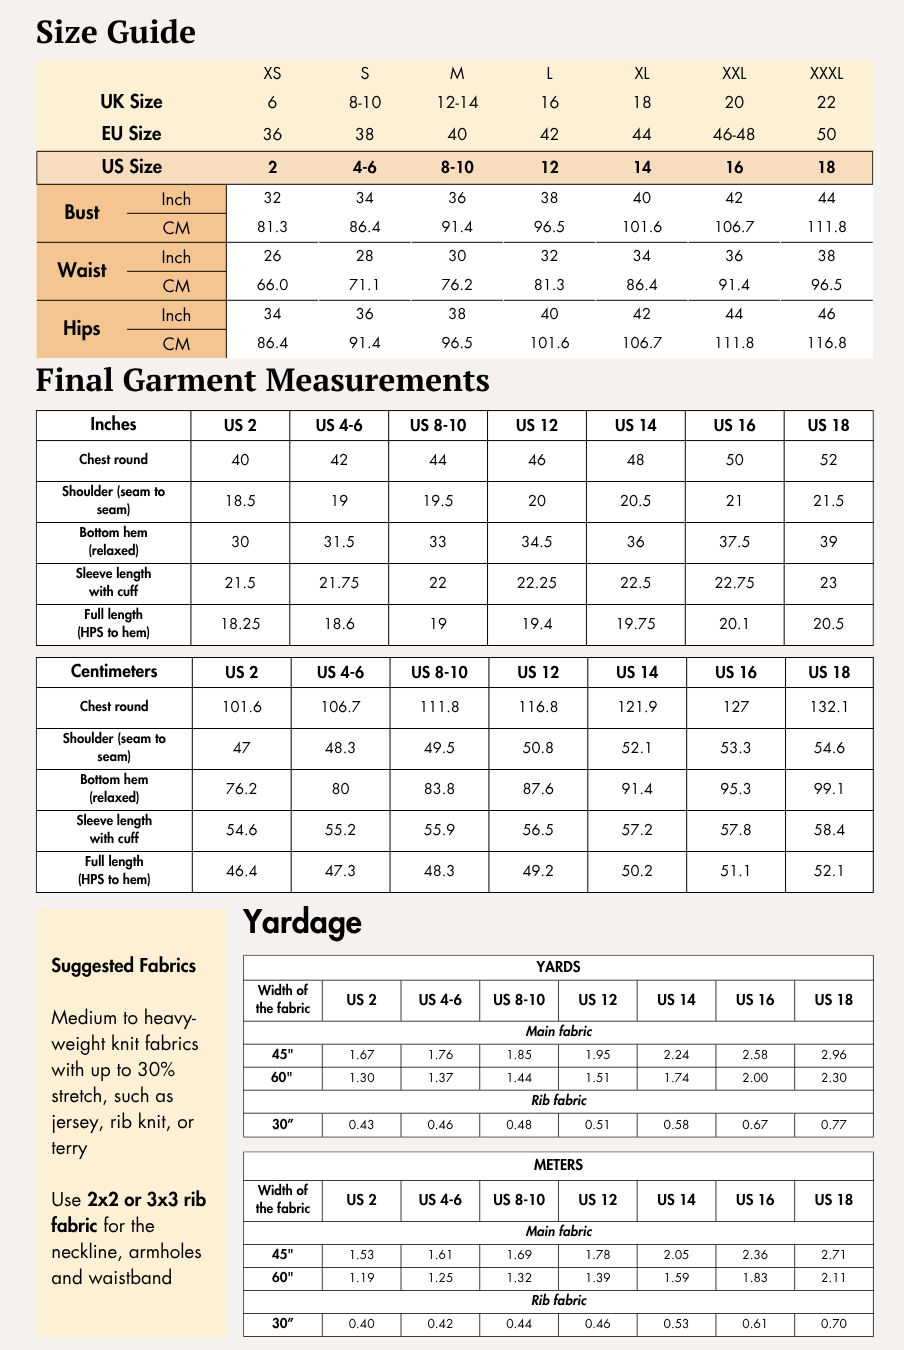
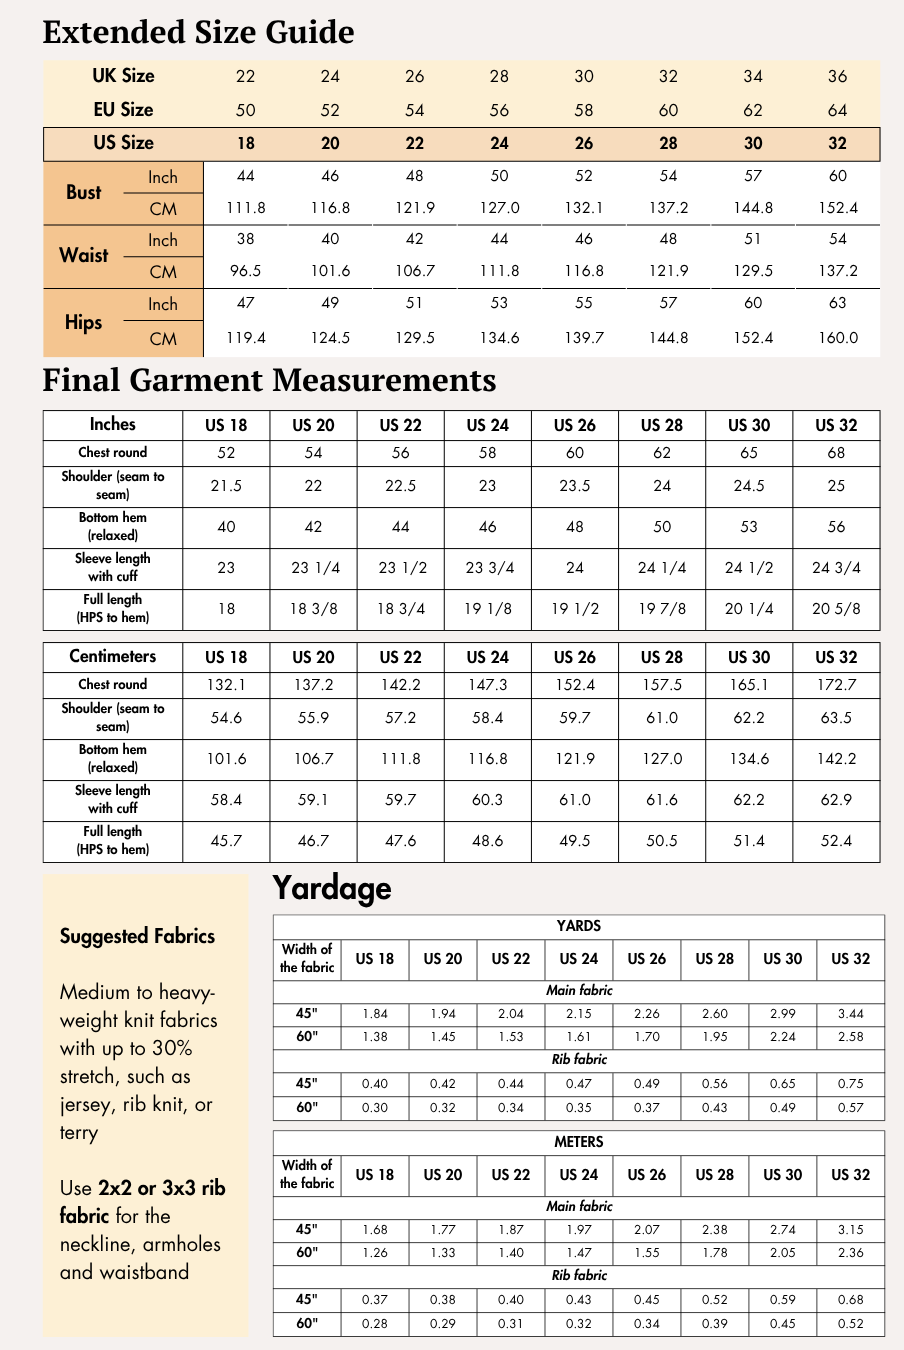
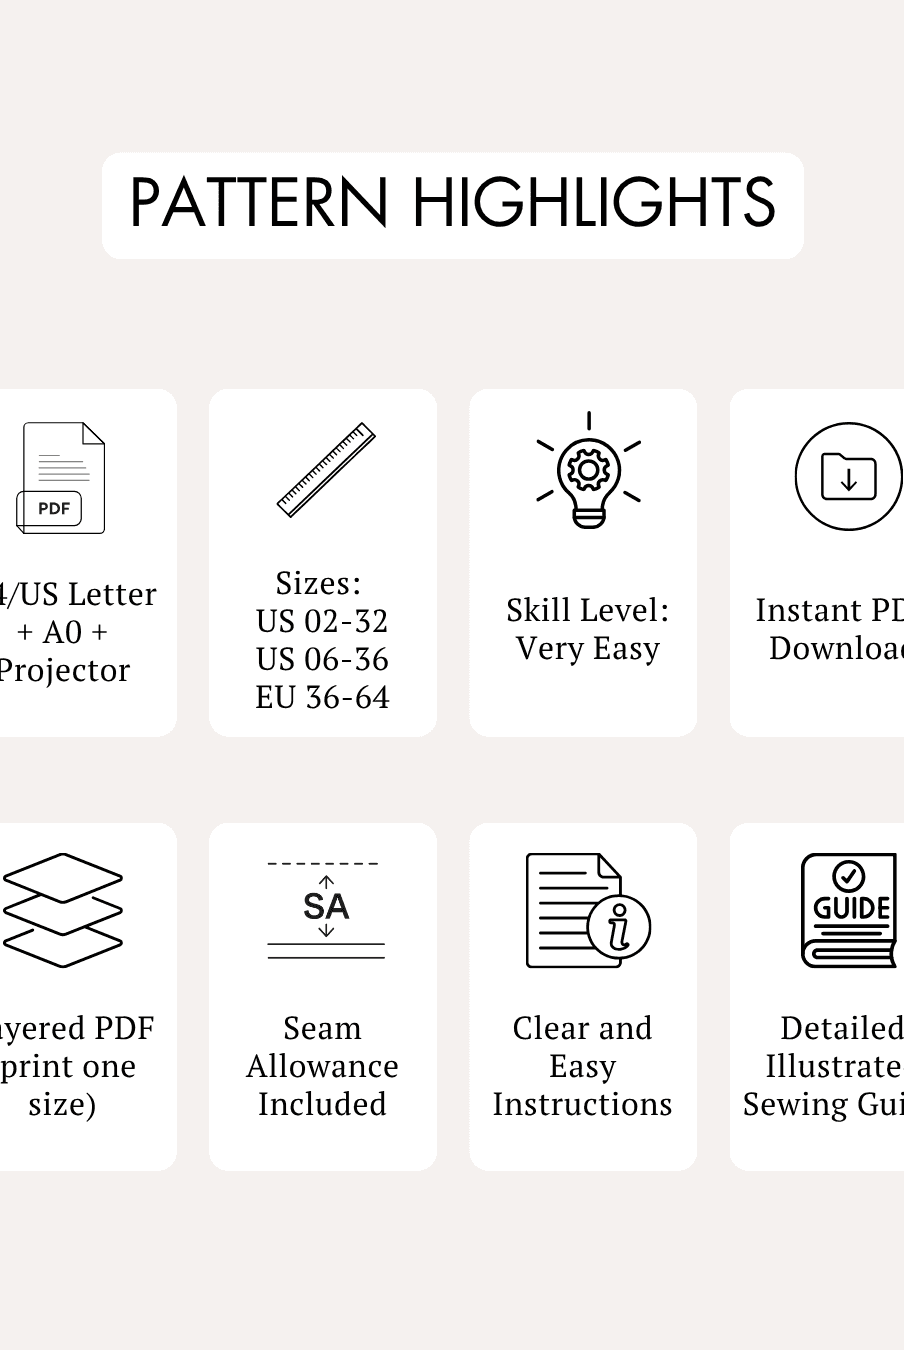
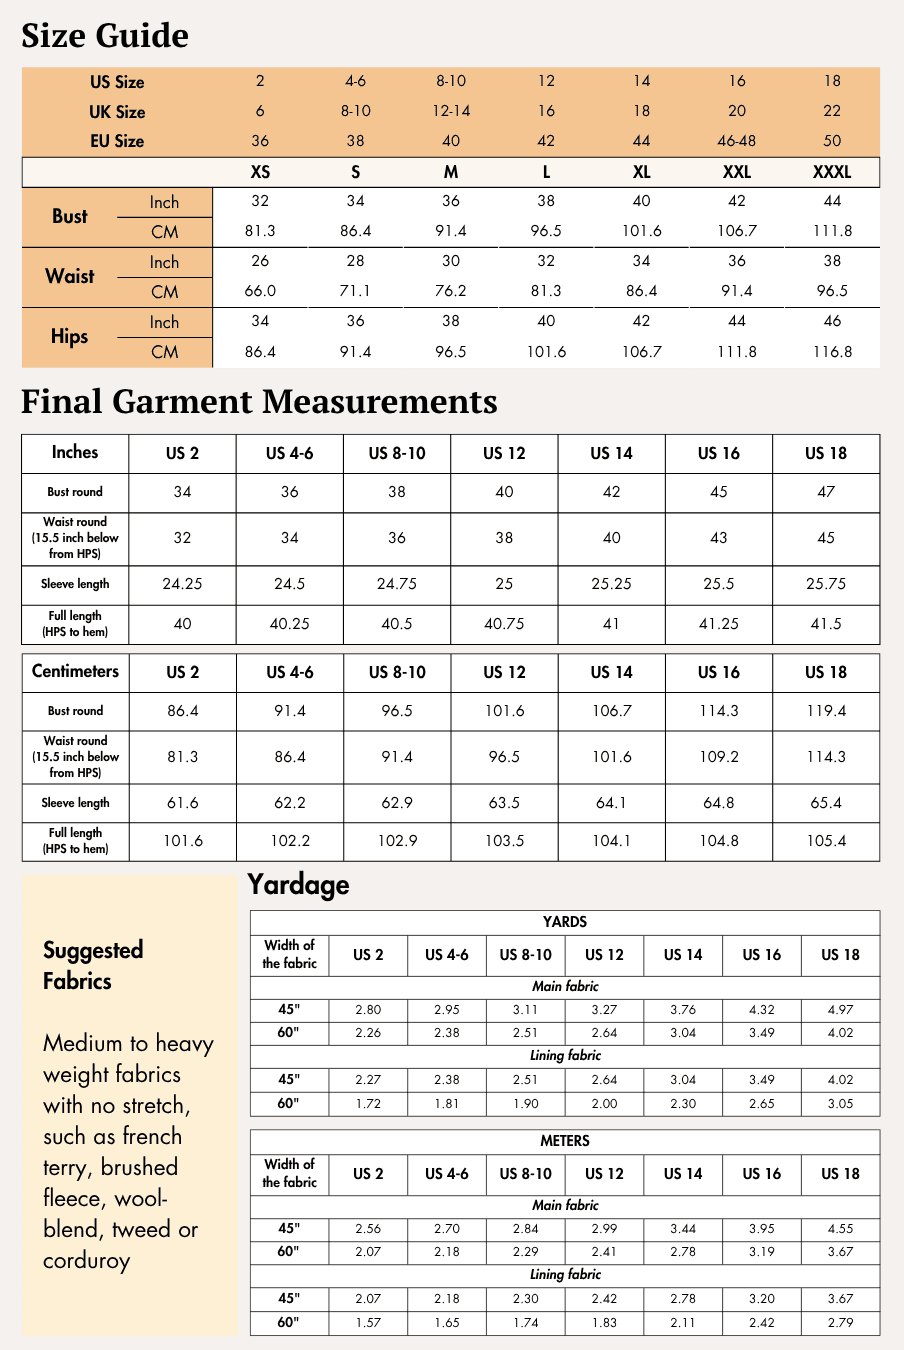
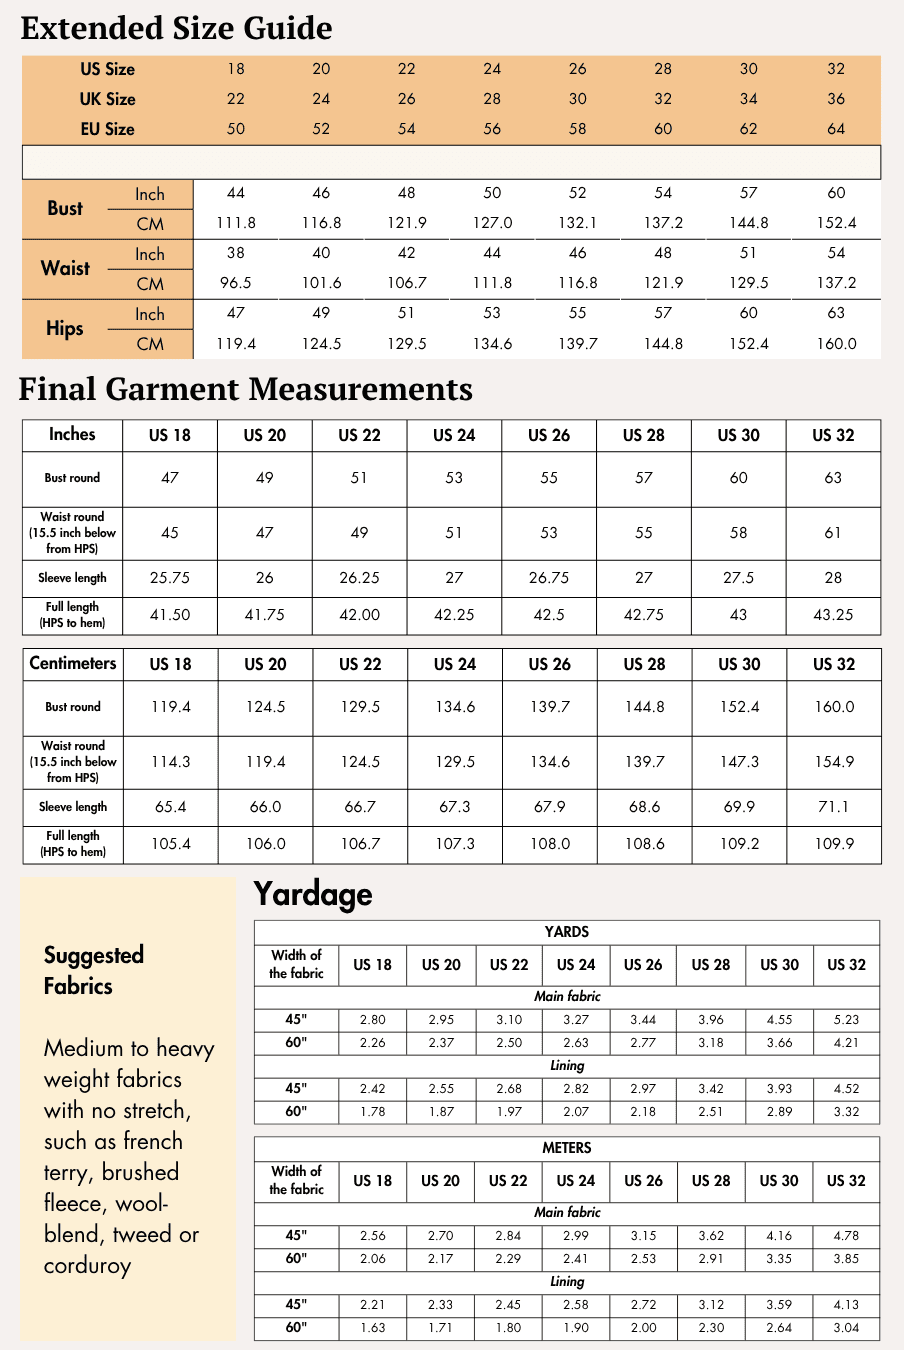
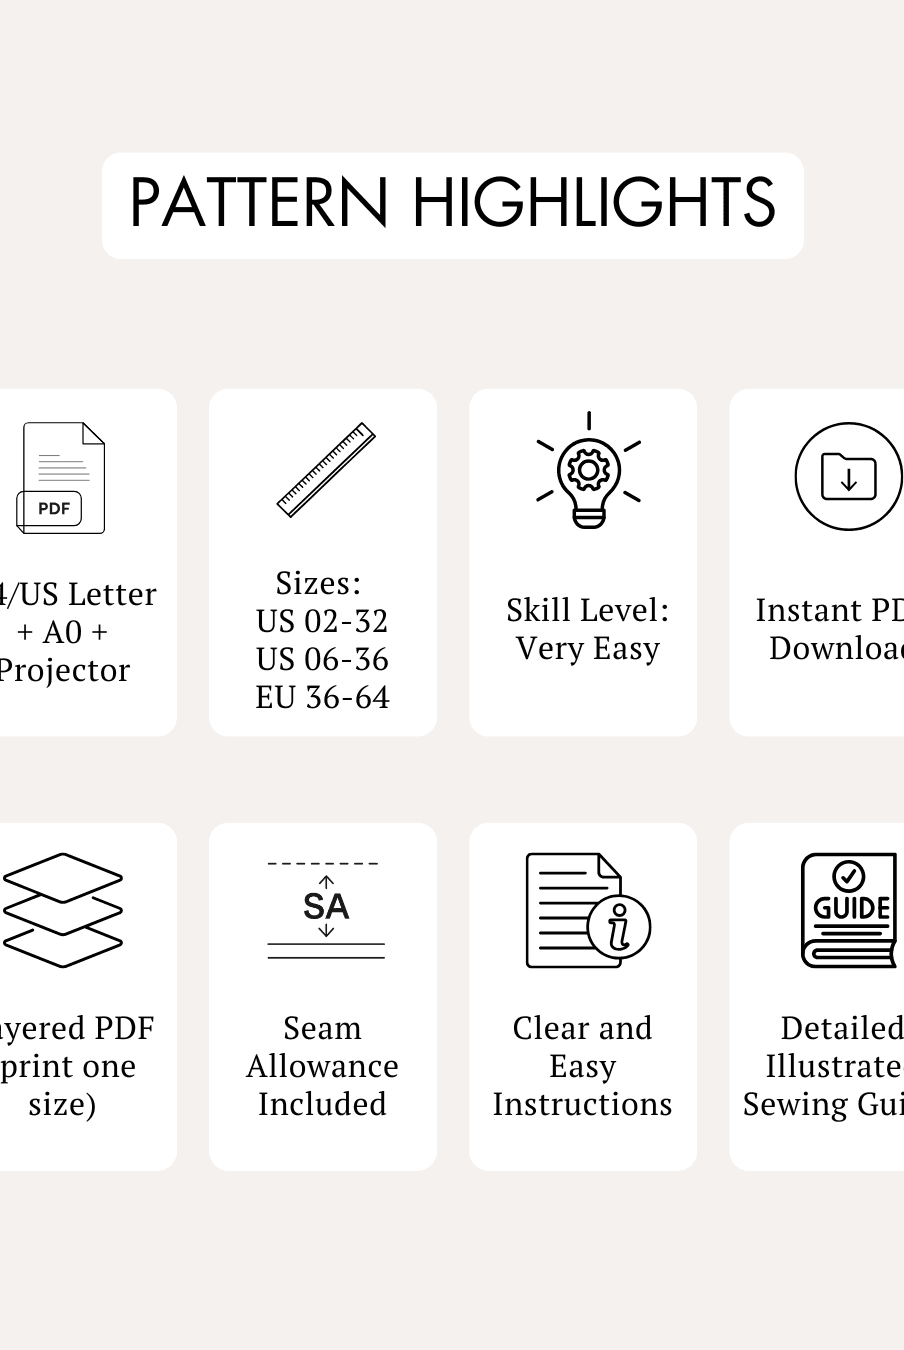
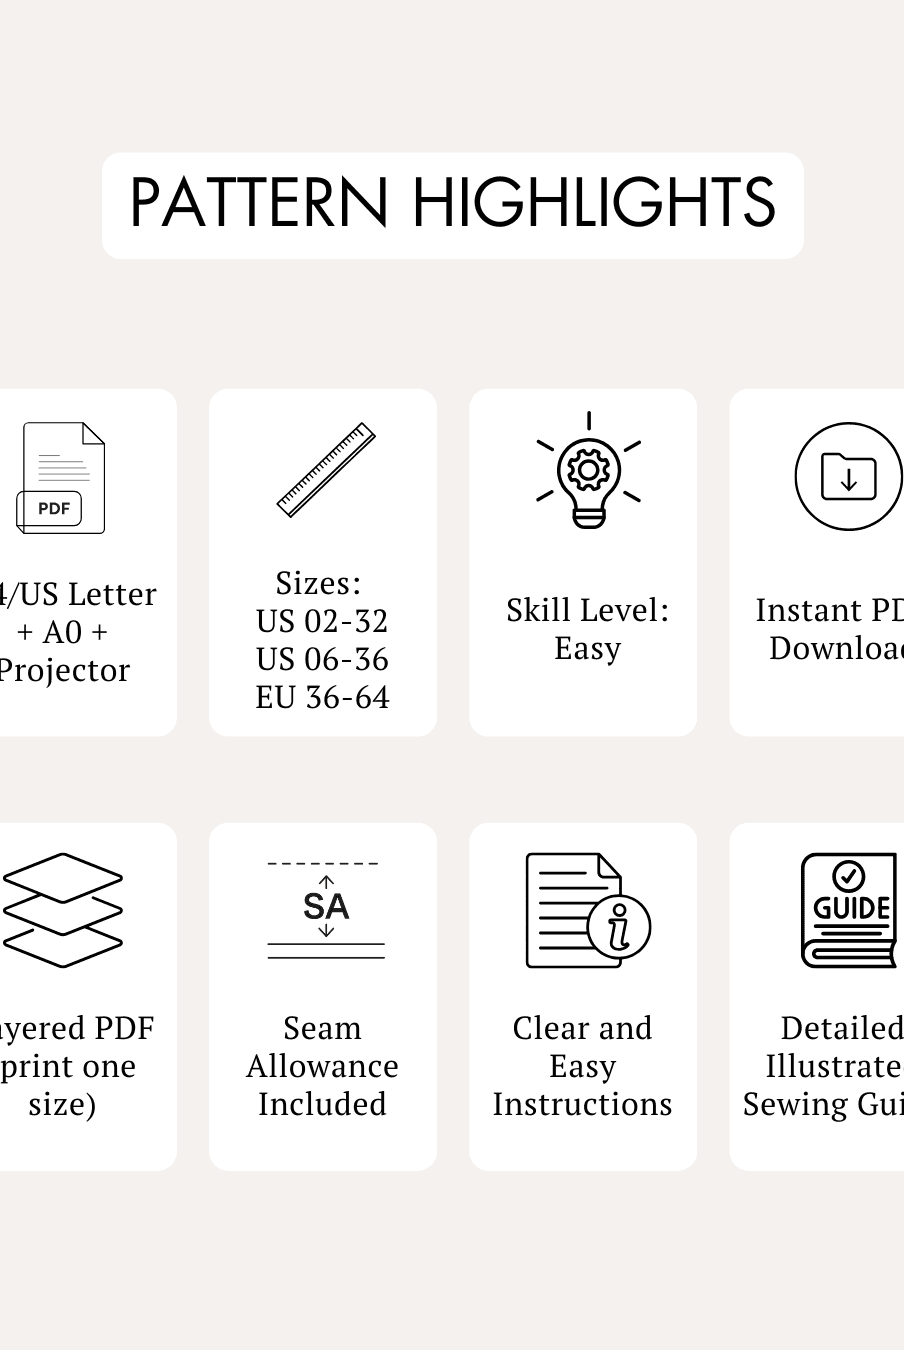
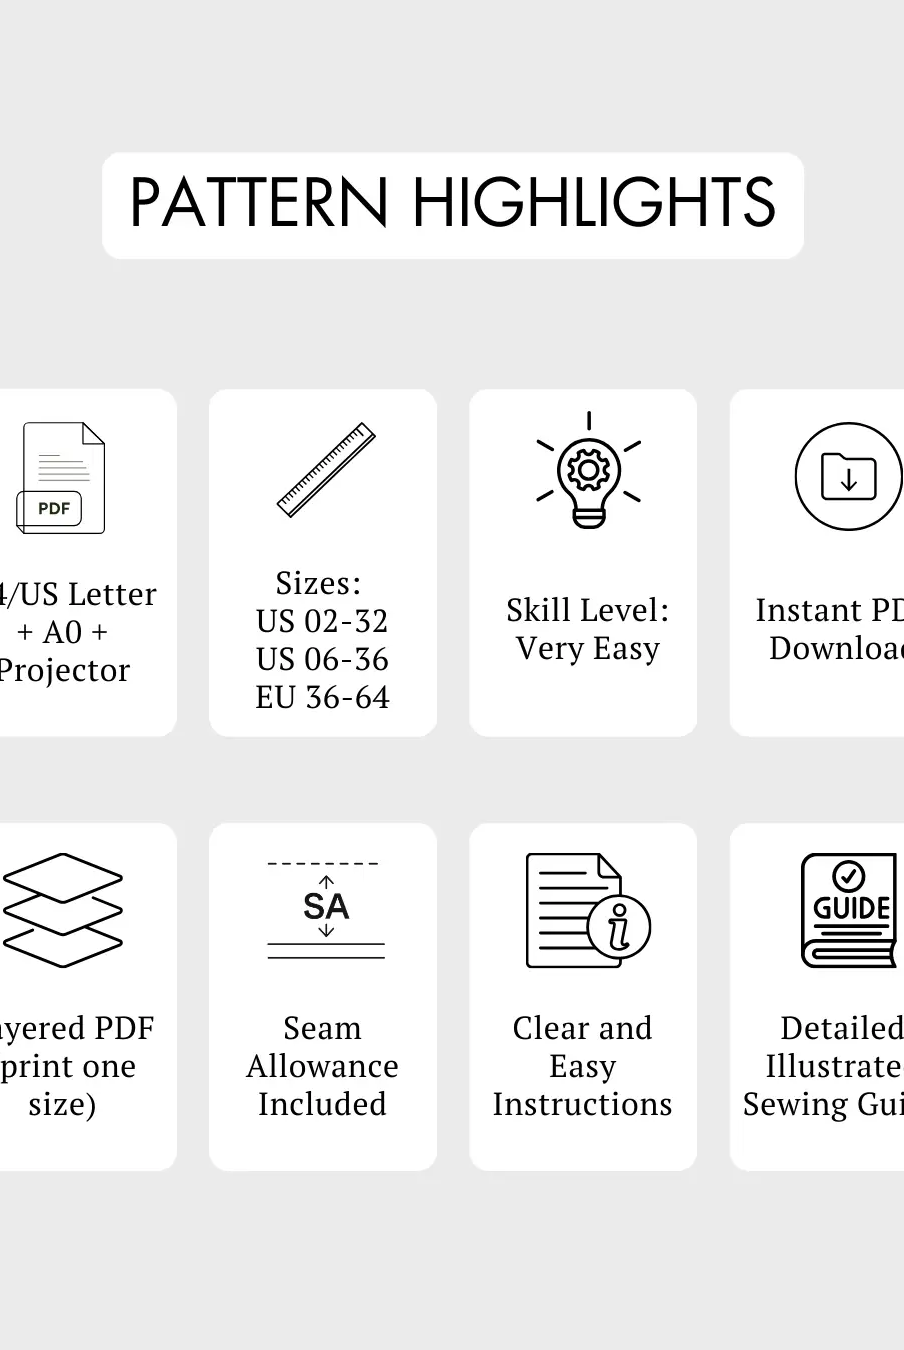
- Available Sizes: US 02 - US 32 | UK 06 - UK 36 | EU 36 - EU 64
Supplies & Notions
Prepare the following supplies before you begin sewing the Myrtle Straight Hem Crop Shirt Sewing Pattern:
- Fabric
- 3-ply polyester thread
- Fusible interfacing
- Buttons
- Sewing machine
- Buttonhole attachment
- Sewing needles
- Fabric shears
- Thread cutter
- Pins
- Tape measure
- Tailor's chalk or another suitable fabric marking tool
- Iron
Fabric Recommendations
The Myrtle Straight Hem Crop Shirt Sewing Pattern is designed for:
- Jersey
- Light to medium-weight knits
- Cotton blends
- Viscose fabrics
The sample shirt shown in the sewing guide is made from poly knit fabric.
Poly knit is recommended because:
- It offers excellent durability and wrinkle resistance.
- It wicks away moisture to help keep the wearer dry and comfortable.
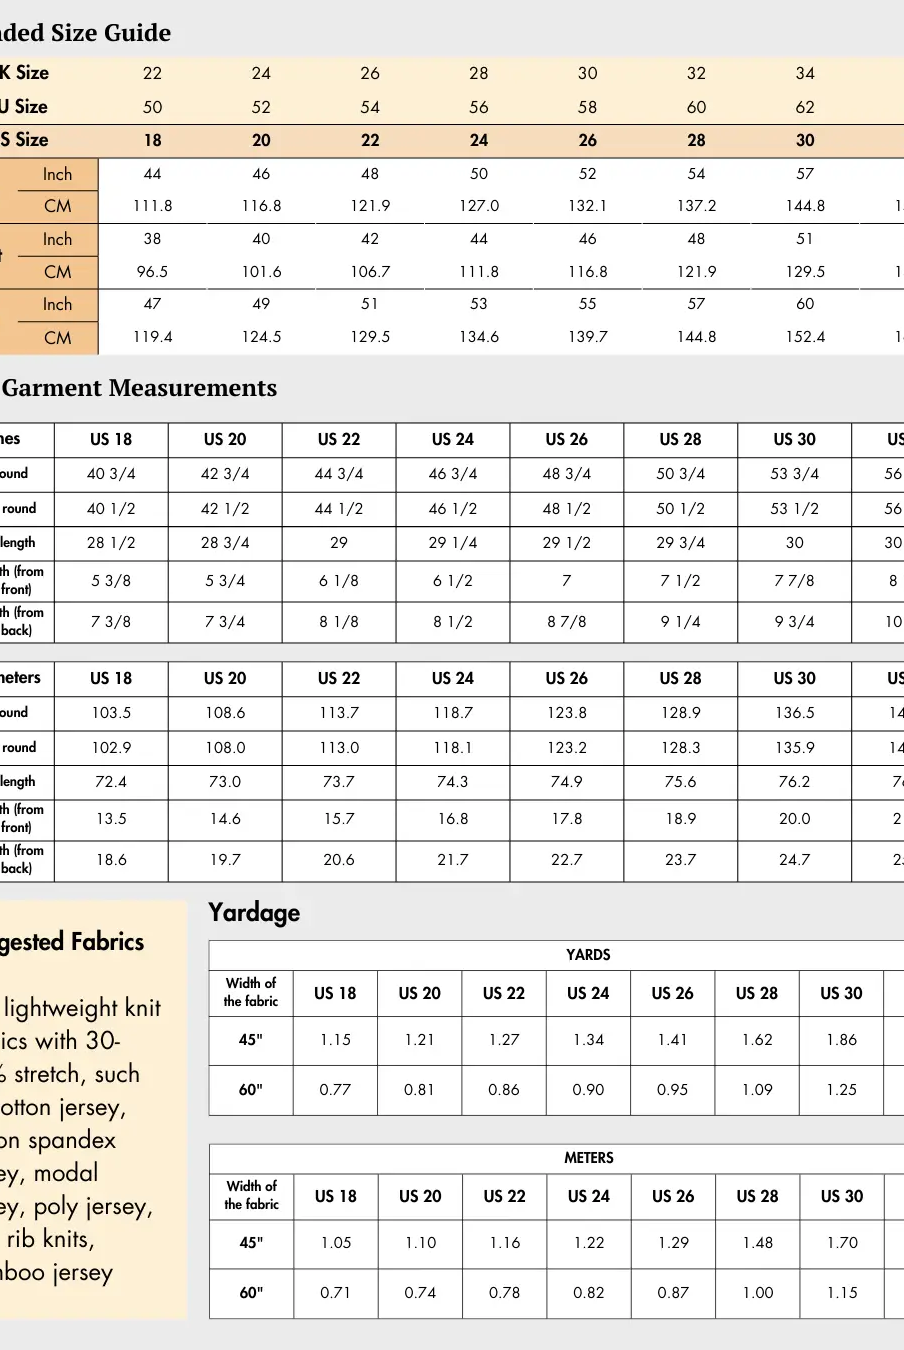
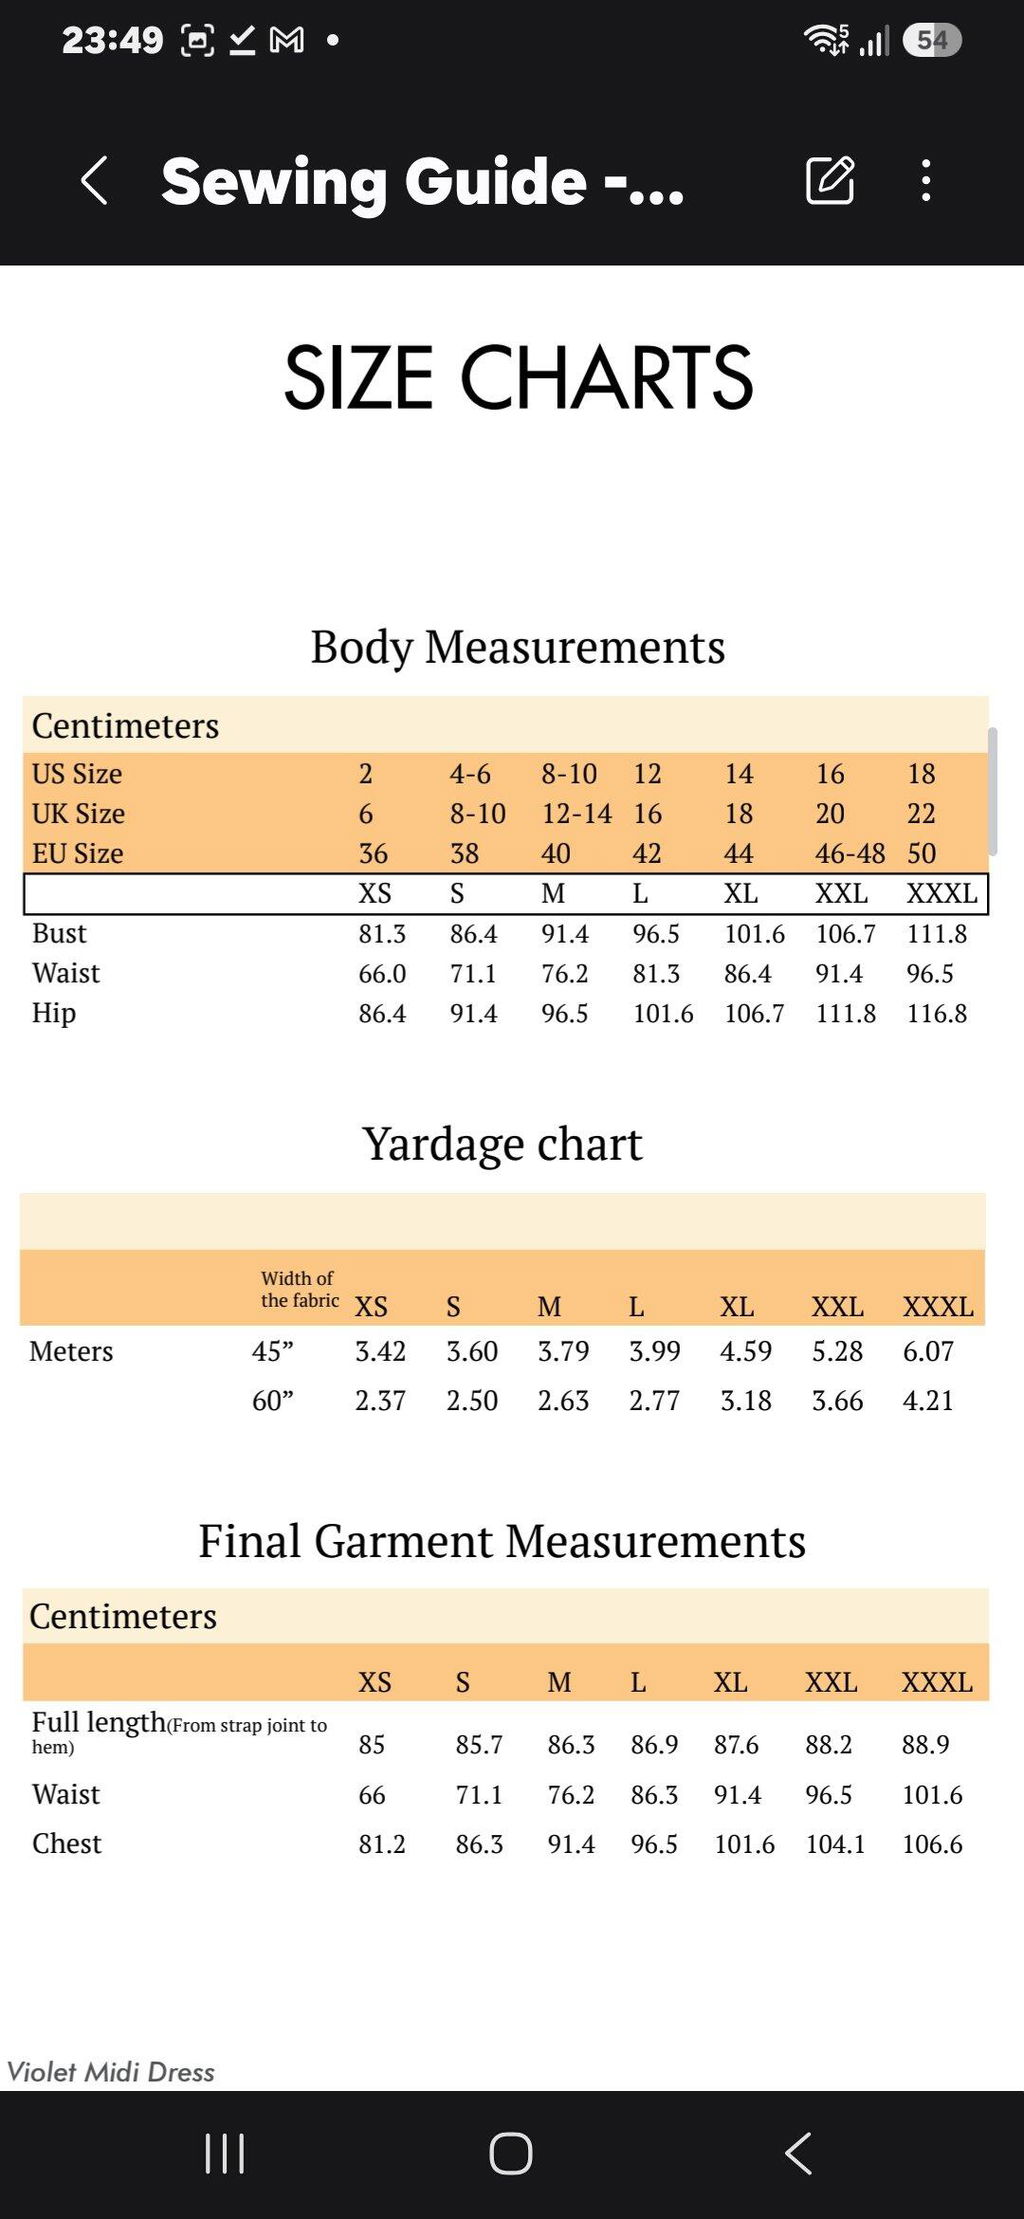
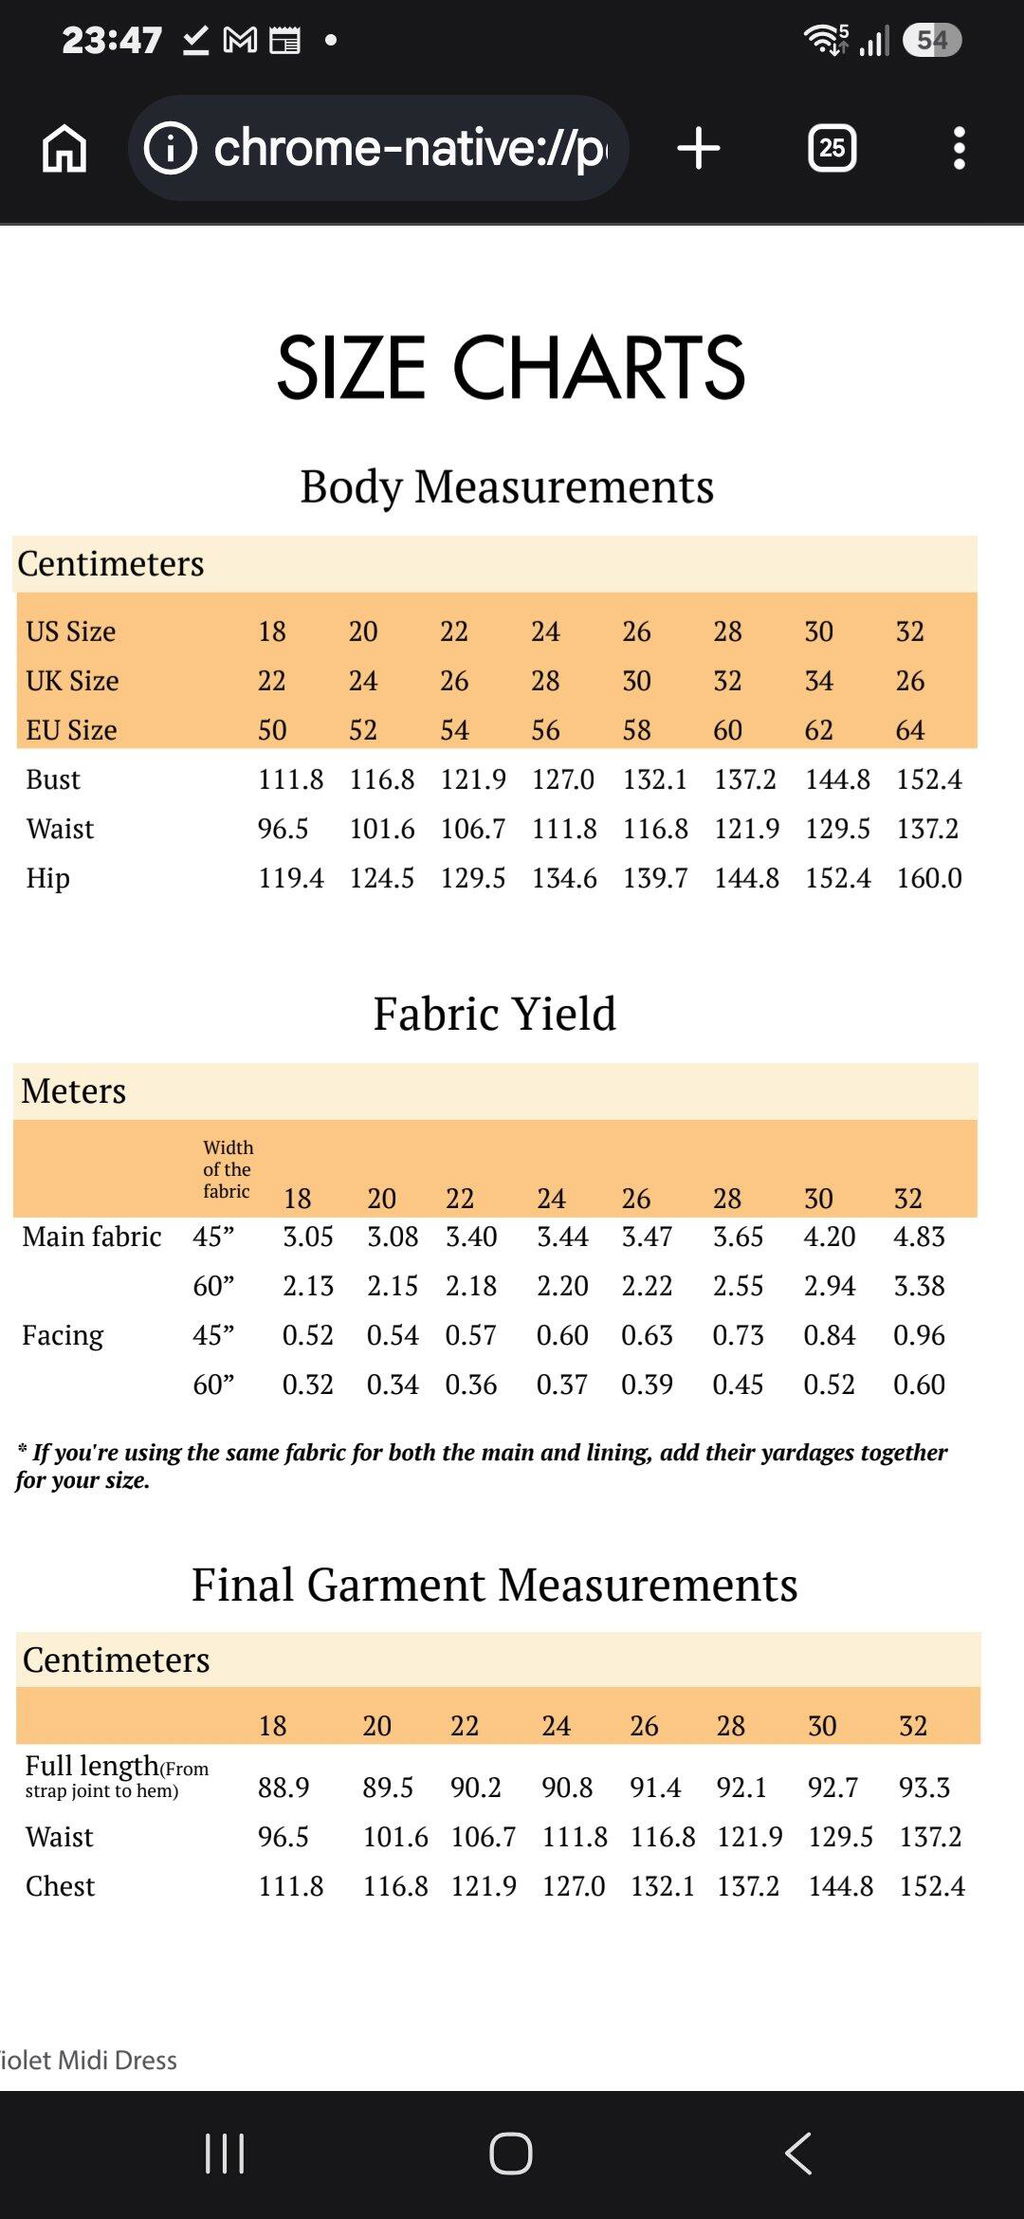
Size Charts
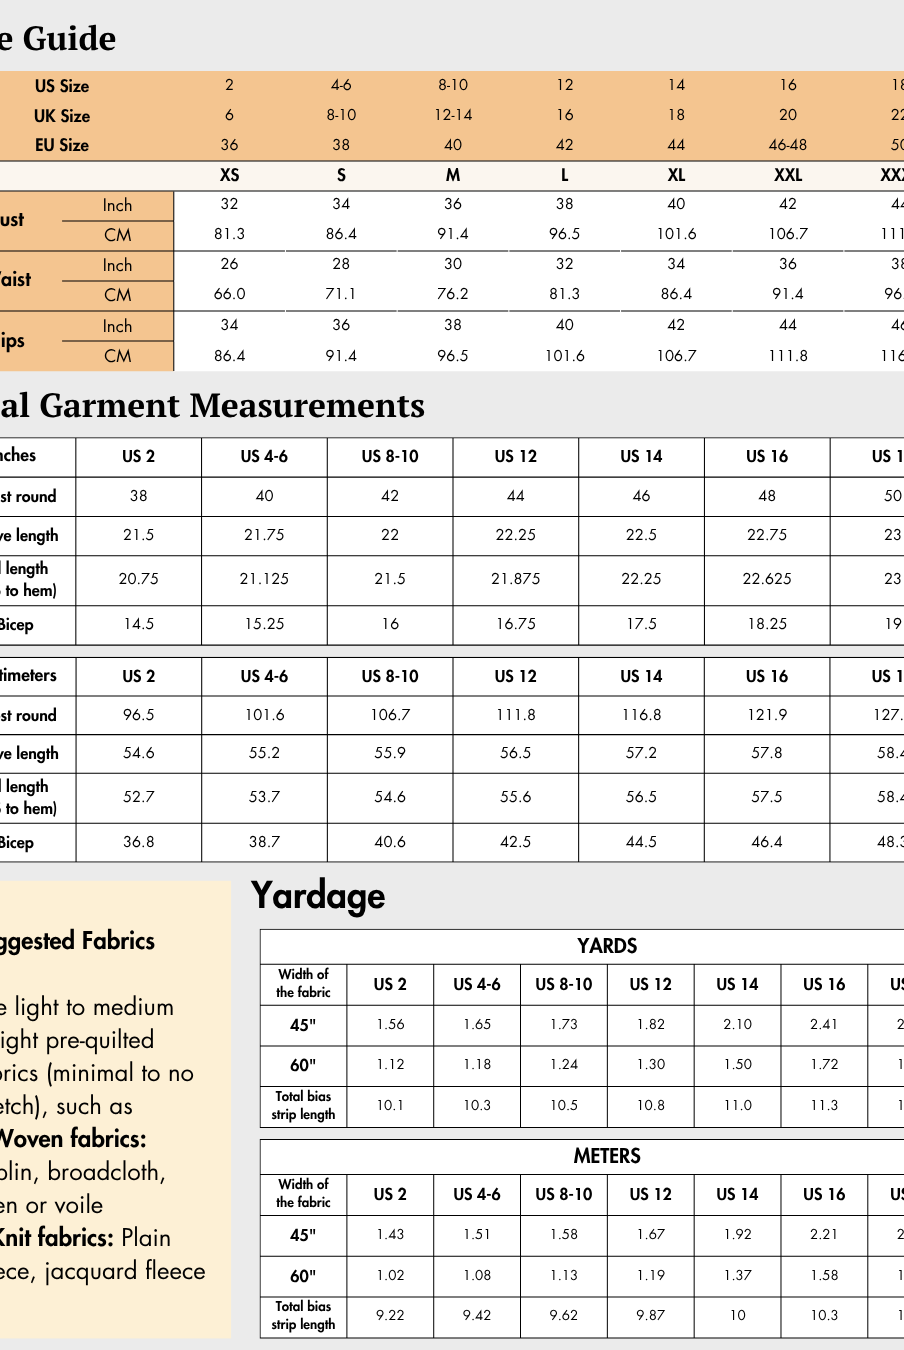
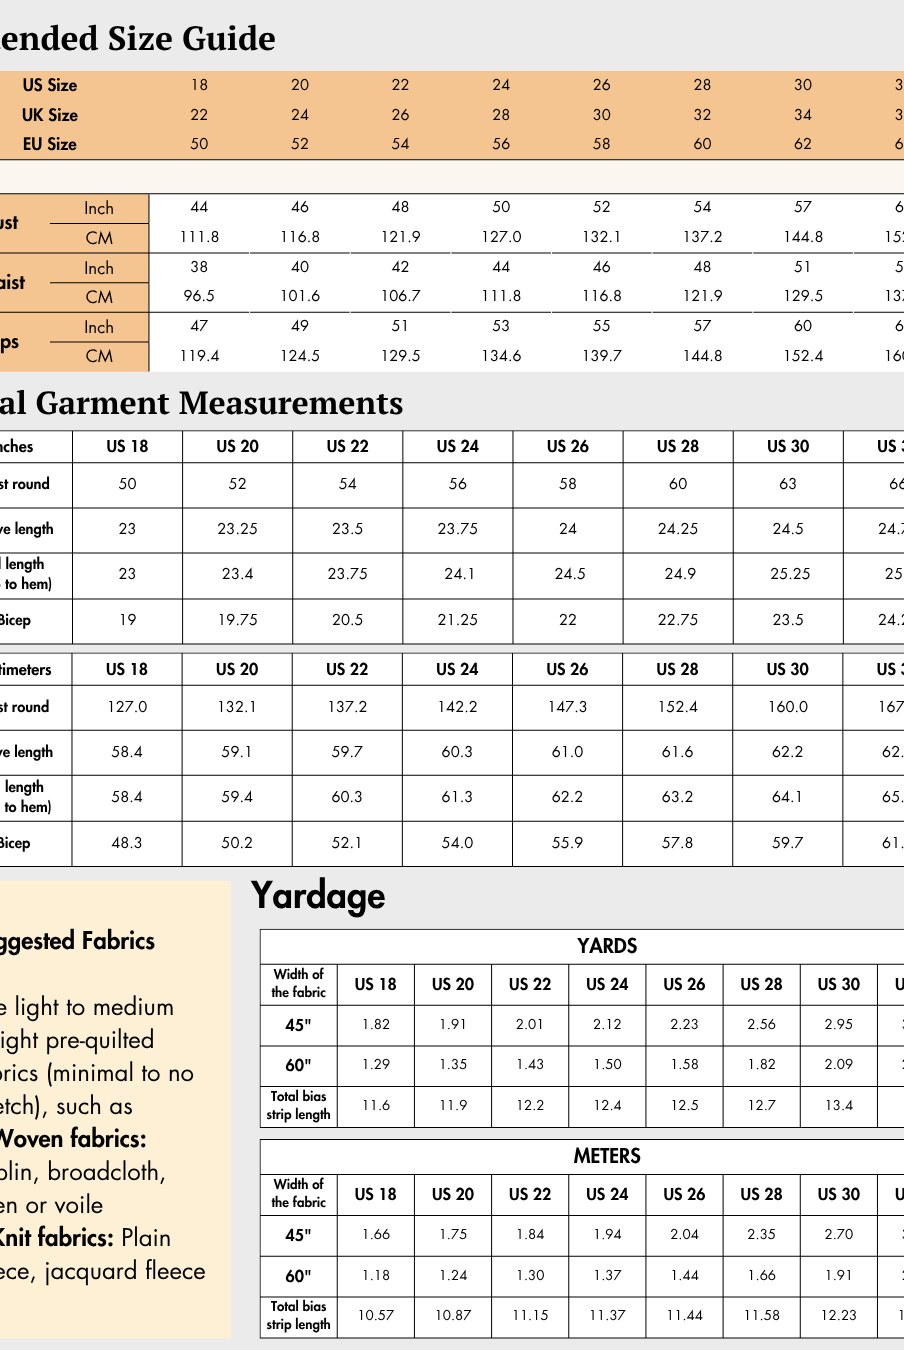
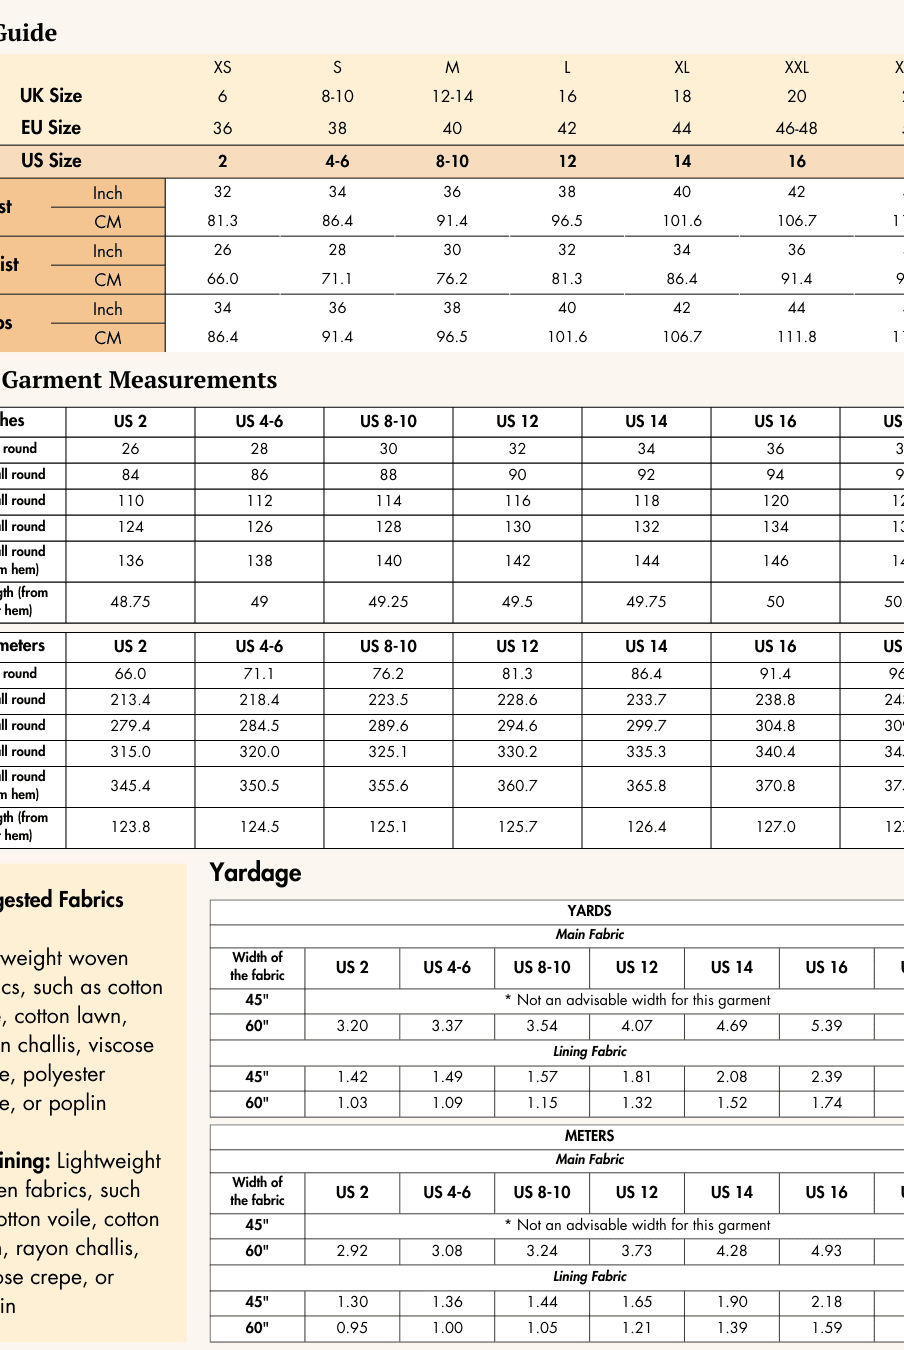
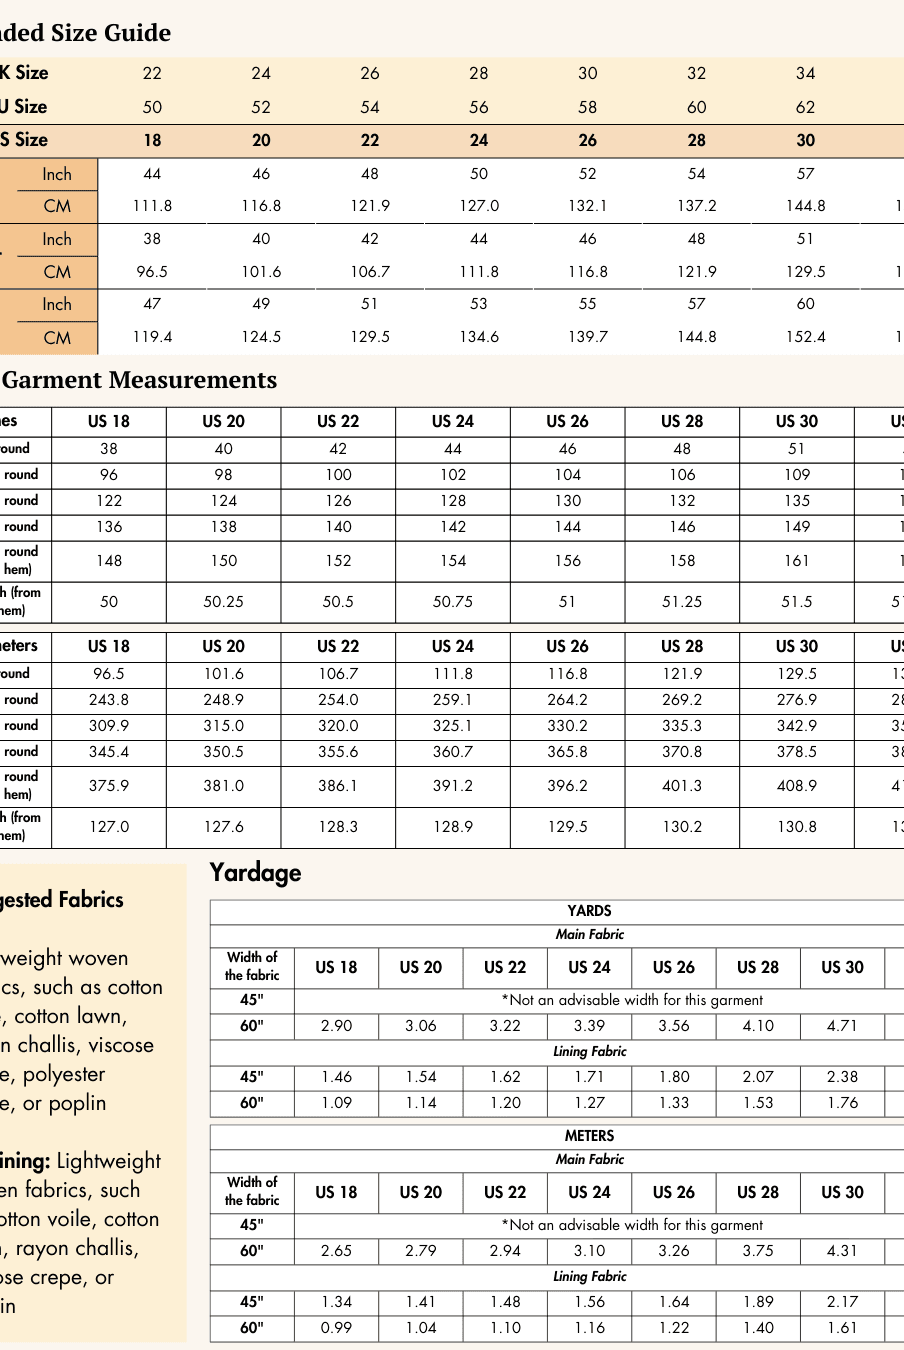
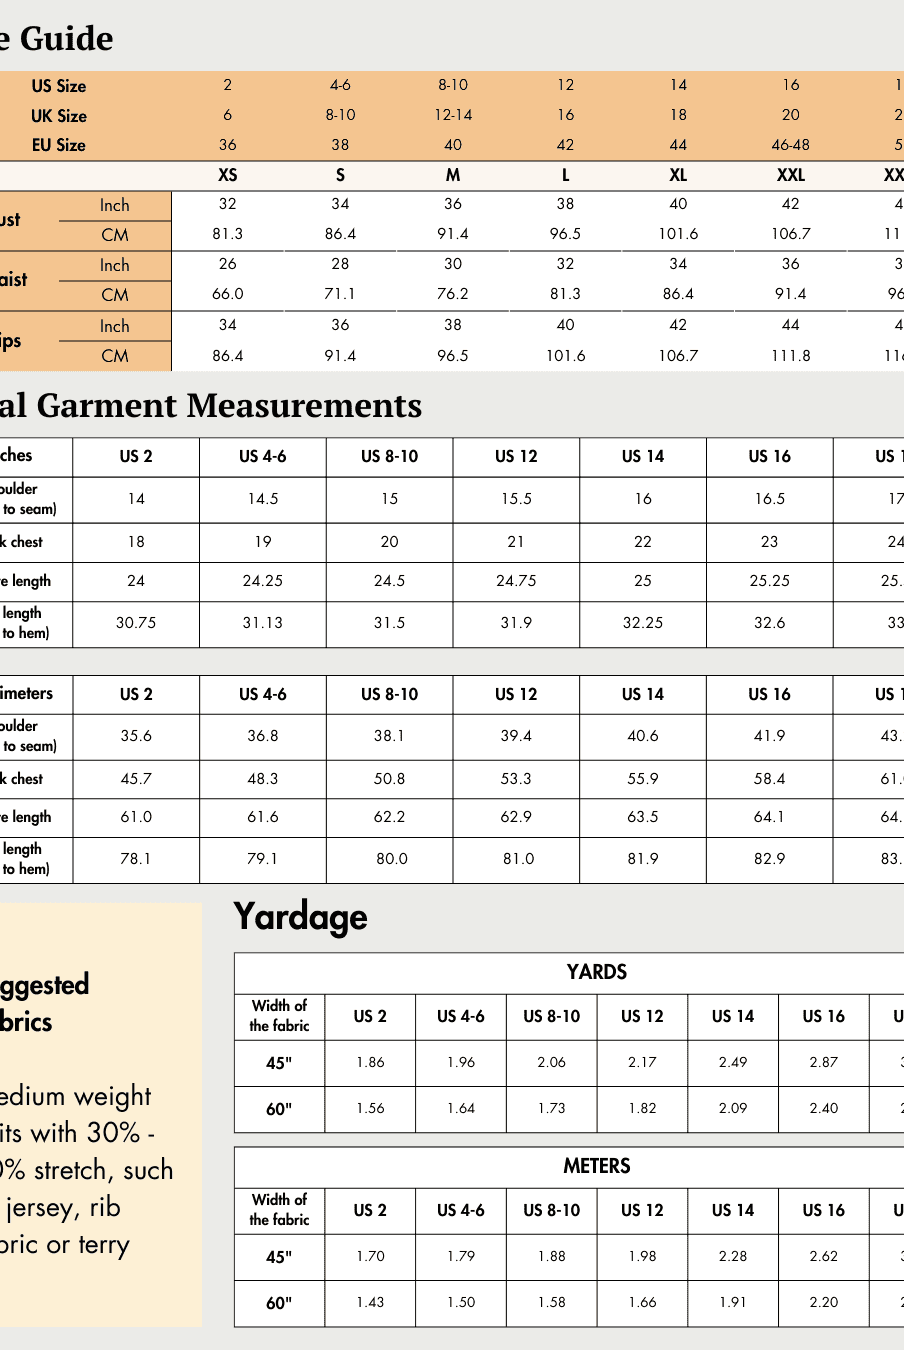
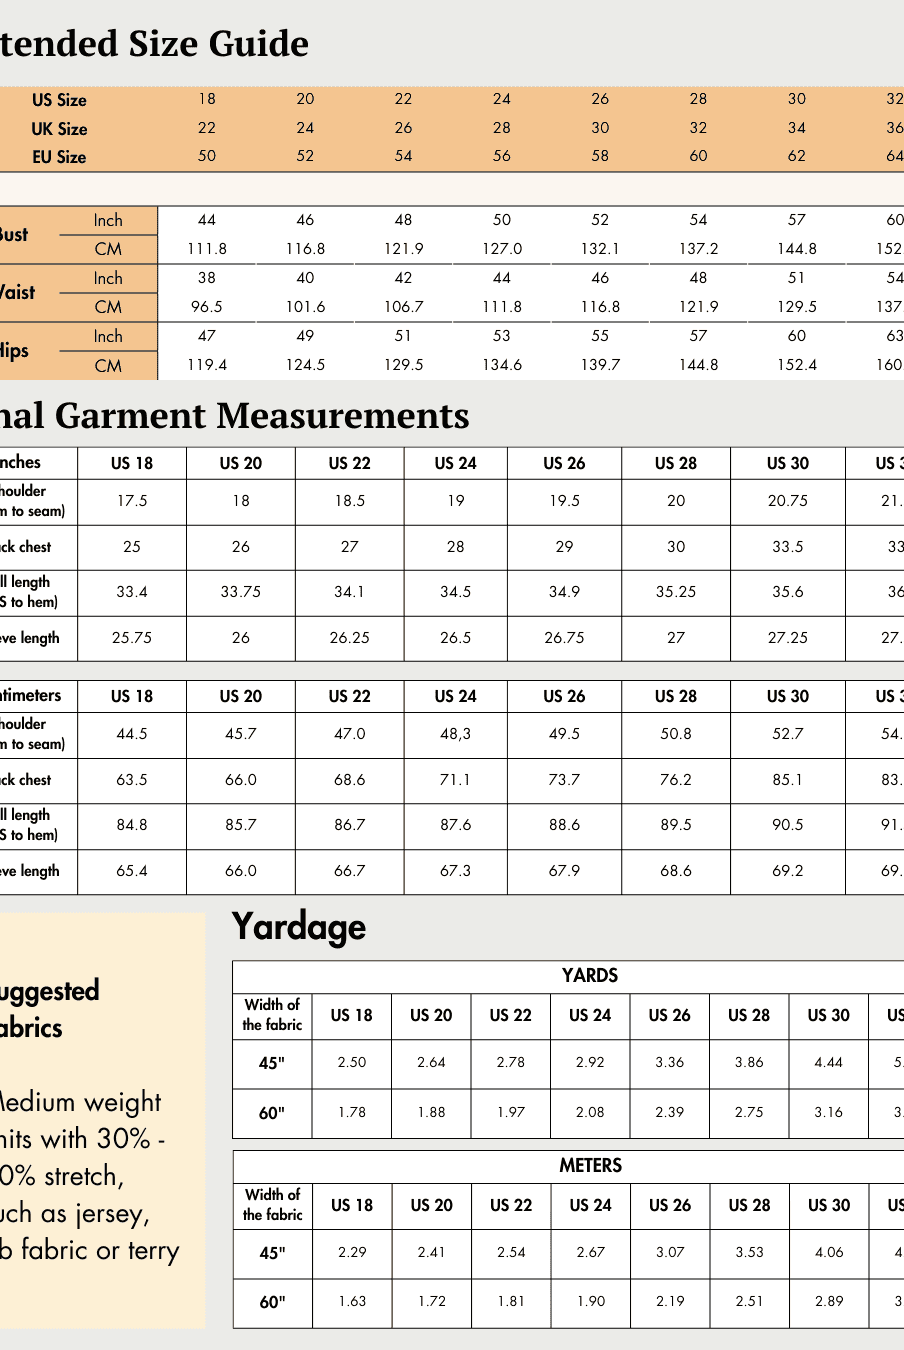
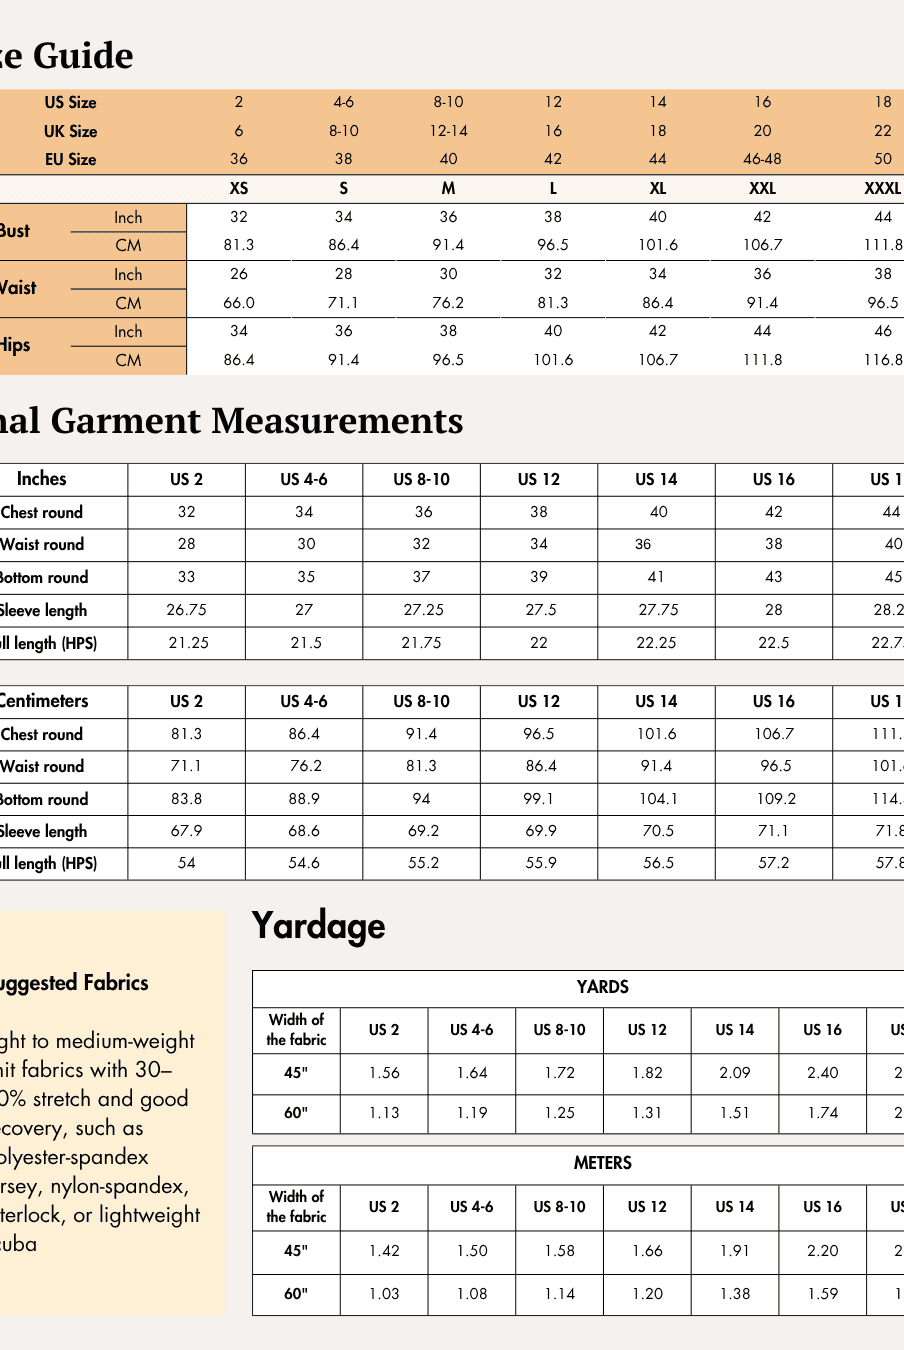
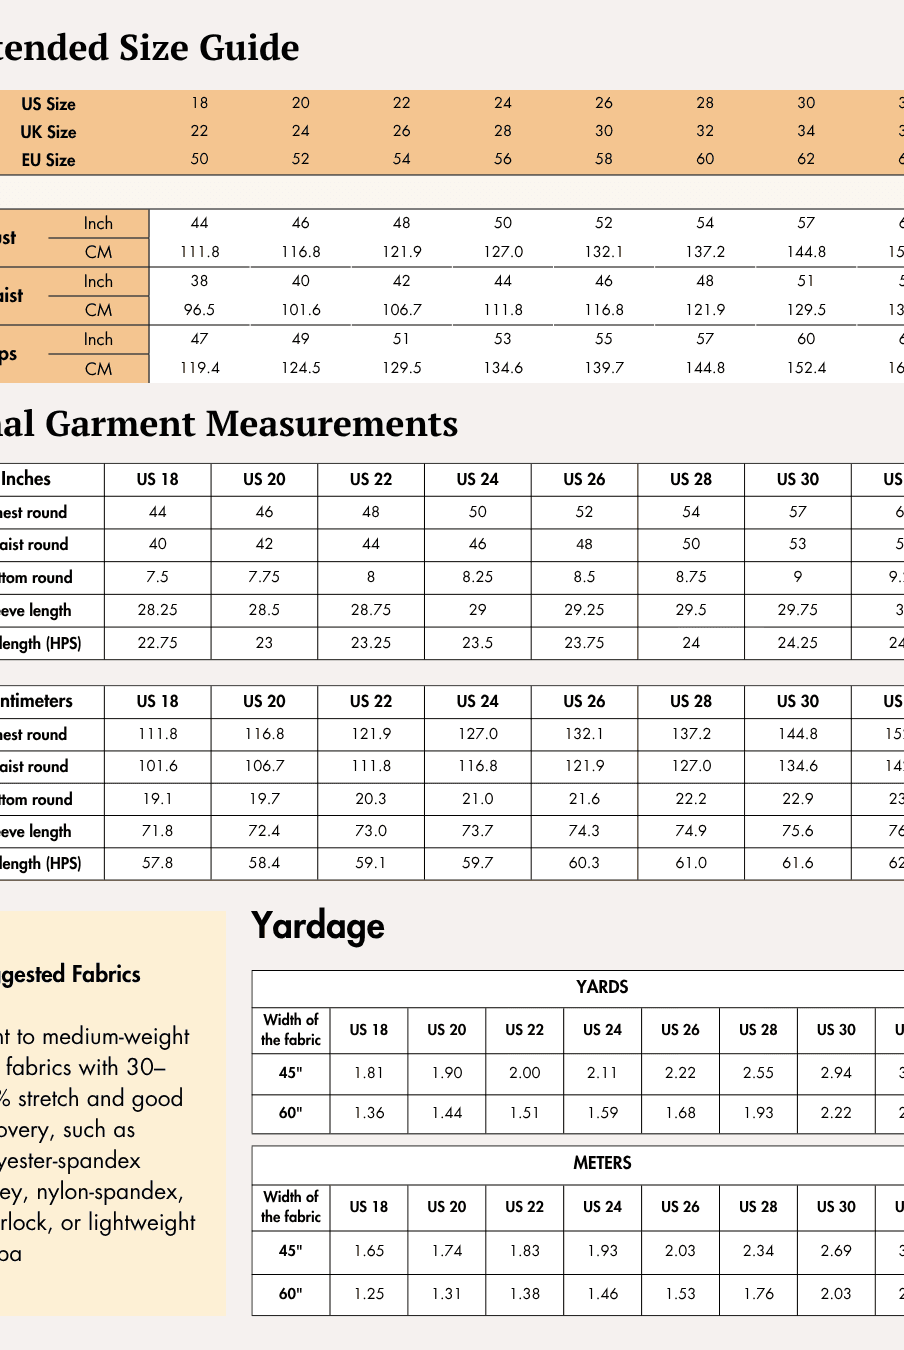
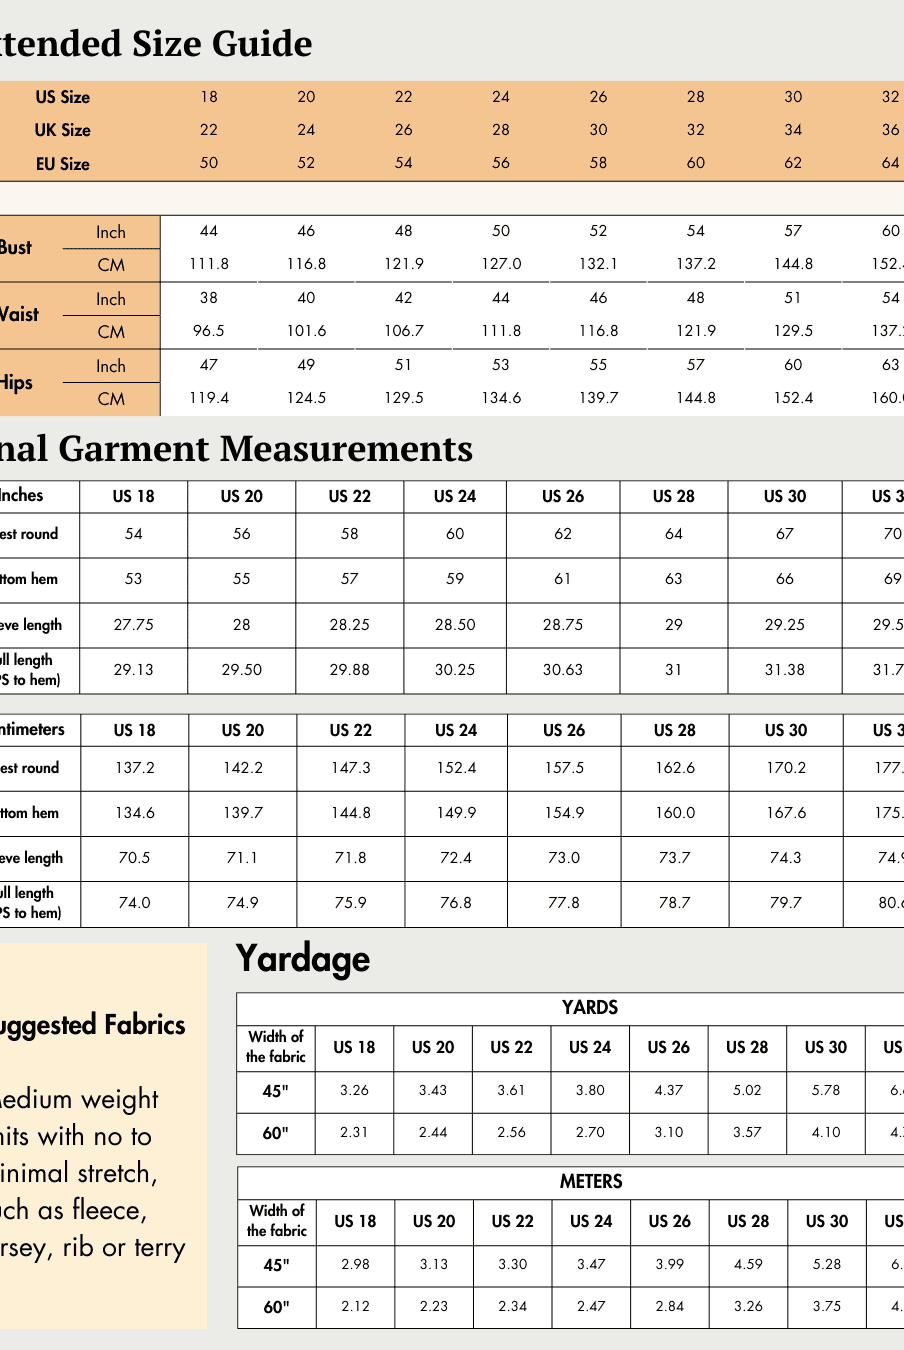
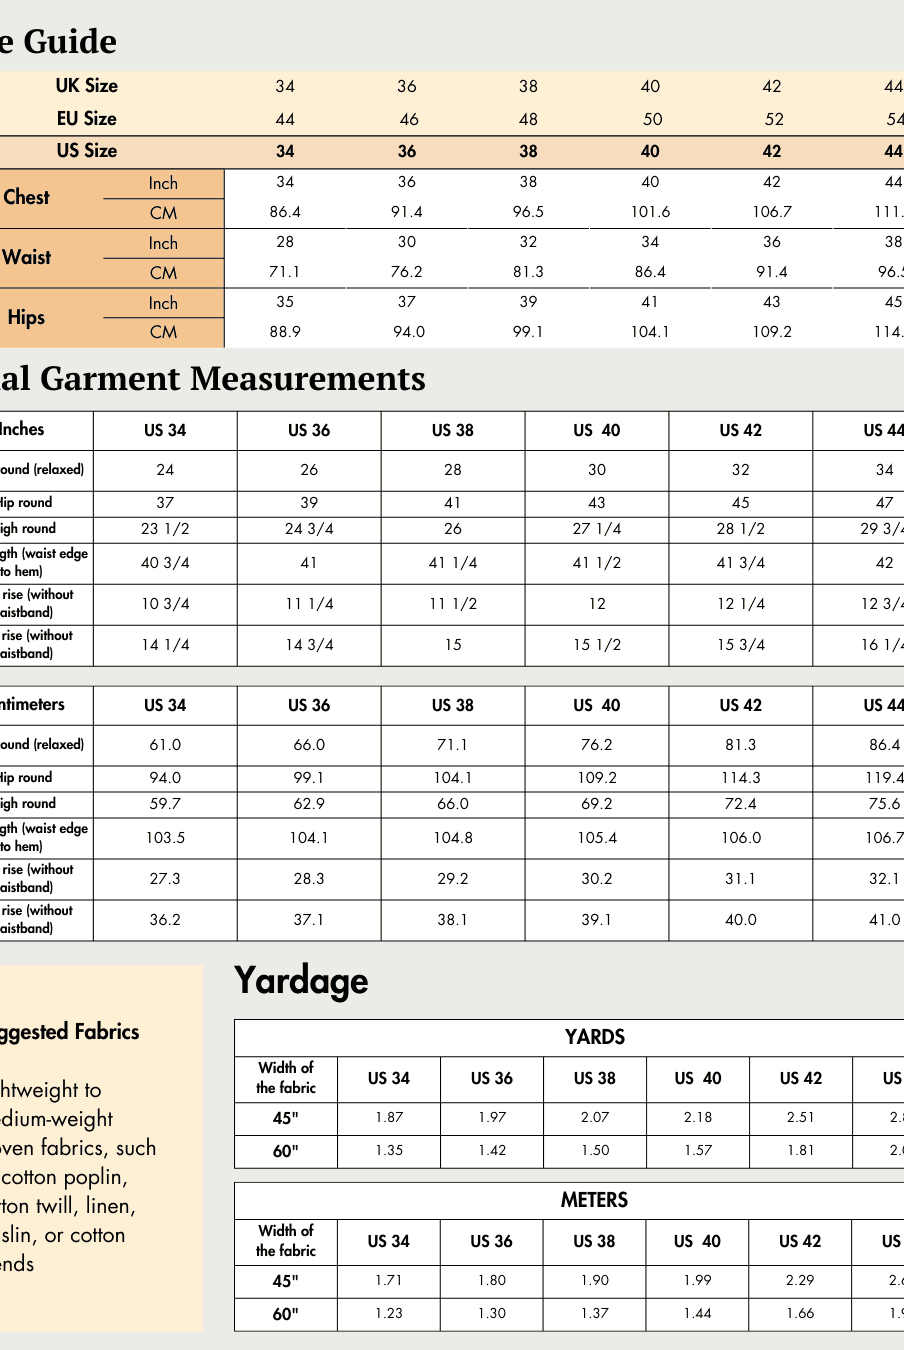
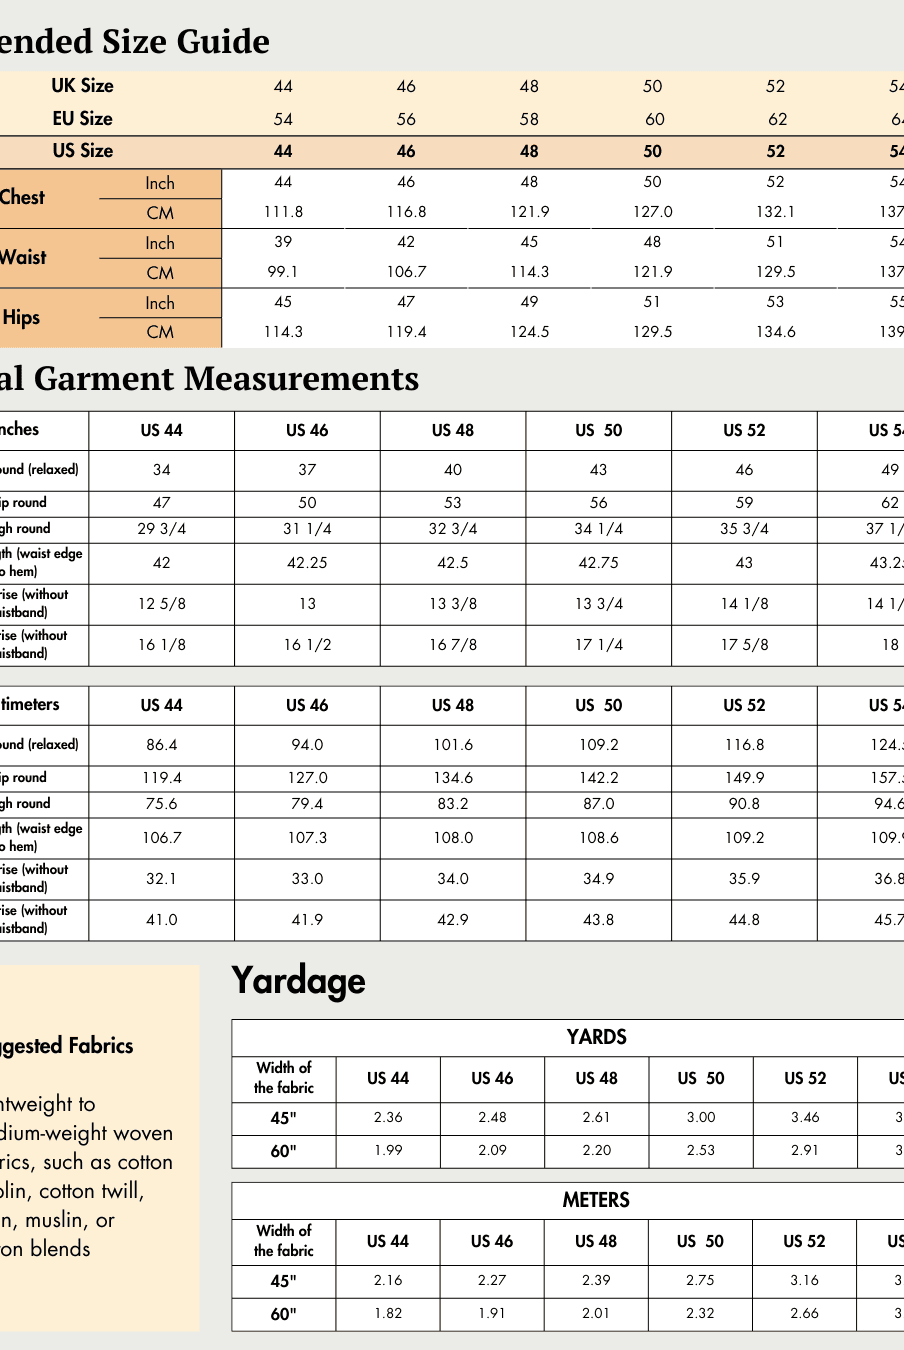
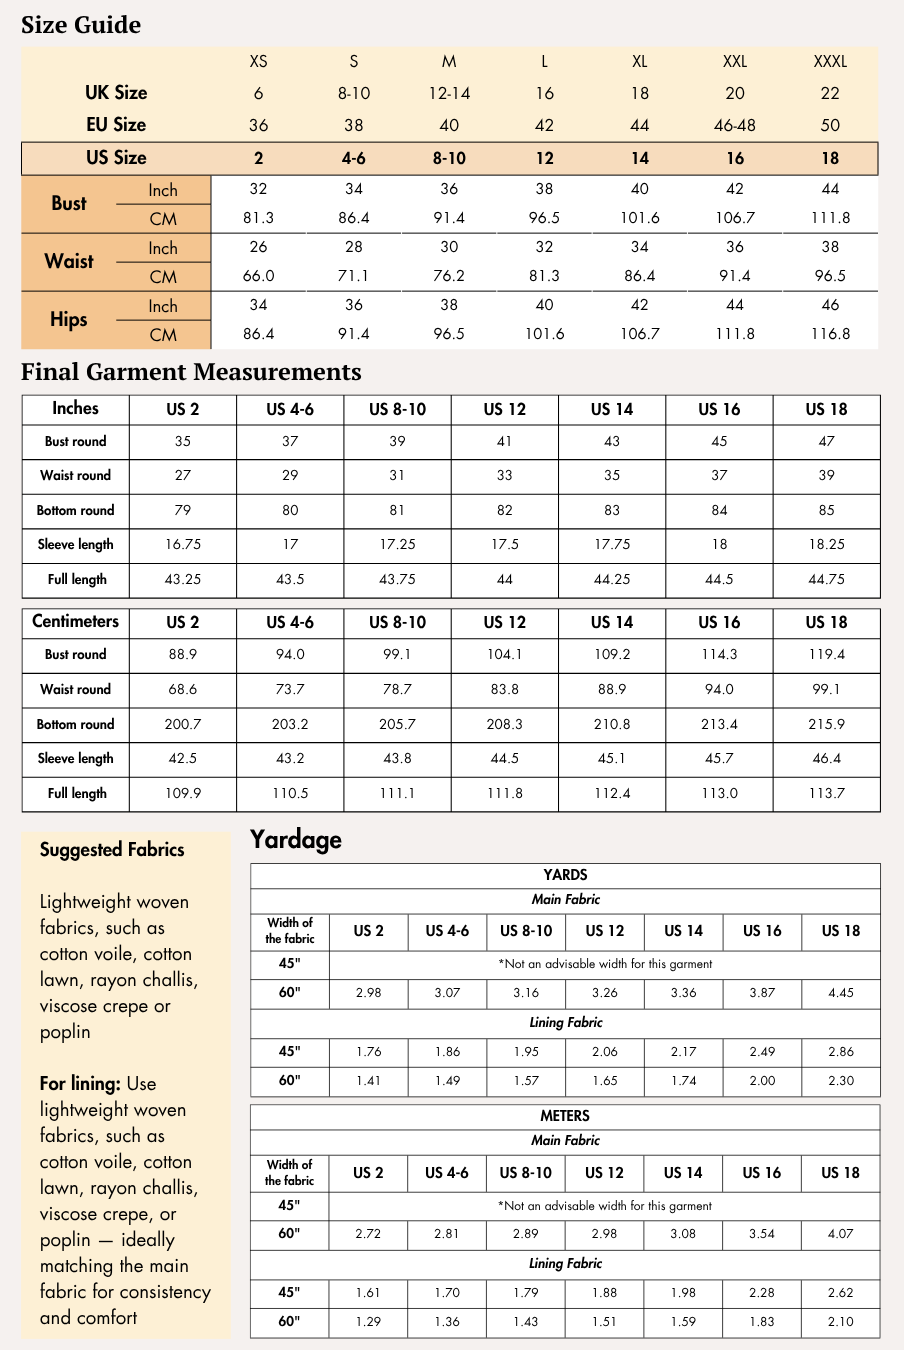
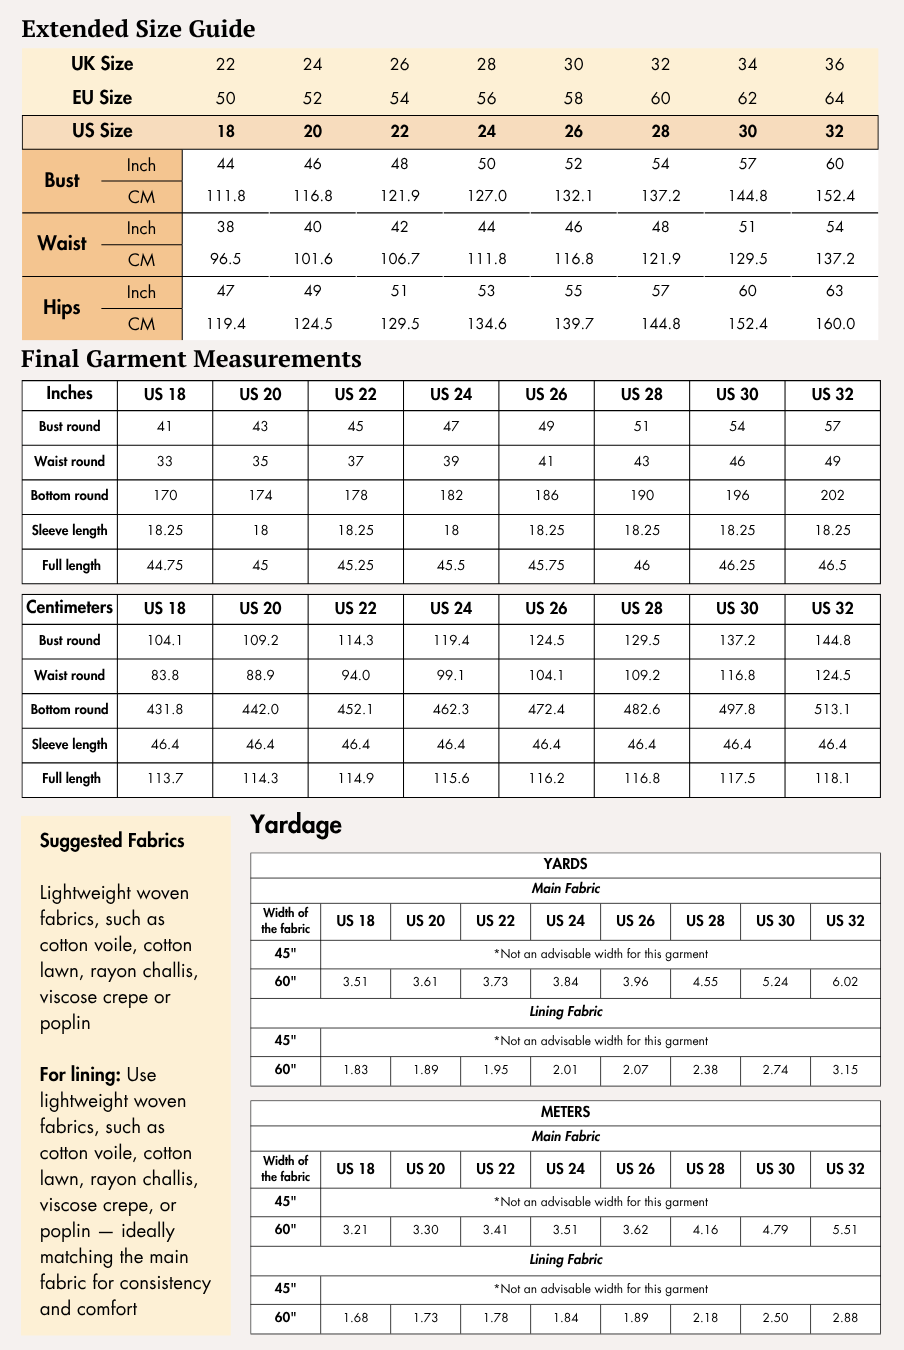
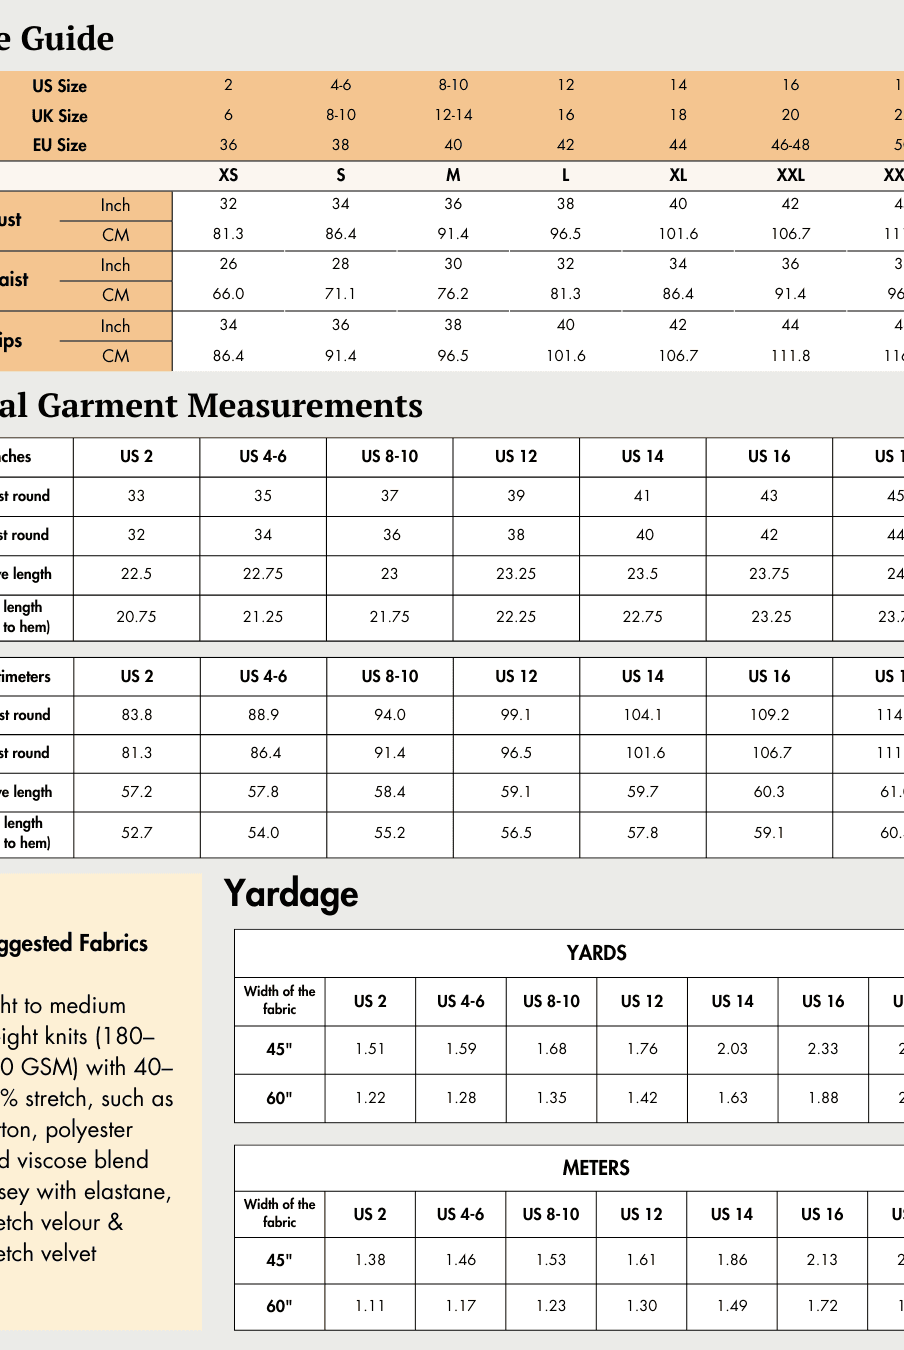
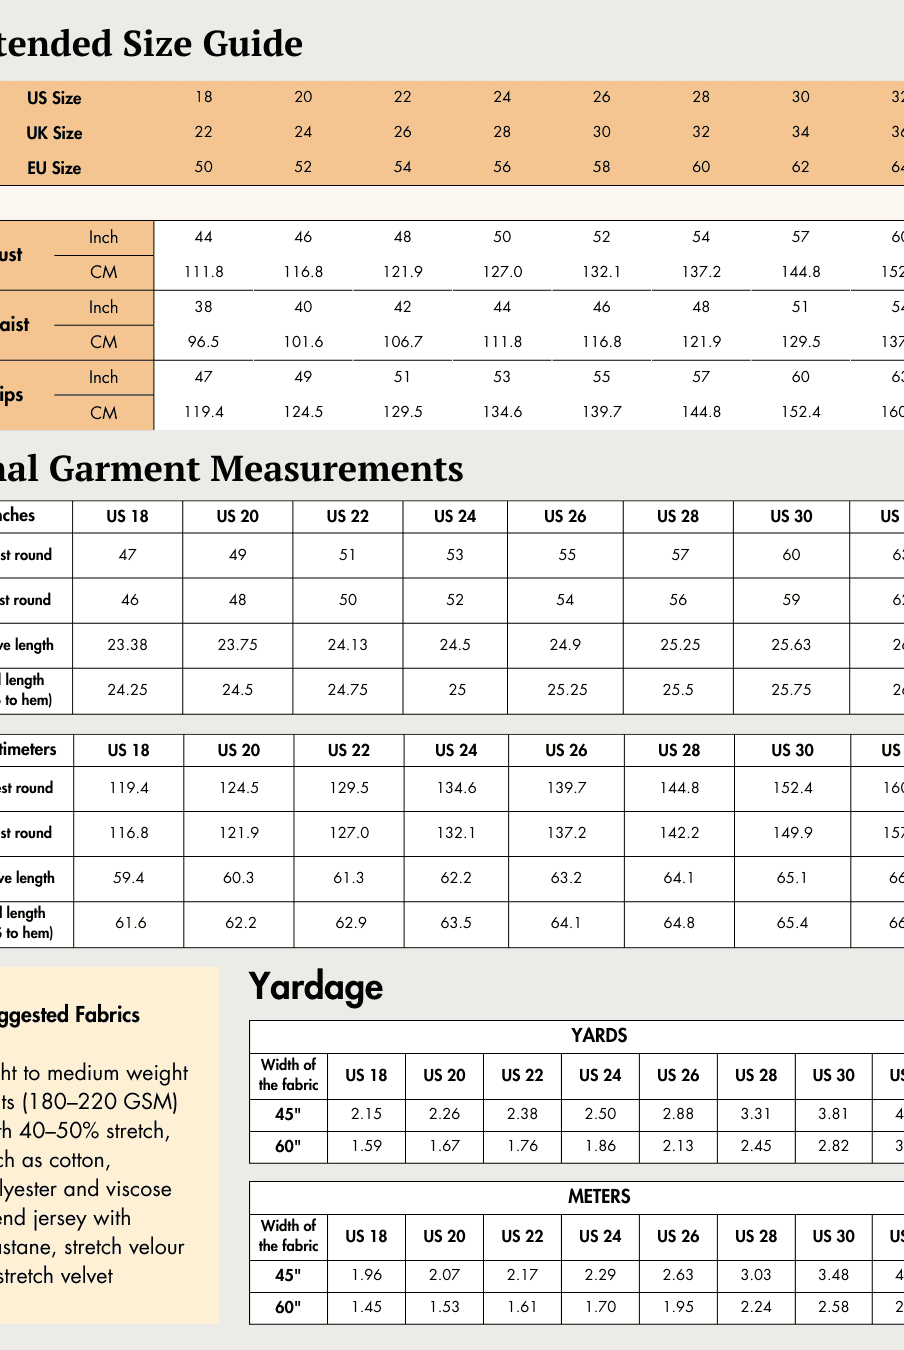
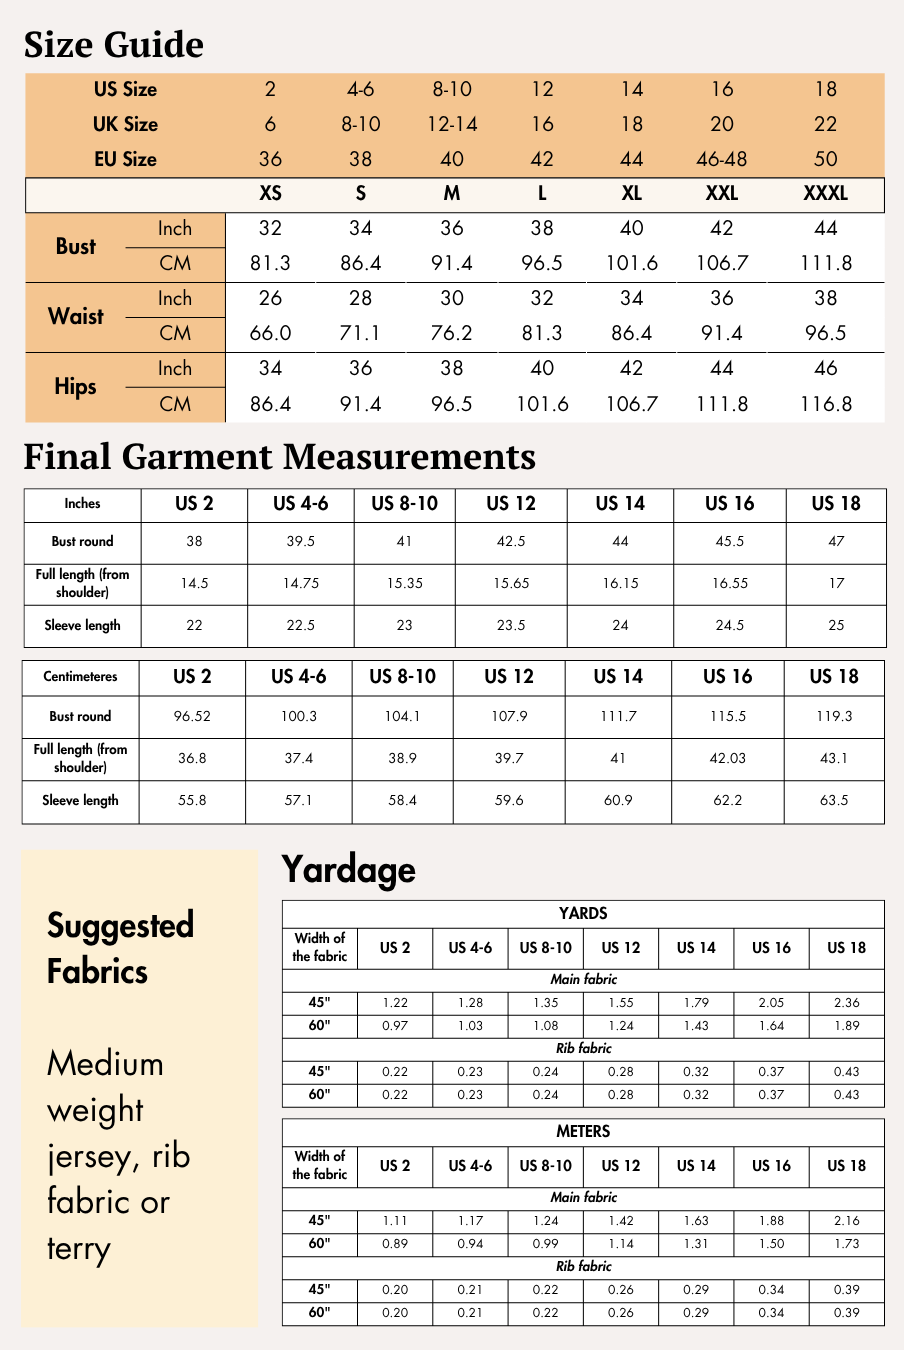
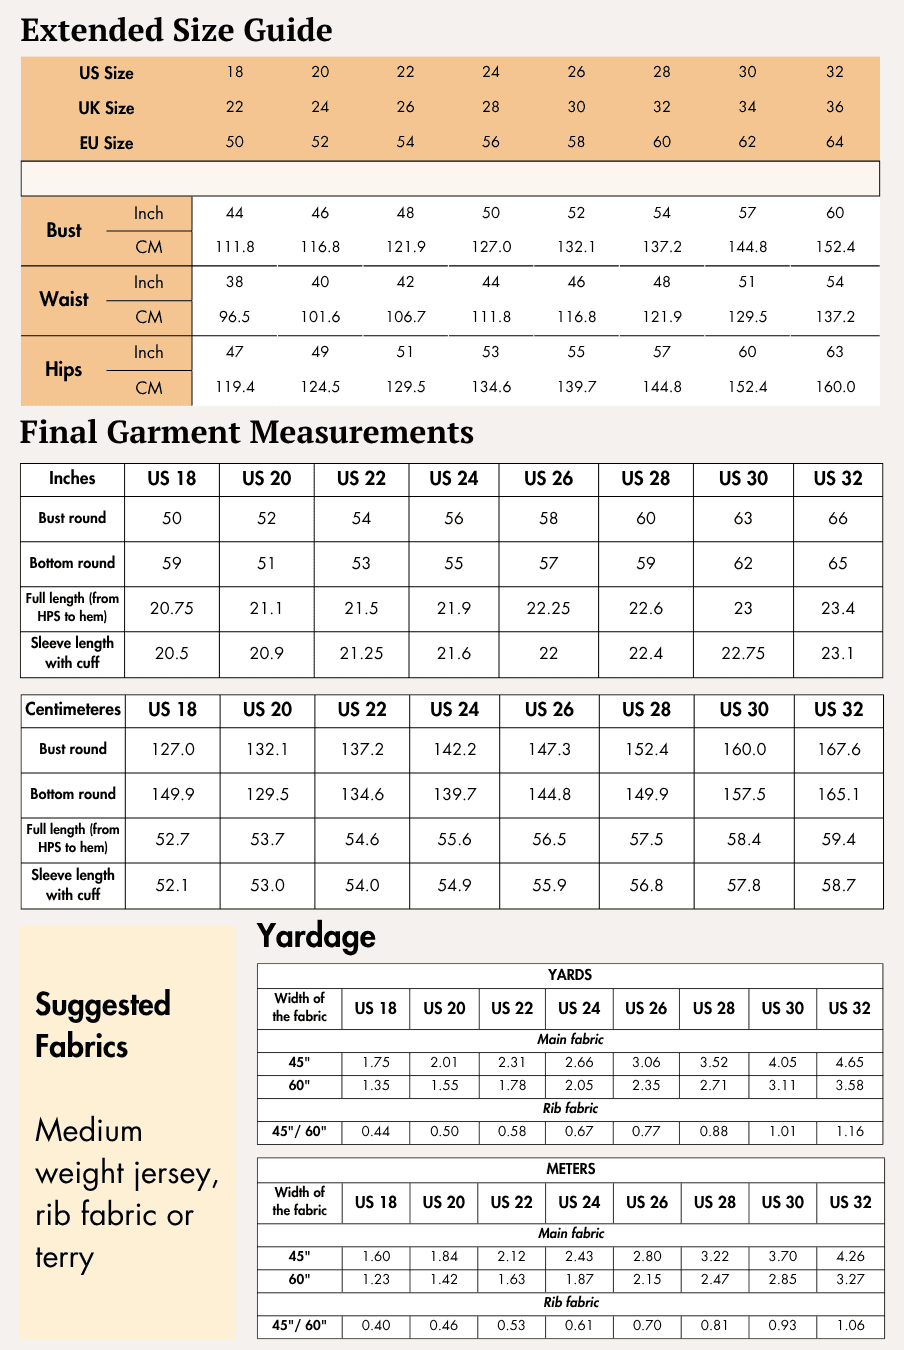
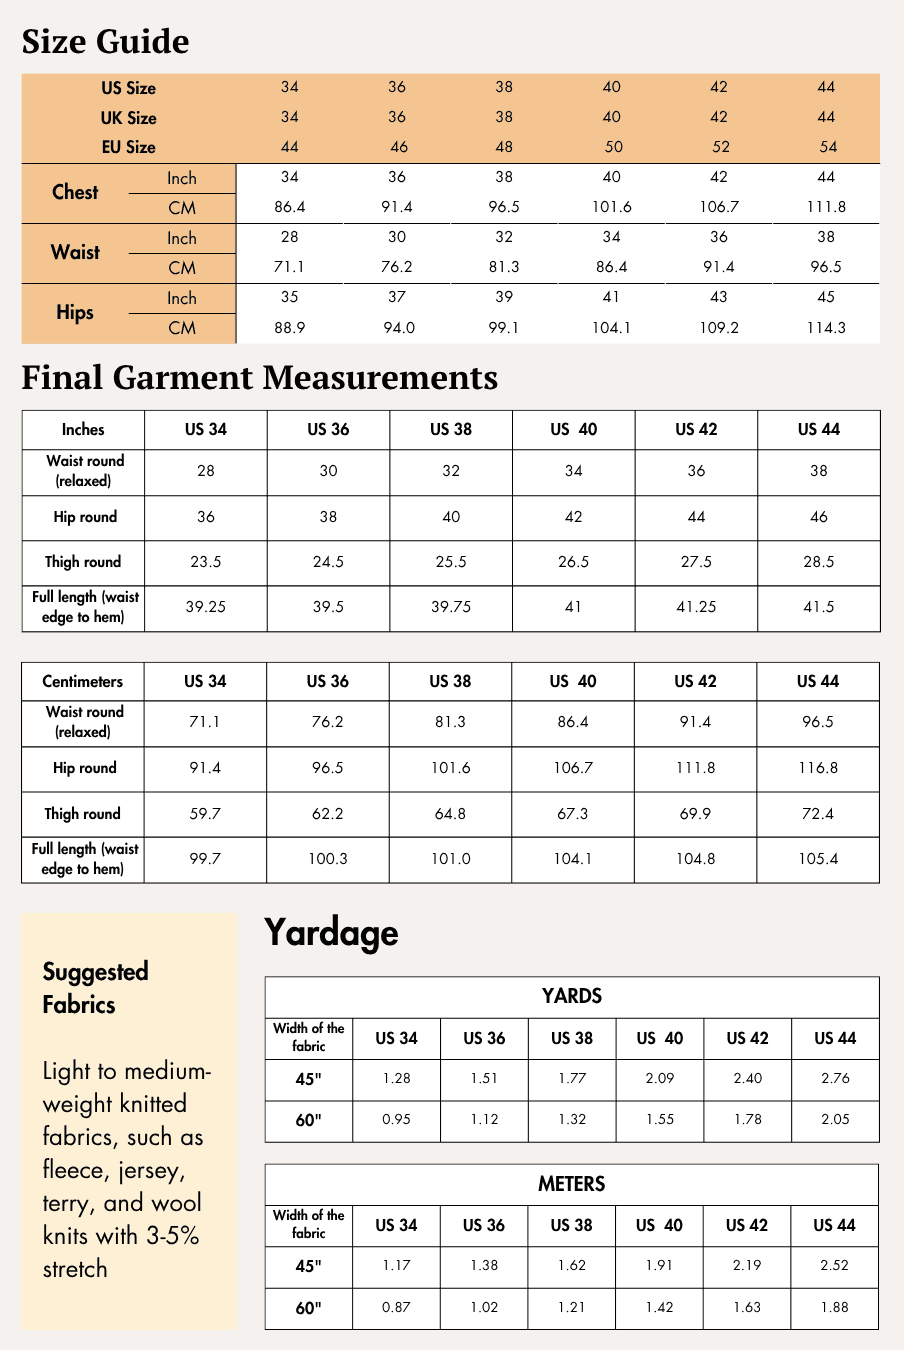
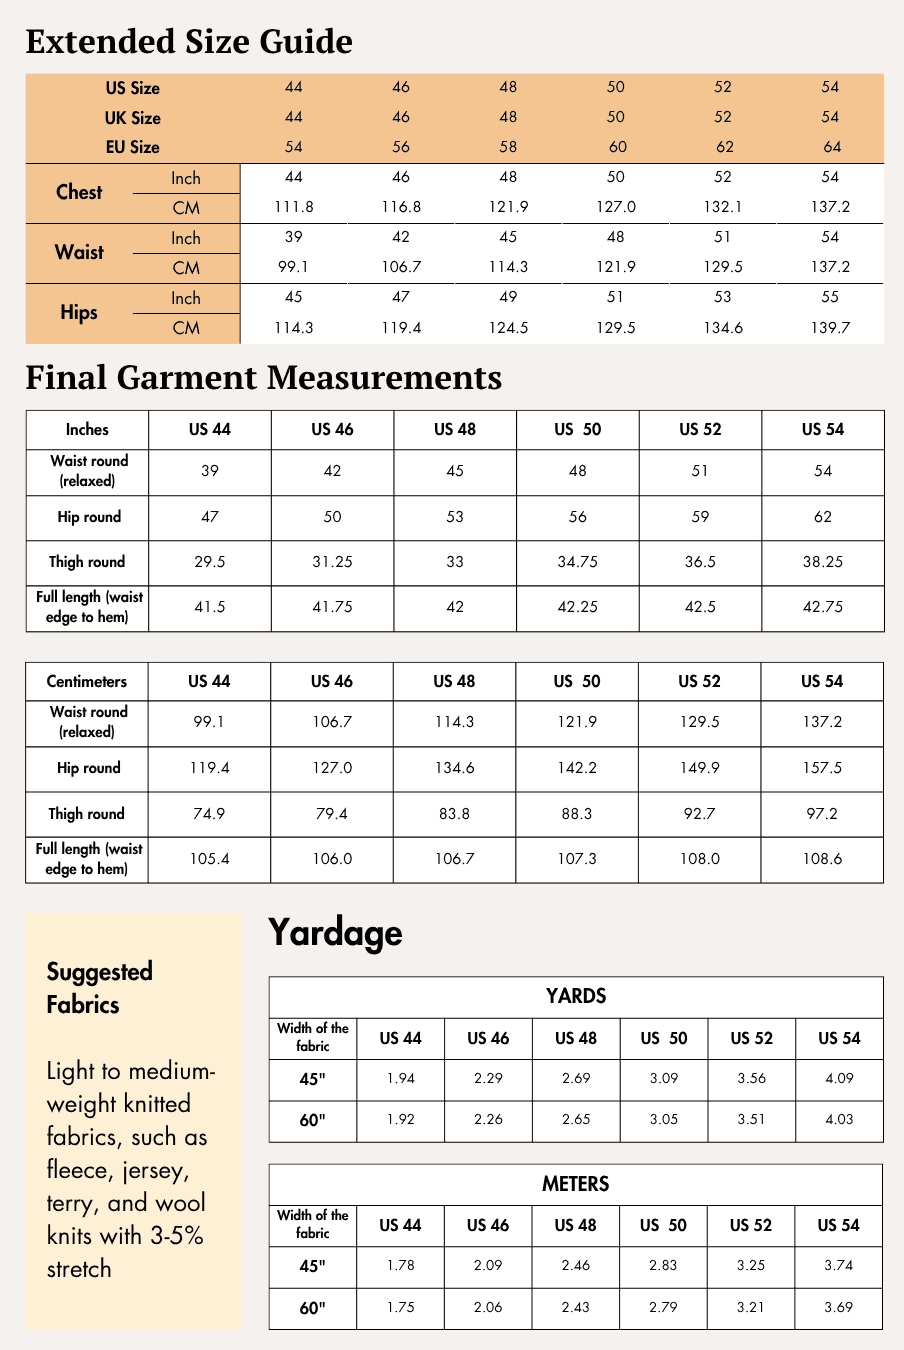
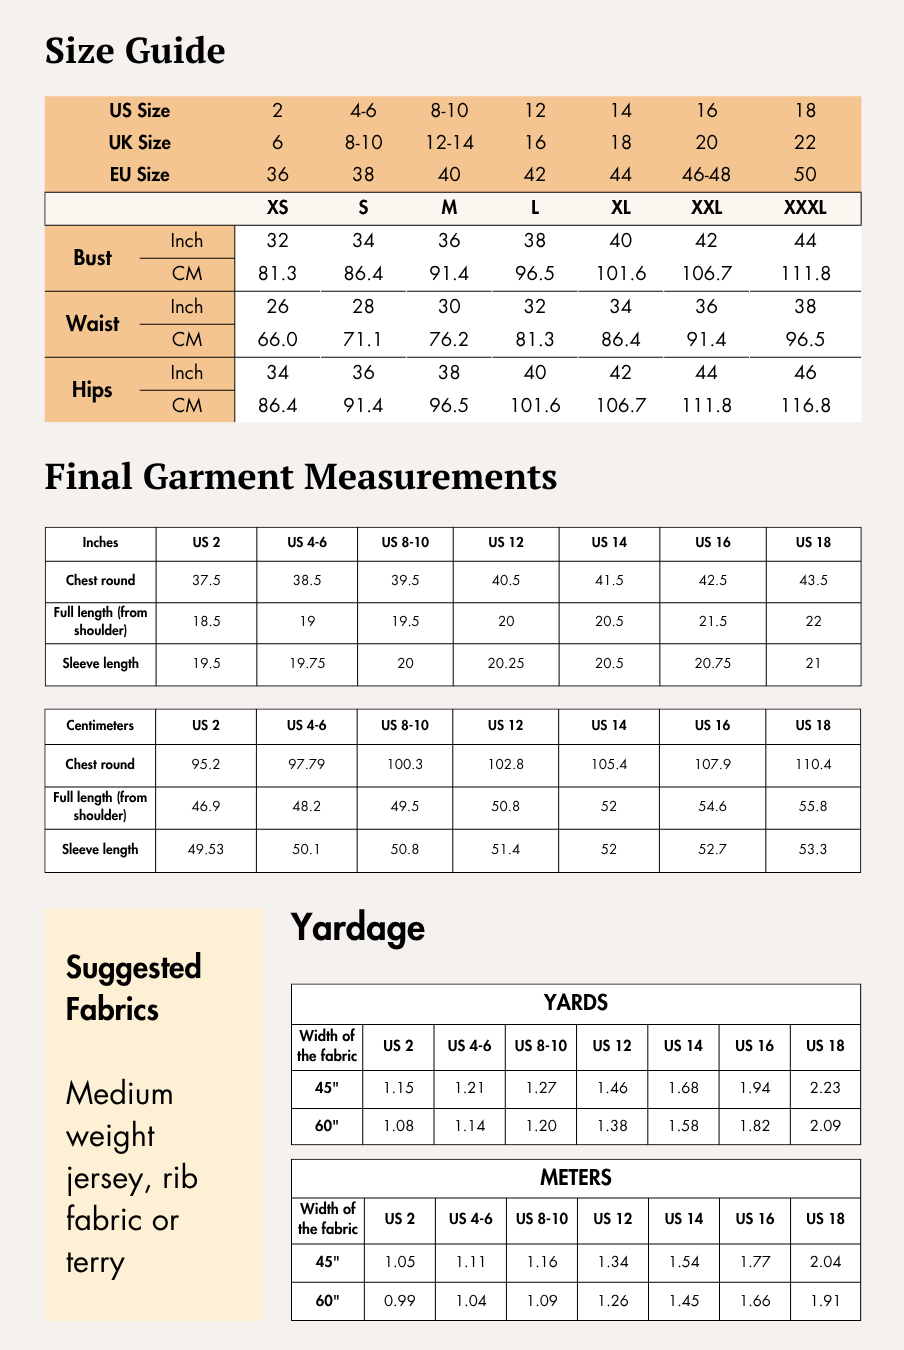
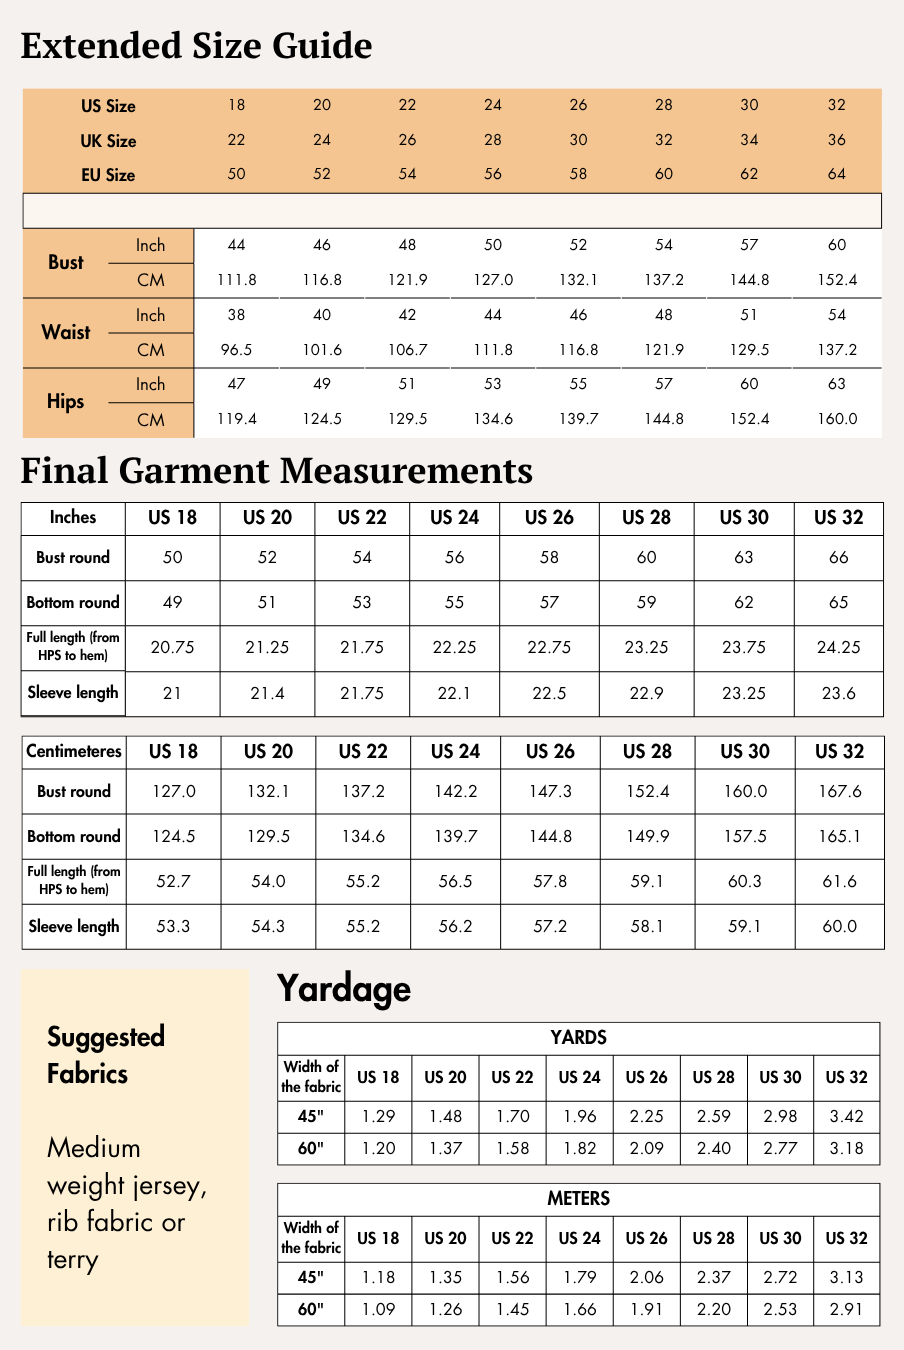
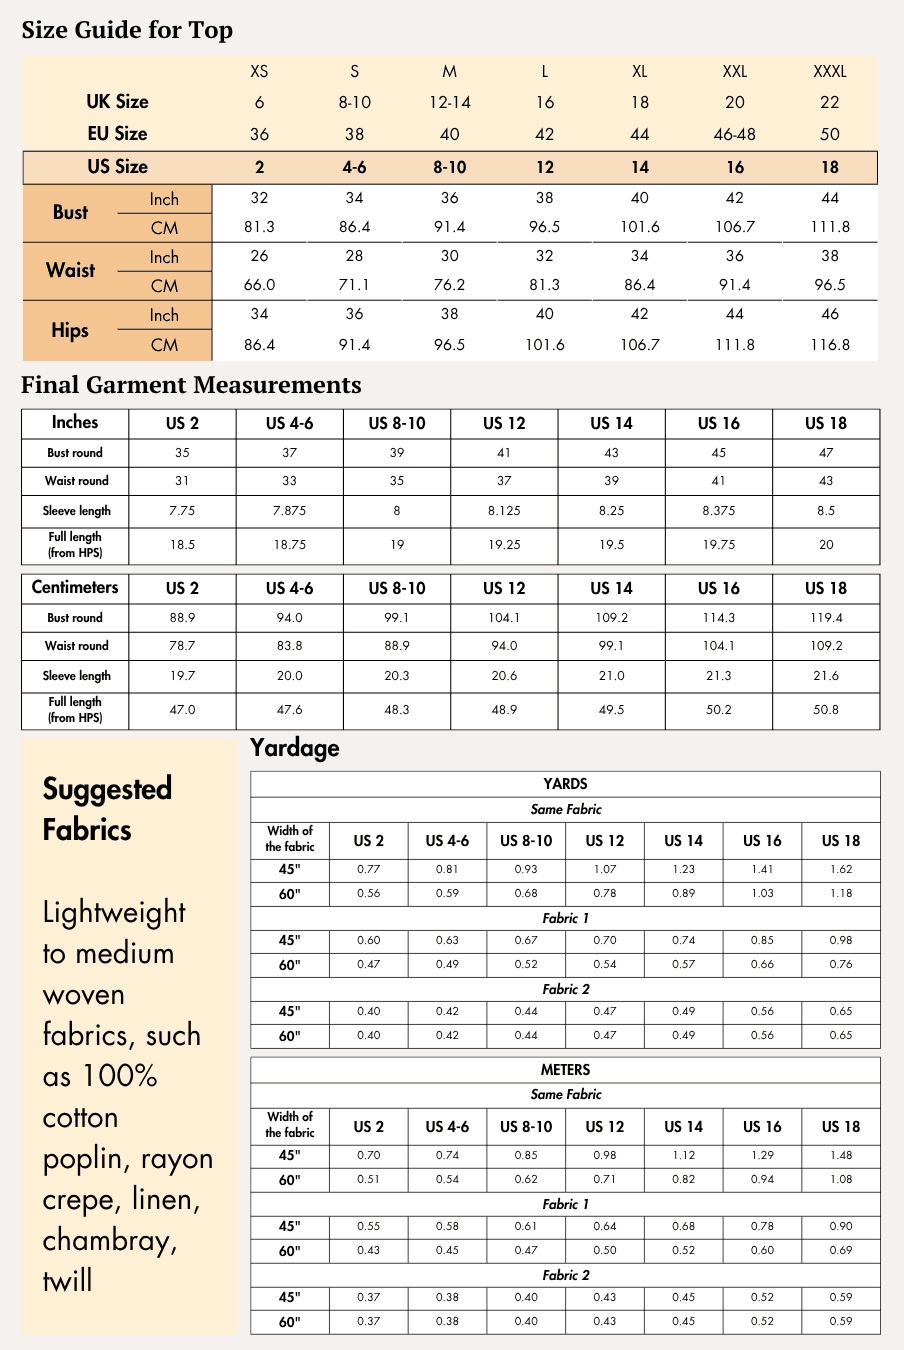
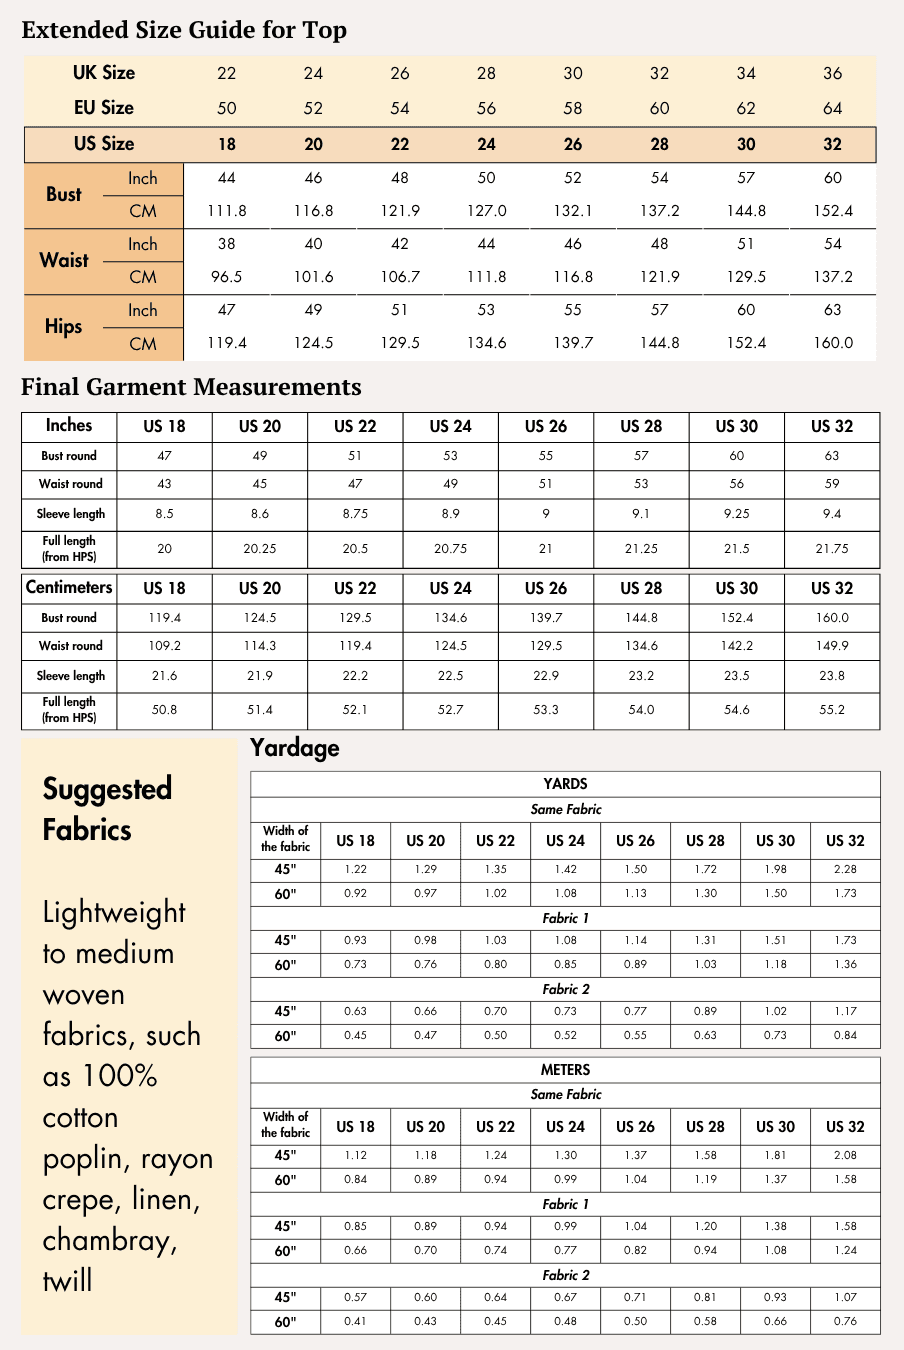
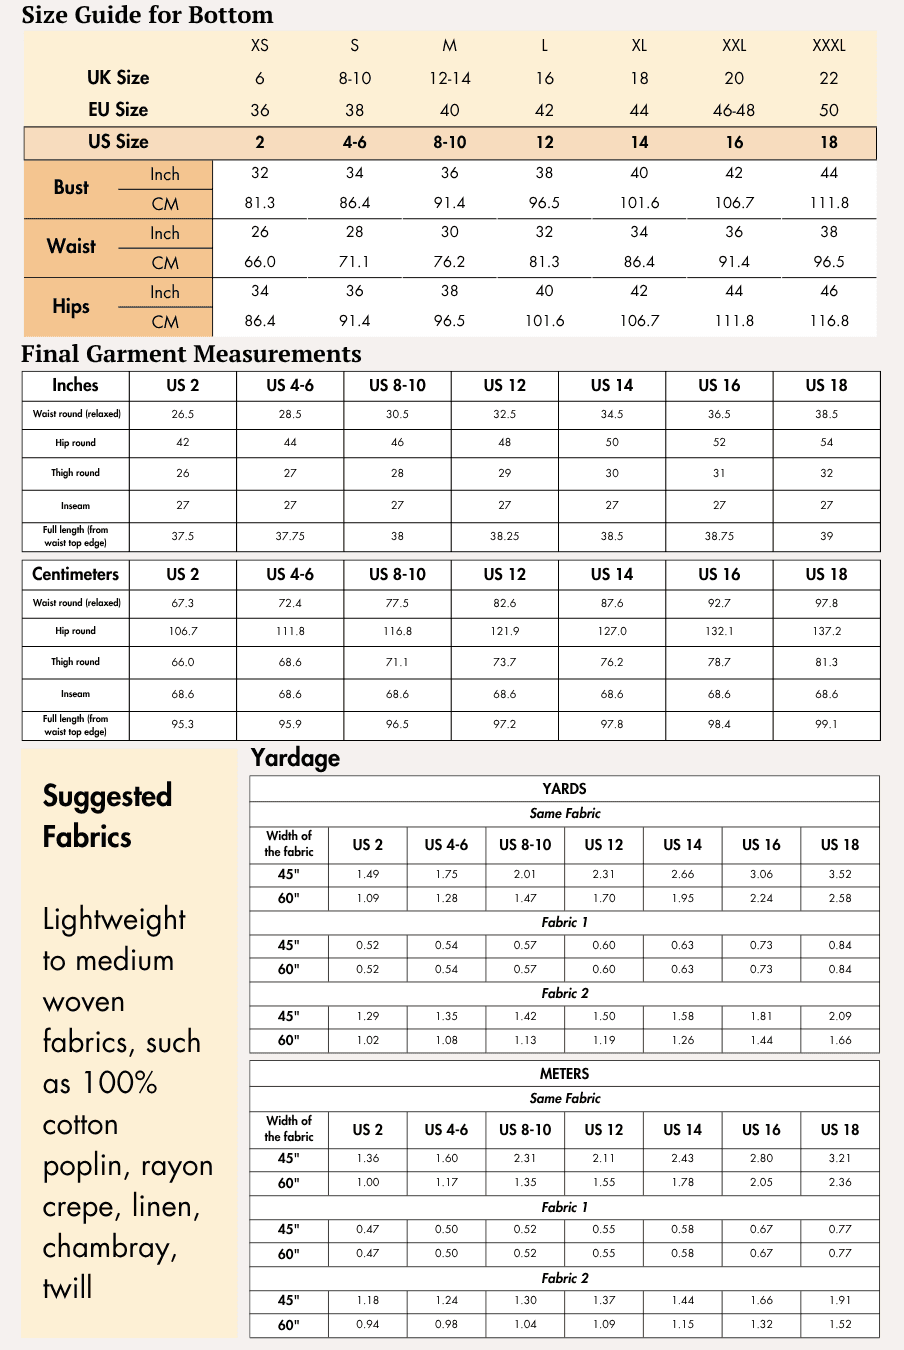
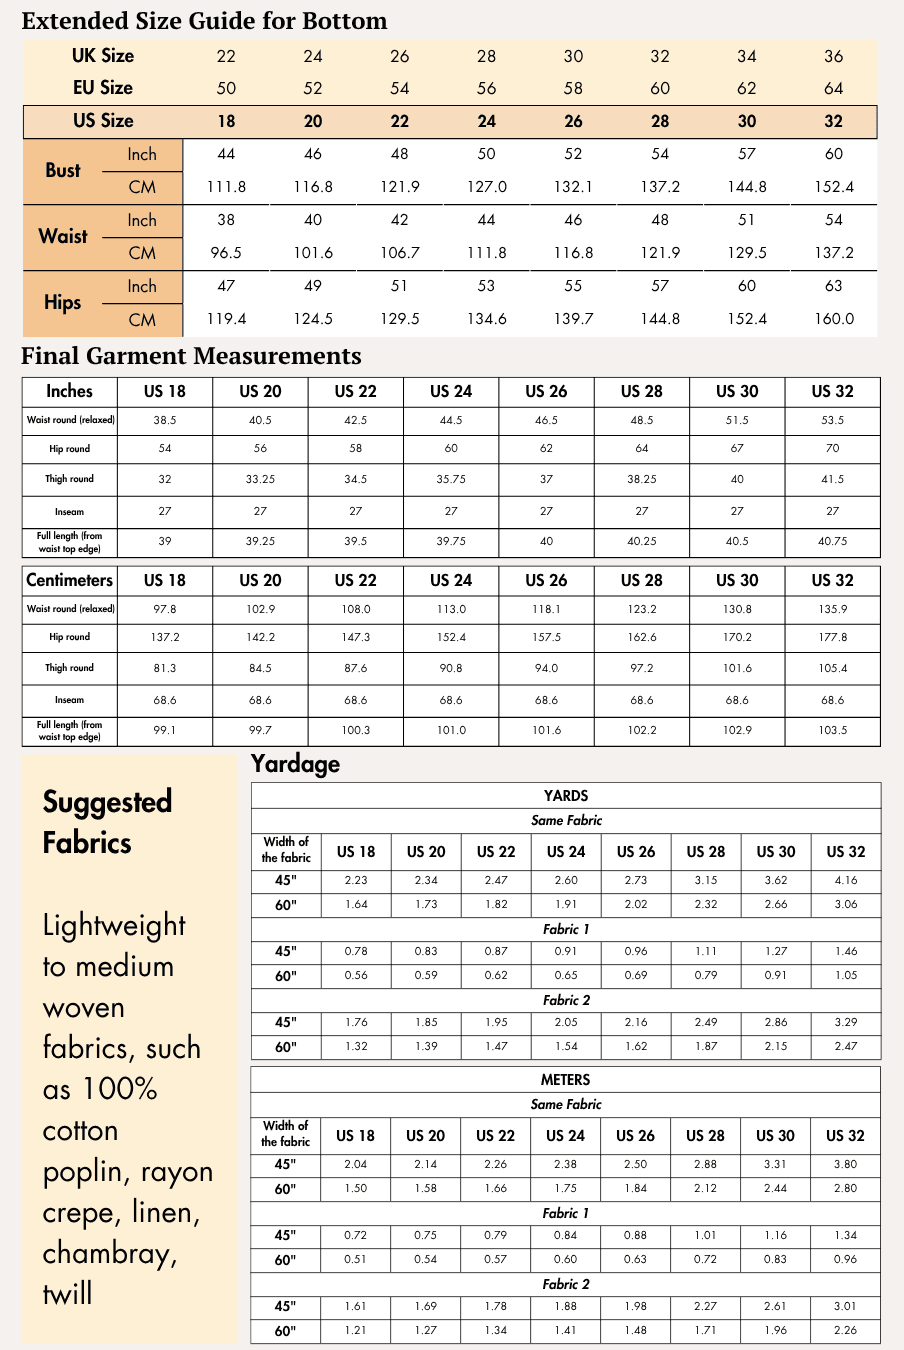
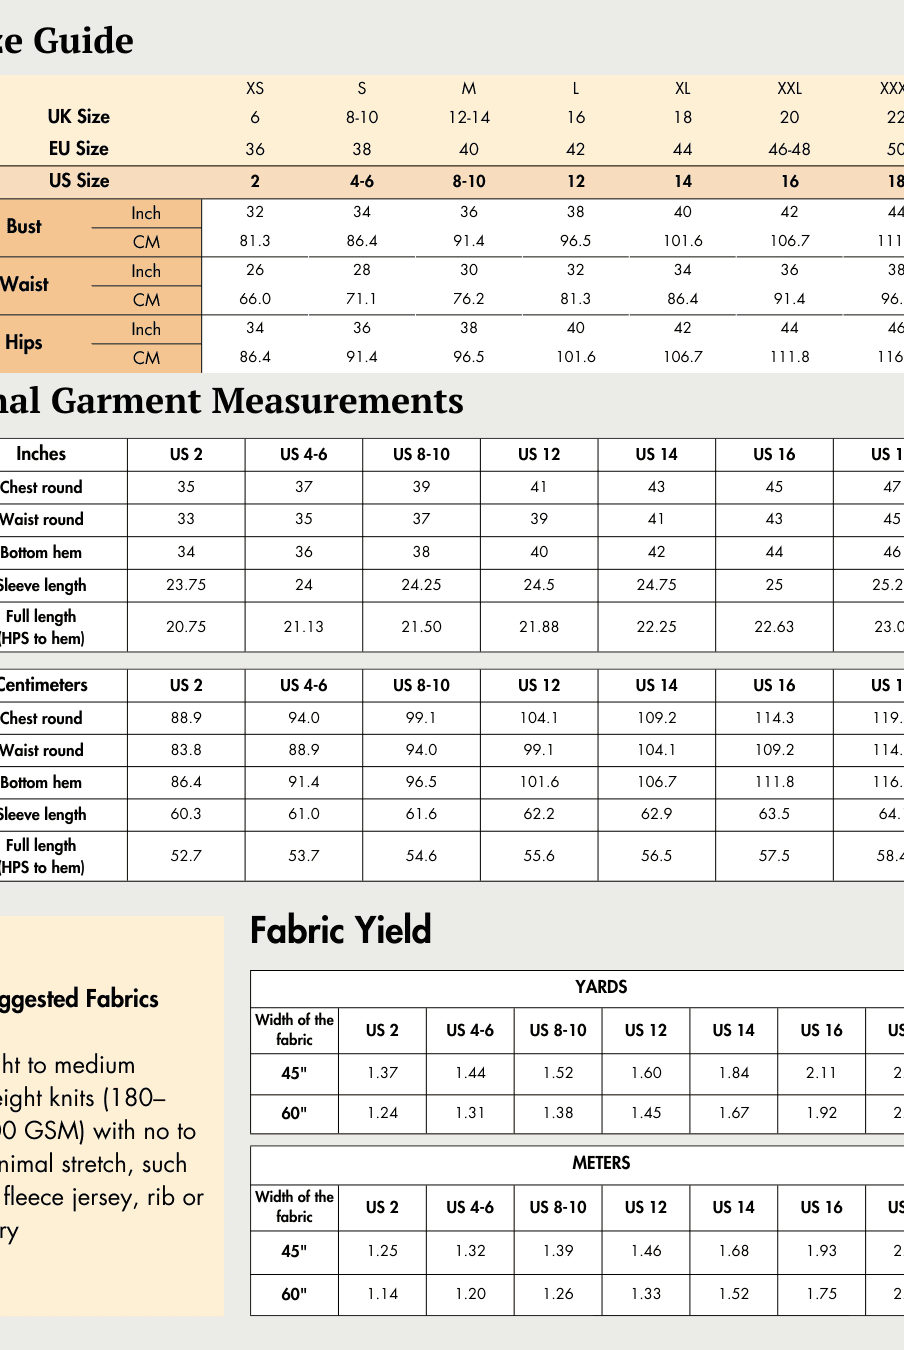
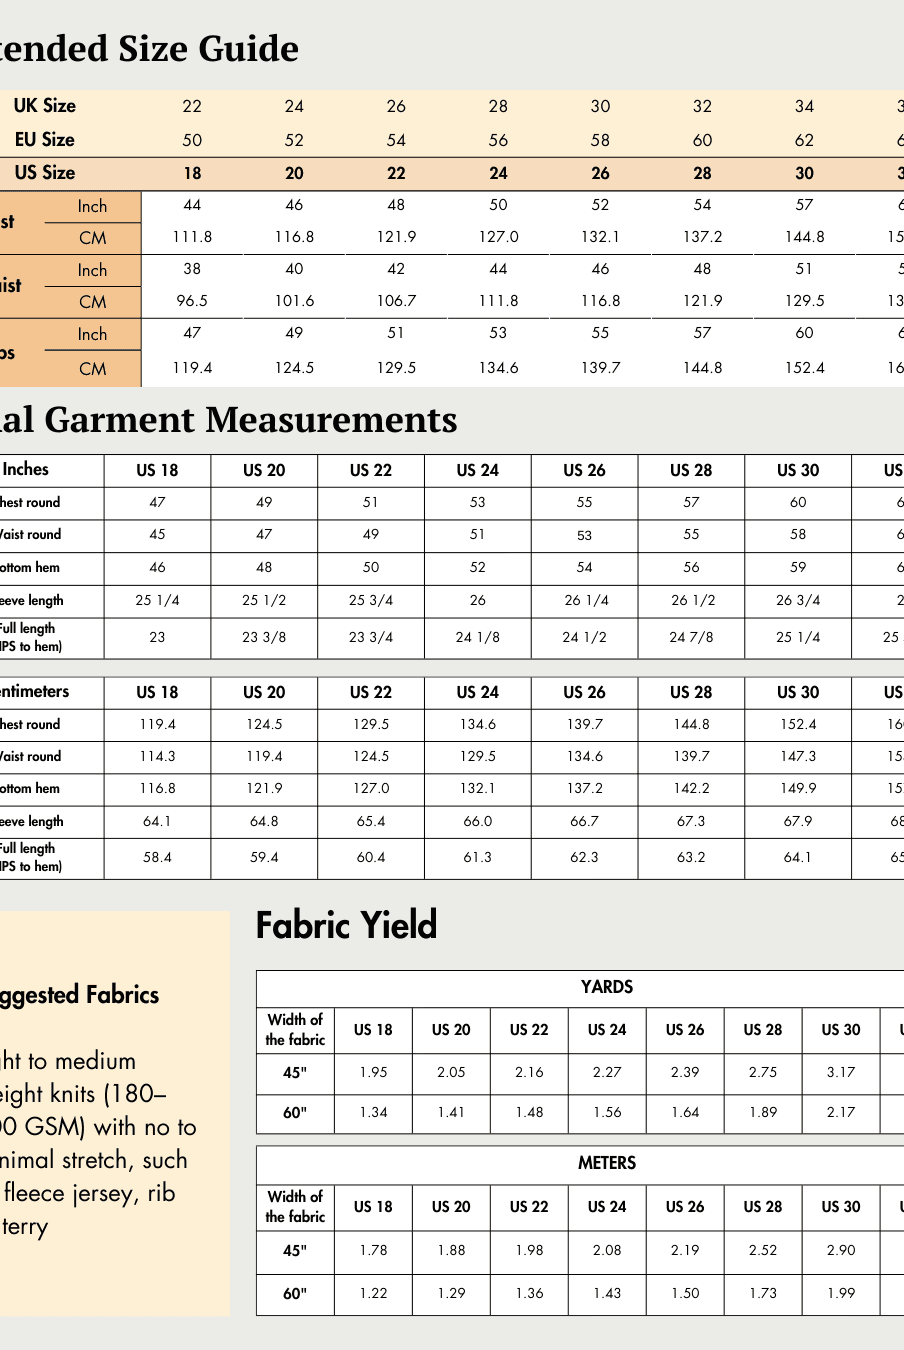
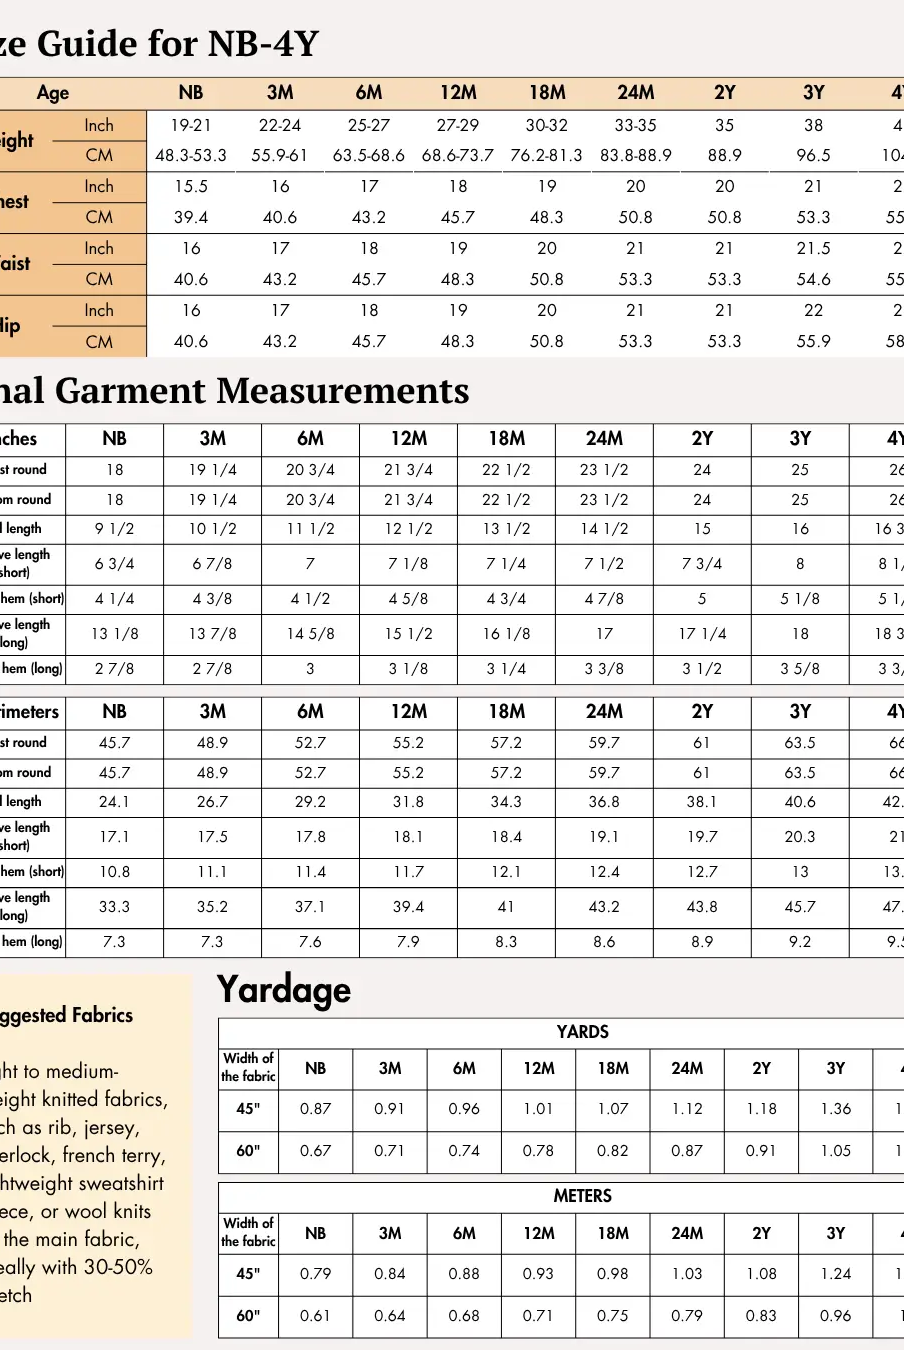
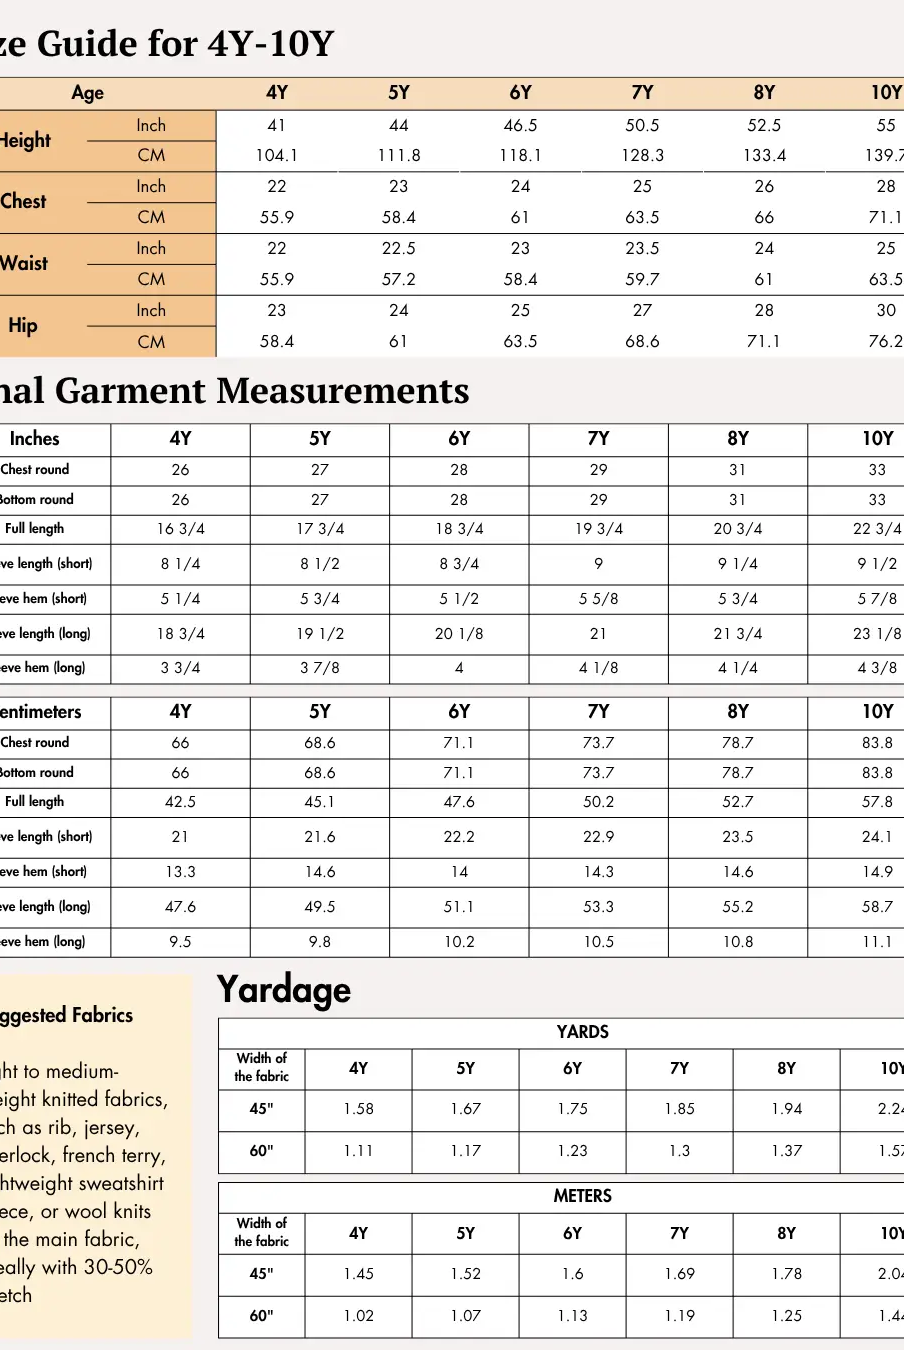
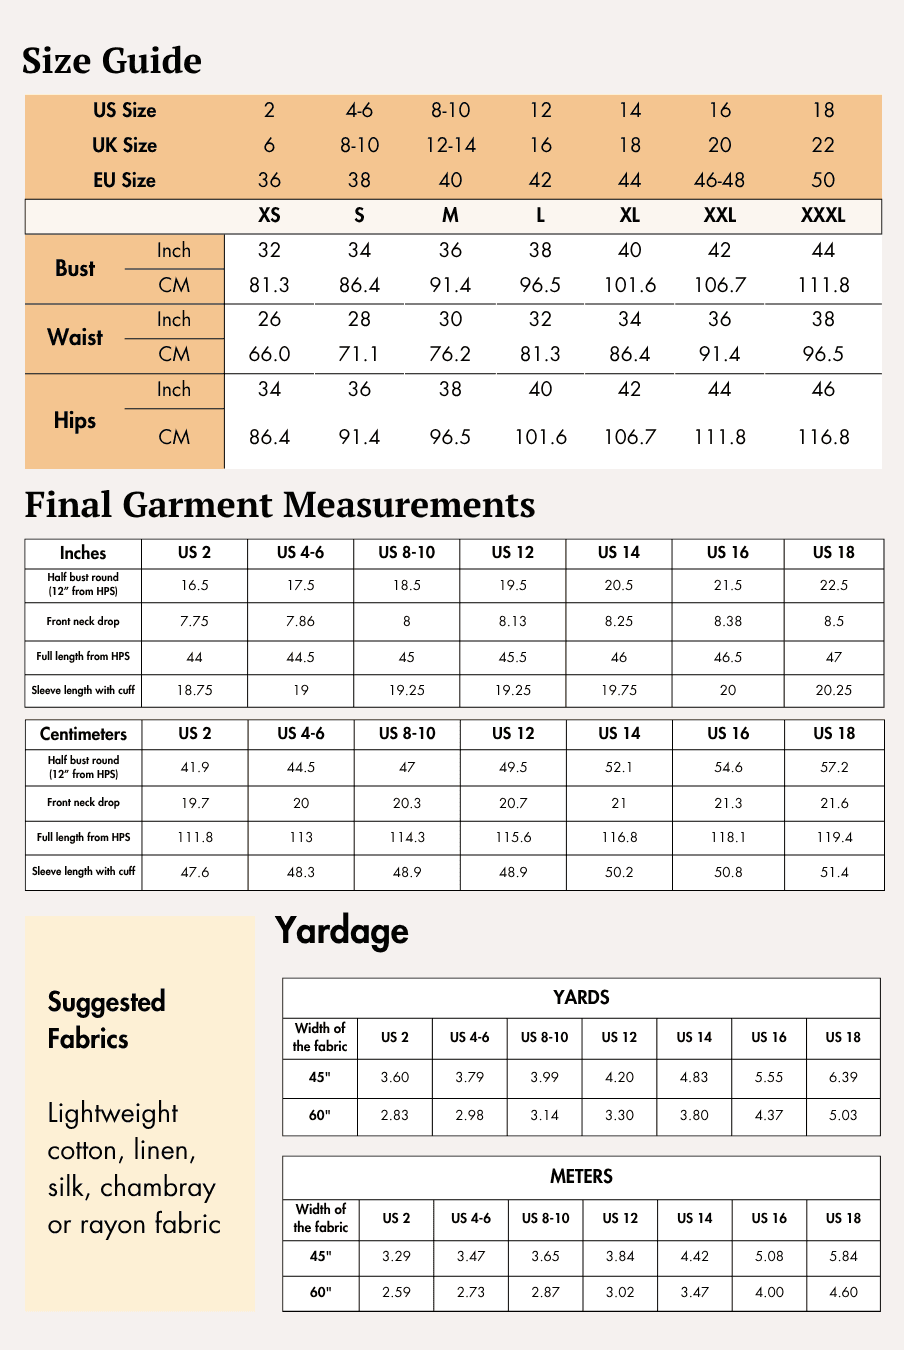
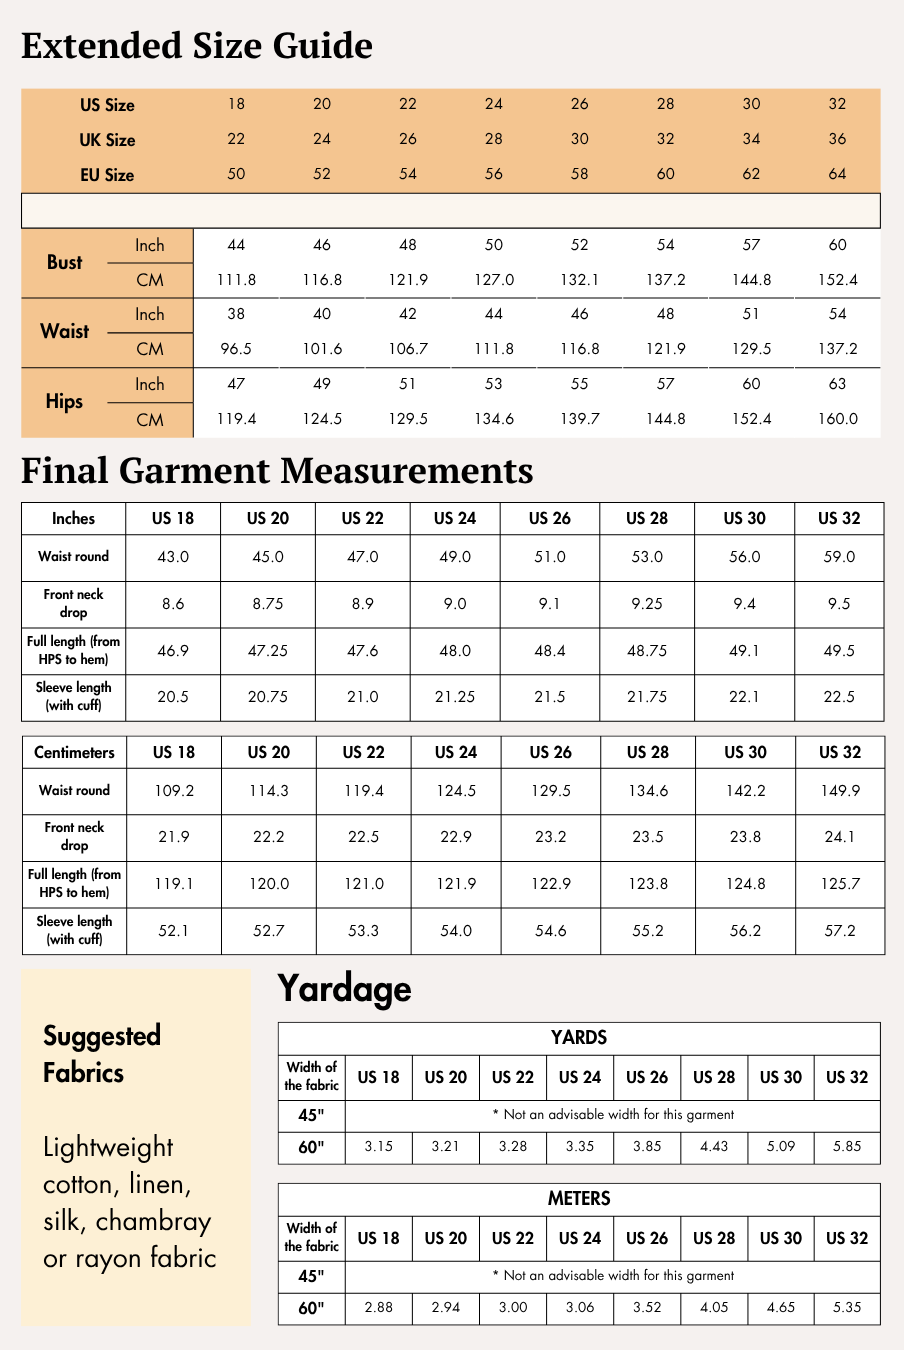
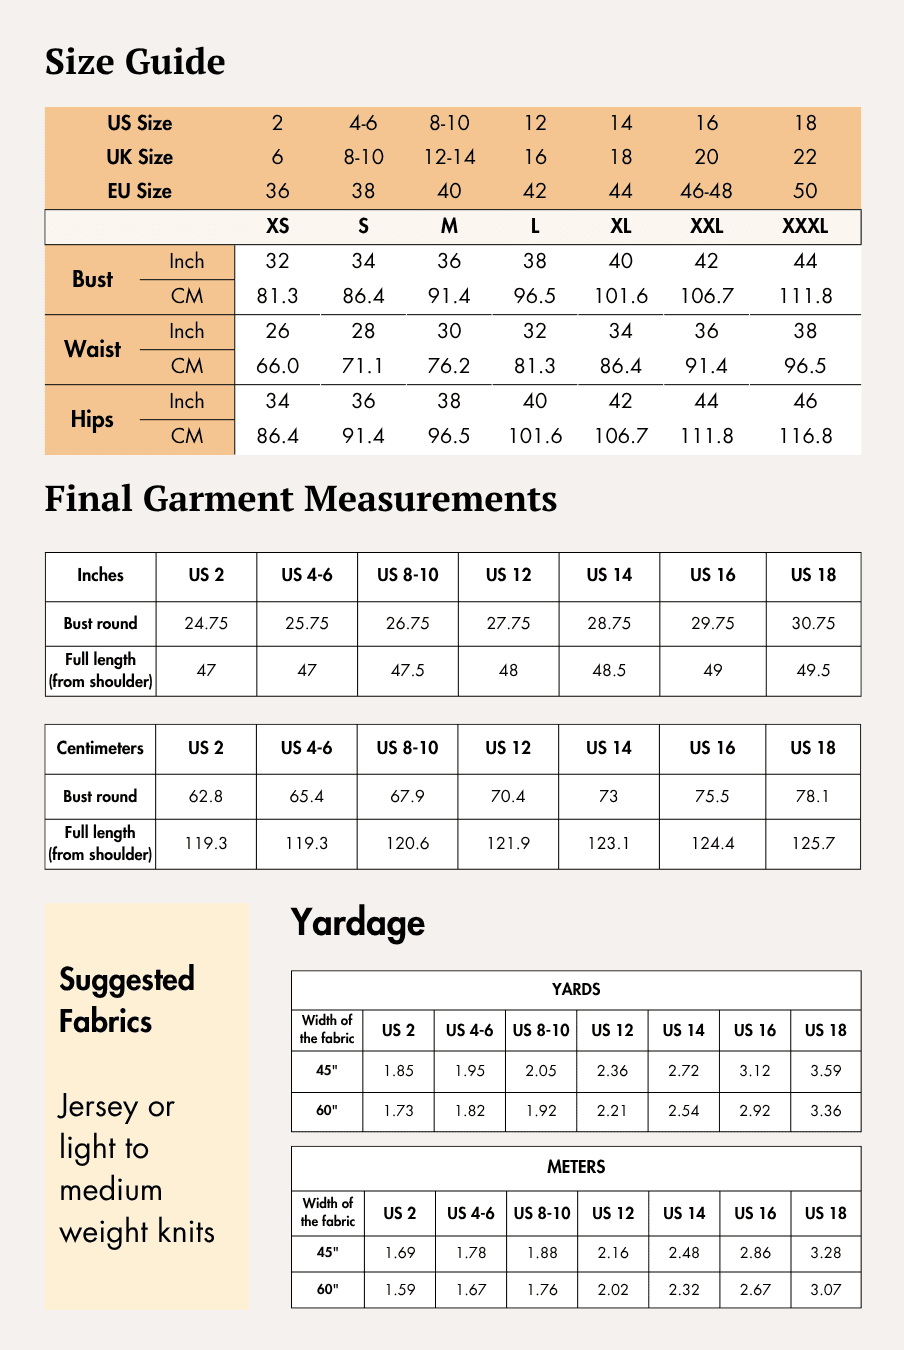
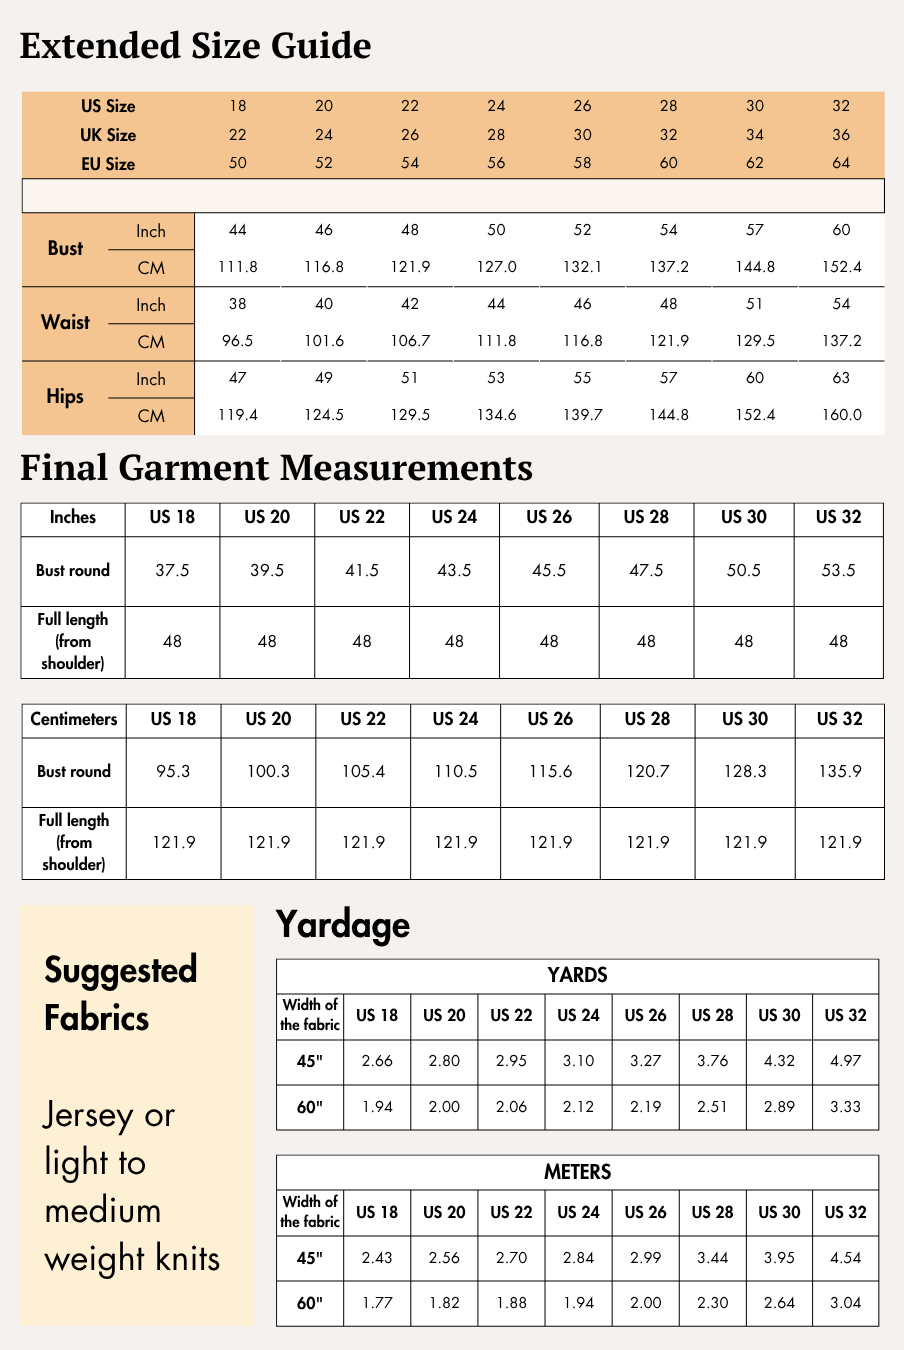
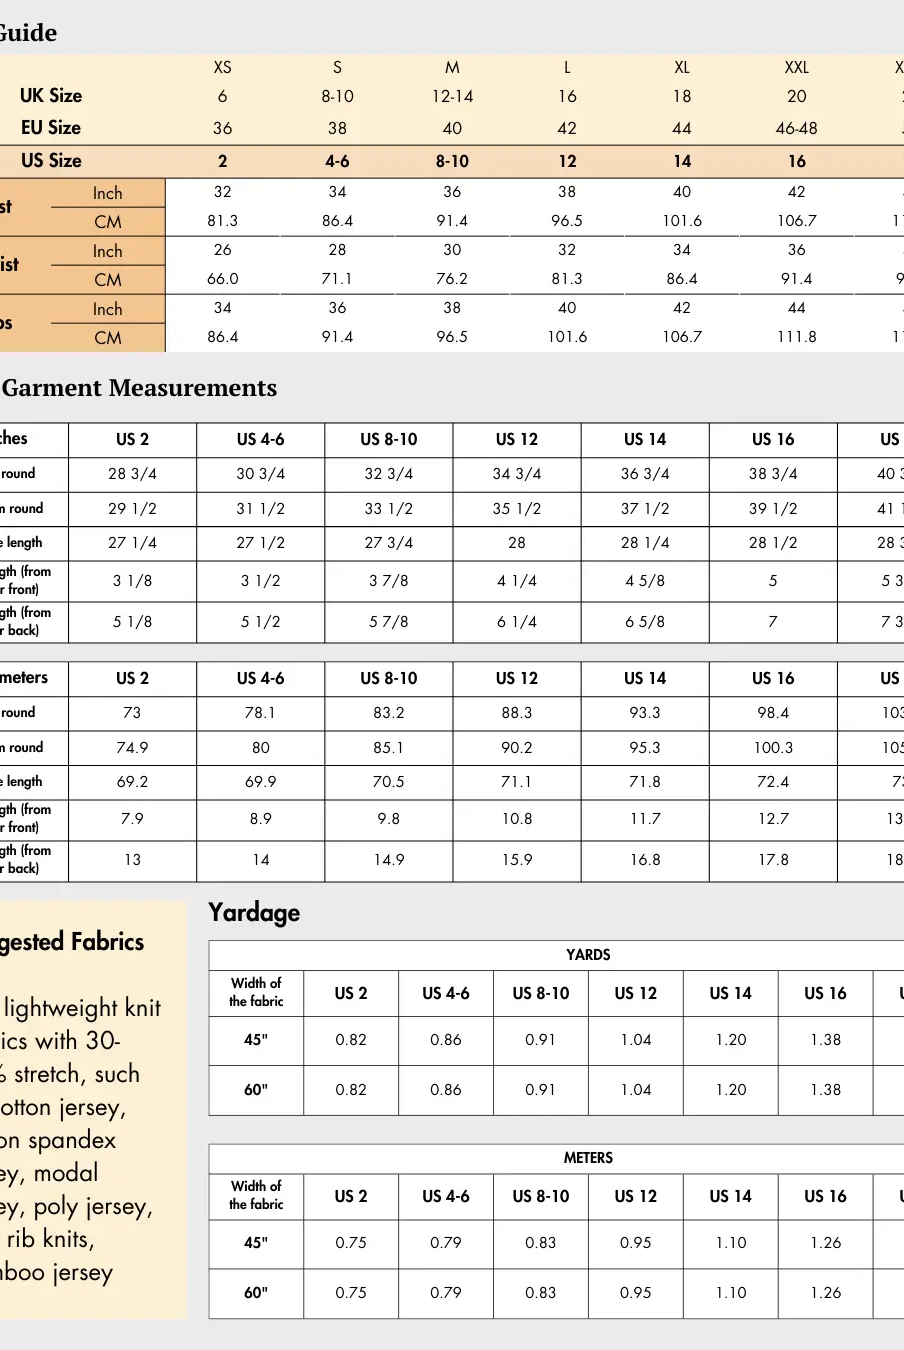
Check the size charts and measure yourself to select the correct size, using the garment and body measurement tables in the guide.
Verify how much fabric you need by referencing the fabric yield table in the guide.
Pattern Inventory: What Pieces to Prepare

Prepare the following pieces for the Myrtle Straight Hem Crop Shirt Sewing Pattern:
- A. Front — Cut 2 fabric
- B. Back Panel — Cut 1 fabric
- C. Sleeve — Cut 2 fabric
- D. Collar — Cut 2 fabric
- E. Collar Band — Cut 2 fabric
- Collar — Cut 1 fusible interfacing
- Collar Band — Cut 1 fusible interfacing
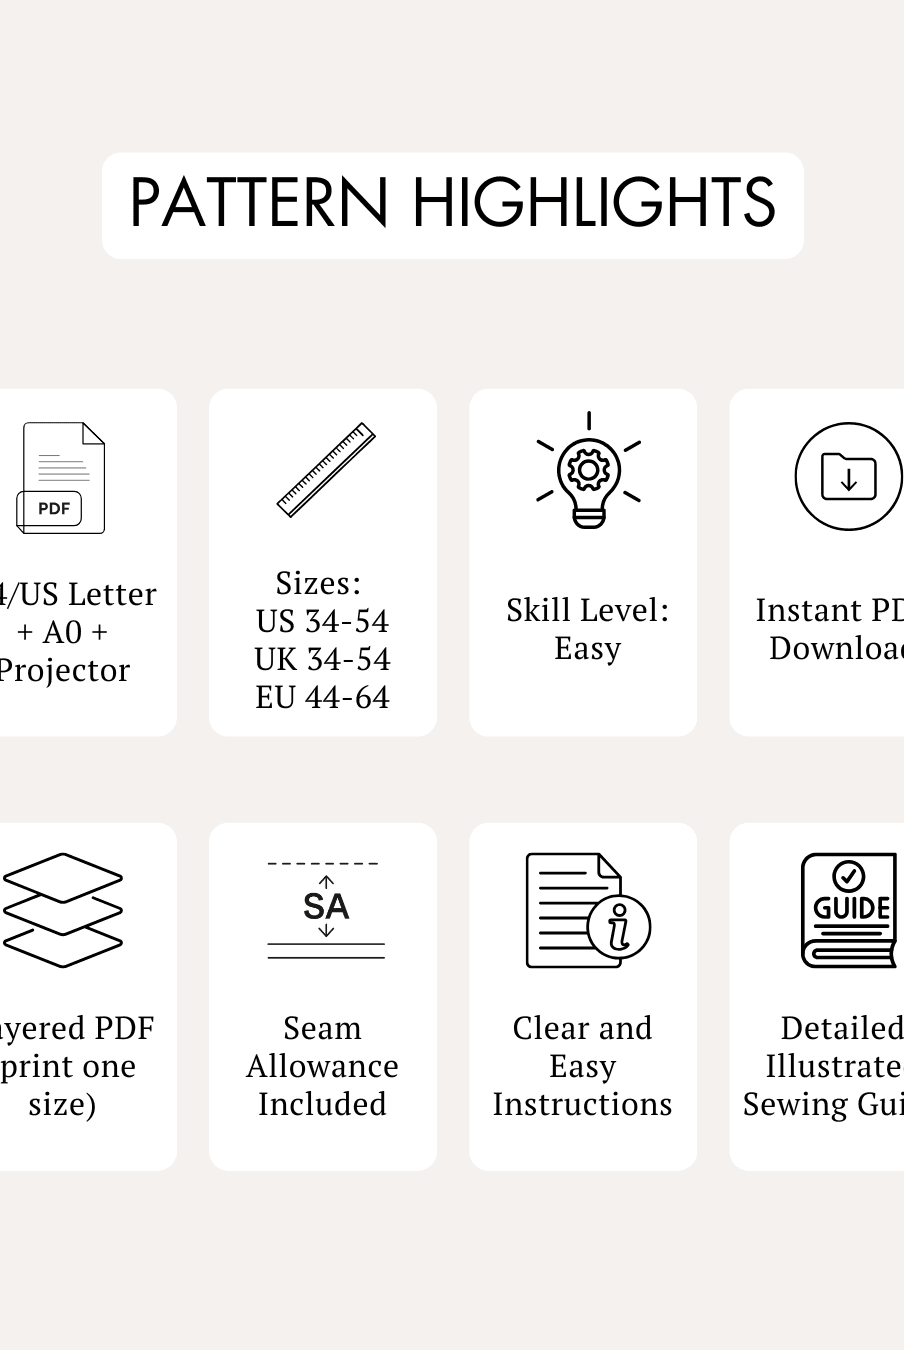
Use the A4/US Letter pattern when printing at home. Use the A0 pattern when printing through a copy shop.
Pattern Marking

Transfer all markings from the Myrtle Straight Hem Crop Shirt Sewing Pattern before beginning construction. The sewing guide identifies the following markings:
- Grainlines
- Necklines
- Shoulders
- Armholes
- Side seams
- Hemlines
- Centre front
- Centre-front button line
- Placket
- Centre-back notch
- Shoulder notch
- Front armhole notch
- Back armhole notch
Cutting Layout


The Myrtle Straight Hem Crop Shirt Sewing Pattern includes separate cutting layouts for 45-inch and 60-inch-wide fabric.
Arrange the pattern pieces so that each grainline arrow runs parallel to the fabric selvage. Pinning the pieces before cutting will help keep them in place and improve accuracy.
The illustrated layouts are intended for non-directional fabrics. Purchase additional fabric when using material with a directional print or nap.
The Medium size is used to demonstrate both cutting layouts in the sewing guide.
Fabric Cutting and Preparation
Arrange the pattern pieces according to the cutting layout provided for your fabric width. Position each piece carefully, ensuring that the grainline arrow runs parallel to the selvage.
If you are using fabric shears, trace around the pattern pieces before cutting. Cut away any visible pen, pencil, or chalk lines and accurately cut all notches shown along the edges.
Transfer construction markings such as circles, buttonholes, and fold lines to the wrong side of the fabric. Mark the centre front of pieces cut on the fold to help with accurate alignment.
Seam Allowance
Please follow the seam allowances as indicated on the pattern file layers. These are provided specifically for each piece to ensure accurate construction.
This pattern uses a 1 cm (or 0.38 inch) seam allowance all around and 2.54 cm (or 1 inch) at the hem.
Step-by-Step Sewing Instructions
1. Prepare the Front Plackets
Sew the buttonholes on the left Front piece and attach the buttons to the right Front piece.
1a. Use the placket guideline from the Front bodice pattern without its seam allowance to cut the fusible interfacing.
Fuse the interfacing to the wrong side of the left and right Front pieces, positioning it along the placket areas. Press carefully so that it adheres evenly.
1b. On both the left and right Front pieces, fold the placket seam allowance toward the wrong side.
1c. Fold each placket along the centre-front fold line and press.
Edgestitch close to the folded edge of each placket, sewing just inside the fold line to secure it.
1d. Sew a second parallel line of stitching closer to the centre front on the left Front piece to reinforce the buttonhole area.
You may repeat this second line on the right Front piece for a more tailored finish.
2. Sew the Shoulder Seams
Place the two prepared Front panels over the Back Panel with right sides together.
Align the shoulder edges and sew along both shoulder seamlines.
3. Prepare and Attach the Collar
3a. Place one Collar piece and one Collar Band piece with their wrong sides facing upward.
Smooth the pieces so that they are straight and free from wrinkles.
3b. Position the corresponding fusible interfacing pieces with their adhesive sides against the wrong sides of the fabric.
Fuse the interfacing in place with a steam iron.
3c. Place the two Collar pieces with right sides together.
Sew along both short sides and the upper edge, leaving the neckline edge open.
3d. Clip the Collar corners to reduce bulk.
Turn the Collar right side out so that the wrong sides are together. Carefully shape the corners with a pencil or another pointed tool.
3e. Take one Collar Band piece and fold its neckline seam allowance toward the wrong side.
Press the fold and secure it temporarily with basting stitches.
3f. Place the Collar between the two Collar Band pieces, with the Collar Band pieces facing right sides together.
Sew through the layers, joining the Collar to both Collar Band pieces and closing the short ends.
3g. Turn the Collar Band right side out and press along the stitching line to create a stable Collar shape.
3h. Place the longer open edge of the Collar Band along the bodice neckline with right sides together.
Pin it in place and sew along the neckline seamline, keeping the folded Collar Band edge free.
3i. Fold the neckline seam allowances inside the Collar Band.
Bring the folded inner edge over the seam allowances. Pin it in place if needed, then sew along the folded edge to enclose the seam allowances.
Remove the basting stitches after the Collar Band has been secured.
4. Attach the Sleeves
Turn the shirt right side out.
Place one Sleeve over the corresponding armhole with right sides together. Match the front and back Sleeve notches with the front and back armhole notches.
Sew along the armhole seamline to attach the Sleeve.
Repeat the same process for the second Sleeve.
5. Sew the Sleeve and Side Seams
Turn the shirt wrong side out, keeping the right sides of the fabric together.
Align the bodice side seams and Sleeve seams.
Sew continuously along the Sleeve and side seam.
Repeat on the opposite side.
6. Finish the Sleeve and Shirt Hems
Fold one Sleeve hem allowance twice at an equal width toward the wrong side so that the final fold sits along the marked hemline.
Press and pin the hem, then topstitch from the side seam around the Sleeve opening.
Repeat the same process for the second Sleeve.
Fold the shirt hem allowance twice toward the wrong side. Press and pin it, then topstitch around the entire straight hem to complete the Myrtle Straight Hem Crop Shirt.


Ready to Sew Your Own Cropped Shirt?


The Myrtle Straight Hem Crop Shirt Sewing Pattern combines the polished details of a classic button-down shirt with a modern cropped waist. Its straight hemline, full-length sleeves, point collar, front plackets, and relaxed body-skimming fit create a versatile garment that can be worn with high-waisted trousers, jeans, or skirts.
This intermediate project lets you practise interfacing, placket construction, buttonholes, collar assembly, sleeve insertion, and clean hem finishing. Download the Myrtle Straight Hem Crop Shirt Sewing Pattern and create a handmade shirt that can move easily between casual and smart-casual outfits.
Explore More Sewing Patterns
Browse our Crop Top Sewing Pattern Collection for more stylish handmade tops perfect for warm-weather wardrobes.
Join the Community & Get Support
Share your finished Myrtle Straight Hem Crop Shirt on social media with #MadeWithWinslets. If you have questions, feedback, or customization requests, contact the Winslet's team at support@winslets.com.